What welding projects are you working on? Are you proud of something you built?
How about posting some pics so other welders can get some ideas?
User avatar
  • Posts:
  • Joined:
    Fri Mar 15, 2013 10:55 am
  • Location:
    Philippines

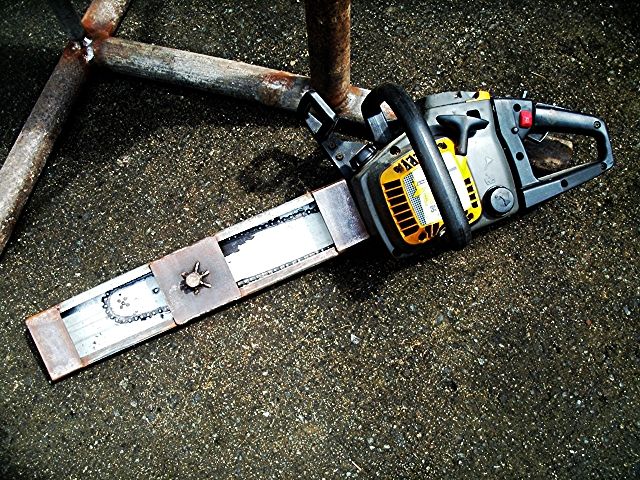
Well most if not all materials used where scraps or excess from other projects stocked in my garage. Using 2" GI pipes for the main body and some 1" GI pipes as well plus others. Decided to make this project to make cutting some logs for firewood easier. I have seen different variations on YouTube but decided instead of remaking or copying their designs, I'll make my own version and see how it will come out. Ok, plans were not set on paper, I just started the project with a clear mind of what I wanted to achieve, adding things here and there as it progresses.

Sorry for there were no pics taken during the initial stages but manage to take some during the middle and last stages up to the completion of the project. :)


Image
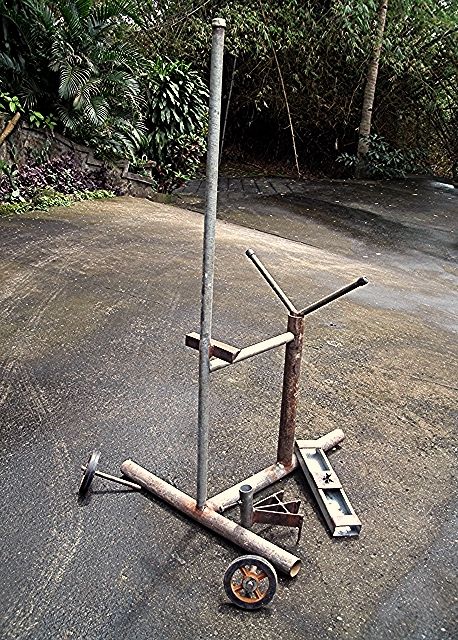
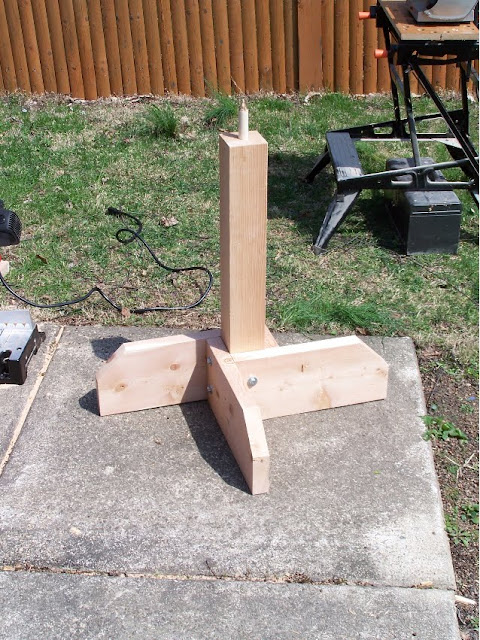
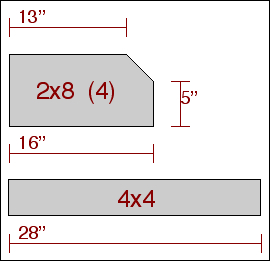
And this is somehow the cutting stand will come out with some of its accessories to be welded.


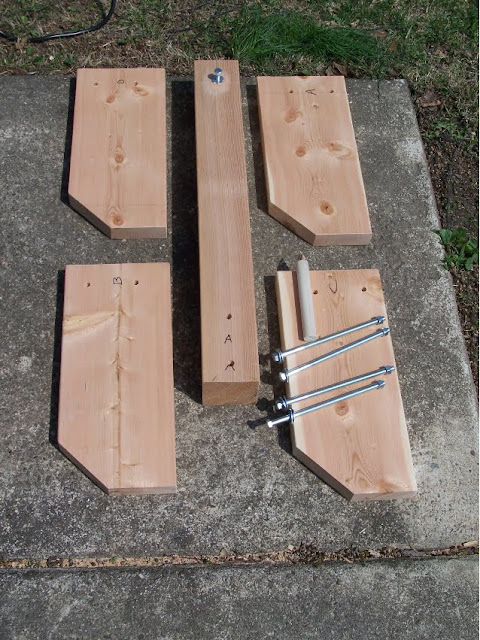
THE INITIAL ACCESSORIES TO BE USED:
Image
The two 6" rubber wheels with its axles.


Image

Image

Image

Image

Image
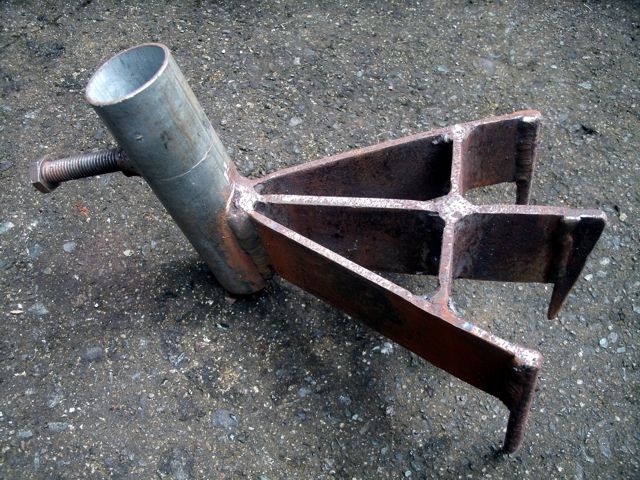
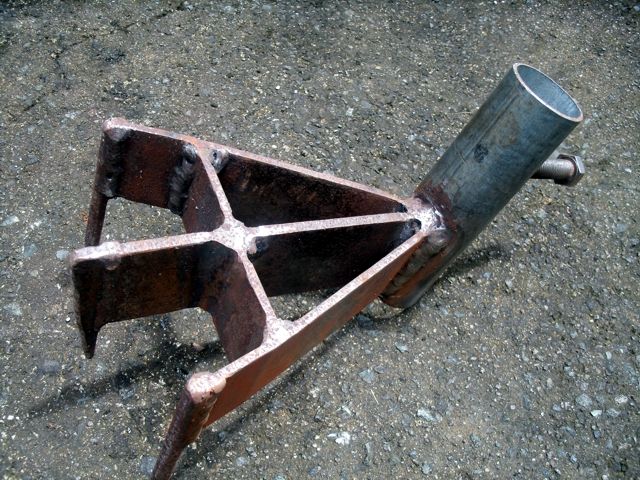
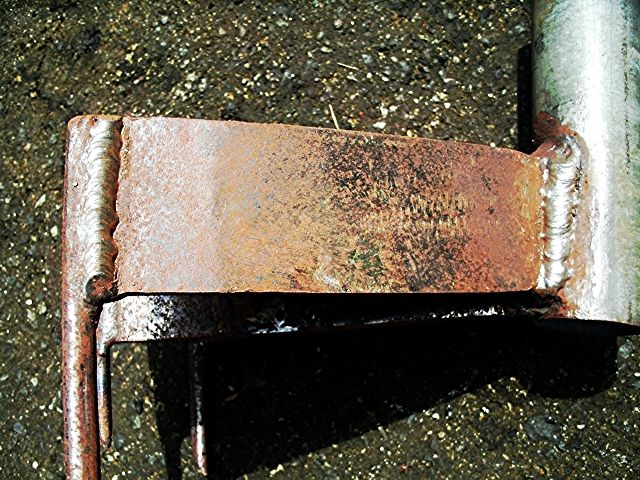
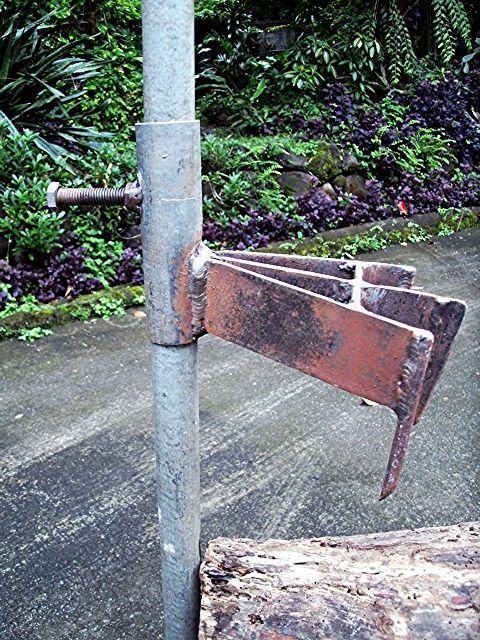
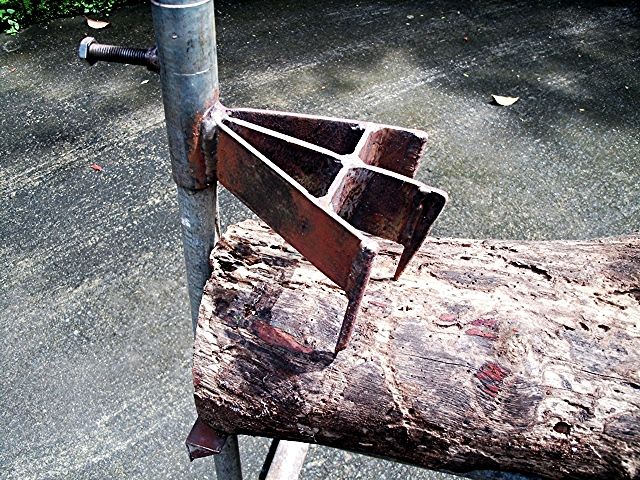
The movable clamping claws.
User avatar
  • Posts:
  • Joined:
    Fri Mar 15, 2013 10:55 am
  • Location:
    Philippines

Image

Image

Image
Made this one too as sort of a holster for my small chainsaw.


Image

Image
And this bolt will lock and secure the guide bar inside the holster.

Image
And this is how it will appear but of course this will still be painted !! ;)
User avatar
  • Posts:
  • Joined:
    Fri Mar 15, 2013 10:55 am
  • Location:
    Philippines

As the project progresses, I decided to add some movable support in front to prevent it from moving or possibly tilting in case mounted with a heavy log !


Image

Image

Image

Image
Worked on some pieces of 1/2" thick steel inserted and welded on a 1" GI pipes of 30" in length.


Image

Image

Image
And this is where the 30" pipe support will be attached.


Image
User avatar
  • Posts:
  • Joined:
    Fri Mar 15, 2013 10:55 am
  • Location:
    Philippines

The 30" GI pipe will appear and serve like this :

Image

Image

Image


And when not in used, them support will be folded to the sides of this cross connecting GI pipe:

Image

Image
User avatar
  • Posts:
  • Joined:
    Fri Mar 15, 2013 10:55 am
  • Location:
    Philippines

Applied three coats of metal primer epoxy !

Image


And the final outcome and color for this project !

Image

Image

Image

Image

Image

Image

Image
User avatar
  • Posts:
  • Joined:
    Fri Mar 15, 2013 10:55 am
  • Location:
    Philippines

Image

Image
Made and added these two metal buckets where I will put my fuel/oil mix.


Image
Also added two 3/16" plate behind as a stopper for the logs plus also expanded and extended the lap by welding scrap 16 mm corrugated steel bars.


Image
Made a rounded steel knob and welded it on the head of the bolt to easily loosen or tightening the hold on the guide bar.


Image

Image
Added a D-Handle welded on a piece of 1 1/4" GI pipe, then added two stainless steel bolts and nuts to secure it on the upper portion of the vertical 1" GI pipe.
User avatar
  • Posts:
  • Joined:
    Fri Mar 15, 2013 10:55 am
  • Location:
    Philippines

Image

Image

Image
OK ! everything is mounted up, the power saw, the two canisters for the fuel/oil mix, so its ready now for the job it is intended to do.


Image
I can just simply push it or pull it going to the cutting site ! ;) :D


Thanks for viewing !! :)
User avatar
  • Posts:
  • Joined:
    Fri Apr 01, 2011 10:59 pm
  • Location:
    Australia; Victoria

Hey,

That is a spectacular job. Lots of smart thinking and trial and error. I have never seen nuts welded on like that, were you tought that or just do it? Also i disagree with the fuel oil mix in the holders, they should be for beer. Lol (for after cutting of course)

Mick
User avatar
  • Posts:
  • Joined:
    Fri Mar 15, 2013 10:55 am
  • Location:
    Philippines

roberts56 wrote:Image[/url]
Made this one too as sort of a holster for my small chainsaw.


Image

Image
And this bolt will lock and secure the guide bar inside the holster.

OH, if you are referring to this kind of welds on the nut, so sorry about the ugly weld beads and how it was welded, I know its so bad but then in the final stages, it has been grinded and re-welded again before the final painting. I just have this habit sometimes of playing around with weld bead applications, trying to find out if it will work or not. Me? well just a self taught hobby welder and still trying hard to master stick welding. Well about those fuel/oil mix canisters, just live 'em there, I'll just have a separate cooler with some ice cold beer around or nearby. LOL :lol:

Thanks mike ! :)
User avatar
  • Posts:
  • Joined:
    Wed Oct 23, 2013 3:30 pm
  • Location:
    Palmer AK

Looks awesome!

~John
Just a couple welders and a couple of big hammers and torches.

Men in dirty jeans built this country, while men in clean suits have destroyed it.
Trump/Carson 2016-2024
GreinTime
  • Posts:
  • Joined:
    Fri Nov 01, 2013 11:20 am
  • Location:
    Pittsburgh, PA

He's not critiquing them man, just curious as to what the motivation to run the stringers out from the corners of the nut ;)

Sent from my DROID RAZR using Tapatalk
#oneleggedproblems
-=Sam=-
paul_s
  • Posts:
  • Joined:
    Thu Feb 06, 2014 10:04 pm
  • Location:
    SW Florida

A really great looking job. It brings back some memories of my wood cutting days.
User avatar
  • Posts:
  • Joined:
    Thu Jan 24, 2013 10:13 pm
  • Location:
    Eddy, TX

Looks good. I especially like the color contrast. I was also wondering about the nuts, can't say I have ever seen them welded that way...looks like a little gusset. You may have just started a new trend :D
-Jonathan
User avatar
  • Posts:
  • Joined:
    Fri Apr 01, 2011 10:59 pm
  • Location:
    Australia; Victoria

Good stuff mate. Keep it up.
Bill Beauregard
  • Posts:
  • Joined:
    Thu Jan 24, 2013 9:32 pm
  • Location:
    Green Mountains of Vermont

Nice cup holders.
User avatar
  • Posts:
  • Joined:
    Fri Mar 15, 2013 10:55 am
  • Location:
    Philippines

Thanks all guys for your kind words and encouragement. Whether with some criticism or none, that's ok with me, it might help improve my welds. ;)
RichardH
  • Posts:
  • Joined:
    Sun Jan 12, 2014 10:45 pm
  • Location:
    Chandler, Arizona, USA

Nice work! It's impressive to see the difference paint makes. The 2-color job makes it look sharp!
Grinding discs... still my #1 consumable!
tradetek
  • Posts:
  • Joined:
    Sun Feb 02, 2014 12:05 pm
  • Location:
    Fishers, IN

The finished product looks good, but I'm curious what the balance feels like at the rear axle? Is it easy to tip it backwards?

Also, what way are you planning to cut logs on it? Cutting piece hanging off the end, or similar to the sample piece you put up and then cutting down or sideways? If so, I'd be a bit concerned about how close the metal cross members are going to be to the chainsaw blade as it breaks through the end of the cut.

Looks like a good build though.

Bill
Lincoln Electric v155s with TIG pack (lift start)
Lincoln Electic Viking 3350 Helmet

One father's love for his autistic son... http://www.inmyimage.com
User avatar
  • Posts:
  • Joined:
    Fri Mar 15, 2013 10:55 am
  • Location:
    Philippines

RichardH wrote:Nice work! It's impressive to see the difference paint makes. The 2-color job makes it look sharp!

Thanks man, glad you like it too! Yes I myself am ecstatic about the final outcome of the color scheme used. ;)

Showed it to a friend recently and he thought its a newly purchased cutting stand from a home depot. :lol:
User avatar
  • Posts:
  • Joined:
    Fri Mar 15, 2013 10:55 am
  • Location:
    Philippines

@ Hey tradetek,

No problem whatsoever with balance specially concerning the rear axle coz the front side is a bit heavy with the addition of the two 30" long movable pipes, plus of course it is tilted towards the front.

When it comes to log cutting, it will simply be as cross cutting from the right side to a desired length, say 20" per cut up to the Y supporting the log with some 3" clearance so I don't think the chainsaw bar will in any way get in contact with any metal parts. ;)

Thanks and do appreciate for the concerns !
tradetek
  • Posts:
  • Joined:
    Sun Feb 02, 2014 12:05 pm
  • Location:
    Fishers, IN

Makes sense. I was recently cleaning some metal with a knotted wire wheel in my angle grinder. It clipped the cord and ripped it in half while wrapping the cord up tight against the spindle. I'd hate to see what damage could happen if a chainsaw were to get through a log hit a metal bar and then start bouncing between wood and metal while your reactions were either yank it out or drop it. Either way, I was envisioning a potential disaster :shock:

Bill
Lincoln Electric v155s with TIG pack (lift start)
Lincoln Electic Viking 3350 Helmet

One father's love for his autistic son... http://www.inmyimage.com
AlexG
  • Posts:
  • Joined:
    Tue Feb 24, 2015 1:23 am
  • Location:
    Cocoa, FL

Here's a cutting stand I made this morning. Quite simple to do, especially if you have family members willing to lend you a few power tools for the day :) Made mine out of a piece of 4x4 and an 8' length of 2x8. It's able to be dismantled for easy transport, being held together by four 8-inch 3/8" threaded bolts. Here are some pictures, and measurements:


Image


Image


Image


Image


Image
exnailpounder
  • Posts:
  • Joined:
    Thu Dec 25, 2014 9:25 am
  • Location:
    near Chicago

Where's the cooler 8-) Very nice!
Ifyoucantellmewhatthissaysiwillbuyyouabeer.
Hvacr
  • Posts:
  • Joined:
    Wed Feb 18, 2015 6:40 pm
  • Location:
    Norfolk, Va

I know this thread is a year old but if the OP is still around wanted to say congrats on ingenuity and color scheme.
massacre
  • Posts:
  • Joined:
    Sat Feb 28, 2015 10:20 pm
  • Location:
    Massachusetts

I wish sometimes we had pics of these in action.
I'm probably dumb but I can't envision how they are supposed to work! lol
Sorry.
Post Reply