
Self taught but trying to improve and learn to 'keyhole':
1.5" by 6" ( 1/8" ) strips tacked 3/32" apart, in the flat position. 3/32" old no-name 6010 at 85 Amps. The keyhole just keeps growing, so tried at <85 Amps and refused to start and stay lit ( not saying it is not me, but I can start and pad the plate at 85 Amps all day ). Will pick up some Lincoln 5P+ tomorrow.
I am I even close on settings?
Thx's, Fred.
Stick Welding Tips, Certification tests, machines, projects
jwright650
- jwright650
-
Ace

-
Posts:
-
Joined:Wed Dec 03, 2014 3:27 pm
Hi Fred,jyblood2 wrote:The keyhole just keeps growing
Quick question....are you striking the rod off and then quickly shortening up your arc as short as possible? If not, the longer the arc, the hotter it burns for the same amperage. Remember it is a constant current machine(CC) so it will vary the voltage according to the arc length to maintain the set amperage.
Let me see if I can remember Jody's saying..." set it hot enough to maintain a short arc,...then... maintain a short arc"
John Wright
AWS Certified Welding Inspector
NDT Level II UT, VT, MT and PT
NACE CIP Level I Coating Inspector
AWS Certified Welding Inspector
NDT Level II UT, VT, MT and PT
NACE CIP Level I Coating Inspector
jwright650
- jwright650
-
Ace
-
Posts:
-
Joined:Wed Dec 03, 2014 3:27 pm
I know it sounds odd but shortening the arc cools off the puddle. Keep this in mind if you roll out a whole bunch of lead and climb way up onto a building somewhere and you need another 1/2 turn of crank ...just lengthen the arc a wee little bit and it's like turning the welder up that extra lil crank. Of course there are limits to how much you can cheat, because when you get the arc long enough, you won't get the gas coverage you need on the puddle from the flux covering on the rod as it burns/melts and porosity will raise it's ugly head.jyblood2 wrote:Thank's for the welcome. I will give any and all hints and tips a try.
Let me see: Long Arc Hot, short Arc Cool.<--for a given setting This seems counterintuitive to me, but will give it a whirl this evening.
Thx's, Fred.
John Wright
AWS Certified Welding Inspector
NDT Level II UT, VT, MT and PT
NACE CIP Level I Coating Inspector
AWS Certified Welding Inspector
NDT Level II UT, VT, MT and PT
NACE CIP Level I Coating Inspector

- Otto Nobedder
-
Weldmonger

-
Posts:
-
Joined:Thu Jan 06, 2011 11:40 pm
-
Location:Near New Orleans
Short electronics lesson to explain this.
PIE.... P=IxE.... Power equals current times voltage.
You have a constant current source. You have a gap to bridge with that current. The bigger that gap, the more voltage required for the current to cross the gap. That means your power goes up. Power equals heat, and can even be converted to BTU if that helps you understand it.
Or... P=I^2*R. "R" is resistance, which goes up as the arc length increases. The higher the "R", the higher the power when "I" is constant.
Steve S
jwright650
- jwright650
-
Ace
-
Posts:
-
Joined:Wed Dec 03, 2014 3:27 pm
^^Good job Otto 
John Wright
AWS Certified Welding Inspector
NDT Level II UT, VT, MT and PT
NACE CIP Level I Coating Inspector
AWS Certified Welding Inspector
NDT Level II UT, VT, MT and PT
NACE CIP Level I Coating Inspector
jwright650
- jwright650
-
Ace
-
Posts:
-
Joined:Wed Dec 03, 2014 3:27 pm
Hey Fred...have you had a chance to try your key hole again?...just wondering
John Wright
AWS Certified Welding Inspector
NDT Level II UT, VT, MT and PT
NACE CIP Level I Coating Inspector
AWS Certified Welding Inspector
NDT Level II UT, VT, MT and PT
NACE CIP Level I Coating Inspector
Yes, but the results were suspect. I could not run anything, old 6010, new 6010, and even the 6011 I picked up. After a while I went into reset mode: I got some 7018 I had previously run without incident, went into the garage and cranked the machine up to 120 A. The welder is sitting in the garage, and I have some long leads that run out to the snow bank that is drifted around the welding table. I tried to run a bead with the 7018 to no avail. About this time I notice smoke from the garage. The rubber insulation on the welding cable connector, that is plugged into the welder, is melted and smoking. Long and short is I had a really bad connection on the ground electrode. I picked up a new connector tonight and just finished installing it. I will have to wait until tomorrow to give it a go.
Will be back asking for help I am sure. Thanks for the interest.
Fred.
Will be back asking for help I am sure. Thanks for the interest.
Fred.
jwright650
- jwright650
-
Ace
-
Posts:
-
Joined:Wed Dec 03, 2014 3:27 pm
Hate to hear about your welder troubles, but glad that it raised it's ugly head so you could find the trouble. Been cold here too but at least we don't have snow blowing and drifting around. Keep me posted on your progress, love to hear how you are getting along.jyblood2 wrote:Yes, but the results were suspect. I could not run anything, old 6010, new 6010, and even the 6011 I picked up. After a while I went into reset mode: I got some 7018 I had previously run without incident, went into the garage and cranked the machine up to 120 A. The welder is sitting in the garage, and I have some long leads that run out to the snow bank that is drifted around the welding table. I tried to run a bead with the 7018 to no avail. About this time I notice smoke from the garage. The rubber insulation on the welding cable connector, that is plugged into the welder, is melted and smoking. Long and short is I had a really bad connection on the ground electrode. I picked up a new connector tonight and just finished installing it. I will have to wait until tomorrow to give it a go.
Will be back asking for help I am sure. Thanks for the interest.
Fred.
John Wright
AWS Certified Welding Inspector
NDT Level II UT, VT, MT and PT
NACE CIP Level I Coating Inspector
AWS Certified Welding Inspector
NDT Level II UT, VT, MT and PT
NACE CIP Level I Coating Inspector
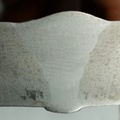
Well I just spent a hour practicing:
1) Fixing the ground connection really helped keeping the electrode lit.
2) I found I have to turn the current down to about 70 amps ( 3/32 ) to even have a chance of controlling the puddle.
And, with the ground fixed, I can keep the rod lit at this amperage.
3) Long Arc = Hot, Short Arc = Cold really does help. I could not keep the rod lit if I dragged the flux coating like 7018 though.
4) A the beginning of the weld, it takes about a 1/2 inch to punch through. I think this will come with practice.
5) At the end of the weld, last 3/4 to 1 inch, the coupon is so hot that everything just falls through.
6) About 2/3 across the coupon, the arc starts shooting out the side or front of the electrode no matter rod angle.
7) How far forward do you move? I am moving 1/4 to 1/2 an inch and the puddle does not seem to cool enough.
I tried moving forward more, but I would blow another hole in the seam, or the seam would close. Problem?
8) I find that I tending to excavate with the rod, and make a short arc, on the forward stroke. On the back stroke, I am
tending to long arc as it seems to fill the puddle back up better. Correct?
All in all it went much better.
Any help/hints will be appreciated.
Thx's, Fred.

- weldin mike 27
-
Weldmonger
-
Posts:
-
Joined:Fri Apr 01, 2011 10:59 pm
-
Location:Australia; Victoria
Are you still on 1/8 steel? Just remember that there will not be a lot of area for the heat to go, hence the fall through. If you had 3/8 plate, WITH a 1/8 root face (land) there would be more material to soak up the heat. Just a point to ponder.

I use 1/8" and 3/16" flat bars as training aids for root passes with 6010. Try a tight 3/32 gap, 65 amps, push the rod through the gap till the fires on the back, move uphill as fast as you can. (Yes, try it vert up 1st) get a feel for the travel speed. Move as fast as you can with the puddle trailing behind you.
Maybe this will help.
Have a good day
Gerald
Maybe this will help.
Have a good day
Gerald
Gerald Austin
If I didn't say it in the post- Have a great day !
Greeneville Tn
If I didn't say it in the post- Have a great day !
Greeneville Tn
wheresmejumper
- wheresmejumper
-
Guide

-
Posts:
-
Joined:Mon Jan 14, 2013 6:14 pm
-
Location:Ireland
You need to keep a tightish arc length when depositing metal.long arc length leads to a defect called root piping which is a long crack down the middle of the bead invisible to the eye but shows up on xrayjyblood2 wrote:Well I just spent a hour practicing:
8) I find that I tending to excavate with the rod, and make a short arc, on the forward stroke. On the back stroke, I am
tending to long arc as it seems to fill the puddle back up better. Correct?
All in all it went much better.
Any help/hints will be appreciated.
Thx's, Fred.
Dancing with the blue lady
Hey Fred,jyblood2 wrote:Well I just spent a hour practicing:
1) Fixing the ground connection really helped keeping the electrode lit.
2) I found I have to turn the current down to about 70 amps ( 3/32 ) to even have a chance of controlling the puddle.
And, with the ground fixed, I can keep the rod lit at this amperage.
3) Long Arc = Hot, Short Arc = Cold really does help. I could not keep the rod lit if I dragged the flux coating like 7018 though.
4) A the beginning of the weld, it takes about a 1/2 inch to punch through. I think this will come with practice.
5) At the end of the weld, last 3/4 to 1 inch, the coupon is so hot that everything just falls through.
6) About 2/3 across the coupon, the arc starts shooting out the side or front of the electrode no matter rod angle.
7) How far forward do you move? I am moving 1/4 to 1/2 an inch and the puddle does not seem to cool enough.
I tried moving forward more, but I would blow another hole in the seam, or the seam would close. Problem?
8) I find that I tending to excavate with the rod, and make a short arc, on the forward stroke. On the back stroke, I am
tending to long arc as it seems to fill the puddle back up better. Correct?
All in all it went much better.
Any help/hints will be appreciated.
Thx's, Fred.
I use 1/8" to 3/16" flat bar to teach students how to control root passes. I start off vertical with this exercise.
Using a 3/32" gap, I set a 1/8" E6010 to about 65 amps. When I start the weld, I long arc at the start for a few seconds to heat everything up (#3 and #4), then jab the rod almost through the plate and immediately start moving , with a 0 to 5 degree push angle, I travel up as fast as I can and the puddle still following me , if the keyhole gets too big, you are going too slow or letting the arc get too long. If you have to stop before getting to the end of the joint, the heat may build in the piece and welding will be slightly different.
This is done with NO whipping. You stay on the front edge of the puddle. Whipping on pcs with a small mass can sometimes cause them to heat up to the point where the puddle is very hard to control. And of course when you get to the end, there is nowhere for the heat to go .
One thing to realize is that when you whip out of the puddle, energy is still going somewhere.
Have a great day and maybe this will help.
Gerald Austin
If I didn't say it in the post- Have a great day !
Greeneville Tn
If I didn't say it in the post- Have a great day !
Greeneville Tn
jwright650
- jwright650
-
Ace
-
Posts:
-
Joined:Wed Dec 03, 2014 3:27 pm
Hi Gerald! Hope all is well down your way.weldingt wrote: Have a great day
Sorry for the hi-jack Fred, saw an old friend and had to say hello.
John Wright
AWS Certified Welding Inspector
NDT Level II UT, VT, MT and PT
NACE CIP Level I Coating Inspector
AWS Certified Welding Inspector
NDT Level II UT, VT, MT and PT
NACE CIP Level I Coating Inspector
No problem on the Hi-jack.
Made a couple of changes:
1) Changed to 1/8" 6010 and current still at 70 Amps
2) Changed Shade to 9
3) As suggested, 3 circles long arc and then dive the rod in at start
4) Changed to Vertical Up
The result was much better, I still had to whip a bit when the keyhole grew bigger than the rod. This was only every couple of inches though. Funny thing is that it seemed a lot easier with the bigger rod ( yet same current ). I am not sure if the bigger rod cooled the puddle faster, or that the weld was cooler given the relative size of the rod. Maybe it was just me seeing better. I am still getting quite a bit of stalagmites on the bottom side ( ~ 3/16" high ), but I am keeping the keyhole closed. I think the stalagmites are at locations where I have to whip as I let the keyhole get out of control.
As pointed out, I might need some thicker metal to practice, so I will pick up some 1/4" on Monday and bevel it down to 3/32".
I appreciate all the help, especially diving the rod in at the start tip.
Thx's, Fred
Sorry about the two posts. I though I posted one last night but didn't see it this morning (or so I thought) so posted again with a little more info.
@John Wright- Hey John, I have been checking out the videos on this site for awhile and just realized there was a forum.
@John Wright- Hey John, I have been checking out the videos on this site for awhile and just realized there was a forum.
Gerald Austin
If I didn't say it in the post- Have a great day !
Greeneville Tn
If I didn't say it in the post- Have a great day !
Greeneville Tn
I weld pipe for pipefitters and sometimes I find that sometimes the way the guy cut or fit the pipe I end up having to weld larger gaps in some spots that blow my keyhole right out. The section of pipe that maybe larger I just run stringers on both sides until the gap is more favorable then feather the ends and run right over it. That usually takes care of it. Not sure if this applies to you but just something to keep in the back of your rolodex!
Get thrown down 9 times get up 10
Return to “Stick Welding/Arc Welding - Shielded Metal Arc Welding”
Jump to
- Introductions & How to Use the Forum
- ↳ Welcome!
- ↳ Member Introductions
- ↳ How to Use the Forum
- ↳ Moderator Applications
- Welding Discussion
- ↳ Metal Cutting
- ↳ Tig Welding - Tig Welding Aluminum - Tig Welding Techniques - Aluminum Tig Welding
- ↳ Mig and Flux Core - gas metal arc welding & flux cored arc welding
- ↳ Stick Welding/Arc Welding - Shielded Metal Arc Welding
- ↳ Welding Forum General Shop Talk
- ↳ Welding Certification - Stick/Arc Welding, Tig Welding, Mig Welding Certification tests - Welding Tests of all kinds
- ↳ Welding Projects - Welding project Ideas - Welding project plans
- ↳ Product Reviews
- ↳ Fuel Gas Heating
- Welding Tips & Tricks
- ↳ Video Discussion
- ↳ Wish List
- Announcements & Feedback
- ↳ Forum News
- ↳ Suggestions, Feedback and Support
- Welding Marketplace
- ↳ Welding Jobs - Industrial Welding Jobs - Pipe Welding Jobs - Tig Welding Jobs
- ↳ Classifieds - Buy, Sell, Trade Used Welding Equipment
- Welding Resources
- ↳ Tradeshows, Seminars and Events
- ↳ The Welding Library
- ↳ Education Opportunities