i called in to the workshop and raided the scrap bin.
sweet some aluminum
unfortunately i have no idea what grade it is. possibly 5 series.
only got 4043 filler so no choice anyway.
big thanks to those who gave the tip about hitting the pedal hard to start the puddle.
that really helps a lot. tho a we bit of trouble backing off without backing off to far. still learning to use the pedal.
took a bit to get cleaning action sorted as no % adjustment. i just tried about a third on the dial and also tried 2/3 on the dial to work out which way it reads.
it ran really fluid and couldn't move fast enough.
Your arc length is too long, causing porosity. Clean your surfaces a bit better another cause of porosity. Your end weld looks better. A great start though.
Lincoln MP 210, Lincoln Square Wave 200,
Everlast 210 EXT
Thermal Dynamics 25 Plasma cutter
" Anything that carries your livelihood wants to be welded so that Thor can’t break it."
CJ737
ran some beads today.
had a few issues. feeding the rod, the end of the rod turned into porridge. to much cleaning action, not enough gas.
bit of good old dirt which made some nice orange glow right out at the edge of the cleaning action.
trying to balance foot pedal and arc length....arghh.
then running out of gas.
however as i was trying to get some more beads down before gas ran out, i picked up the travel speed big time.
what a difference !
pity it was only at the end. going to be a while until i can replace the gas
What does the backside look like? Since your material is pretty thin, and you've got lots of beads, I would anticipate ample penetration lines showing up.
As you practice ally, keep a bucket of water nearby, and just drop it into cool it. Since this is just practice, don't worry about the water quenching effecting strength. But it makes it much more manageable to work with.
As for struggling with arc length, get into a good position where your torch arm and hand are supported, and slide your arm along, basically not moving your hand. Don't put weight on that elbow, it makes it much harder to relax and slide. This eliminates that variable of minute adjustments with the torch. You can shorten your stick out, and rest the cup (alumina types) directly on the material as you go. That enables you to remove yet another variable and prevent the dipping of your tungsten. (Tip just barely equal to the cup lip).
i think i was running those fairly cold to stop them going so wide. but by increasing travel speed i think i can keep the amps up, get better penertration and not end up with super wide beads.
one of the problems was dipping the tungsten when feeding rod. havn't worked out how to lift when feeding and put it back down at the right height.
keep in mind this is still the first hour of alu tig welding.
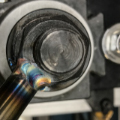
kinda cool that you can see the tungsten in the pools reflection
the weekends practice and a little box from scrap.
box is 2.4mm alloy with 1.6mm ends cause thats all i had.
tacking up was a major pain. fit was not good and tacking thick to thin that you can't hold very well....arghhh.
blew the edges out a few time as well as trying to get a good position. got plenty of practice fixing bits.