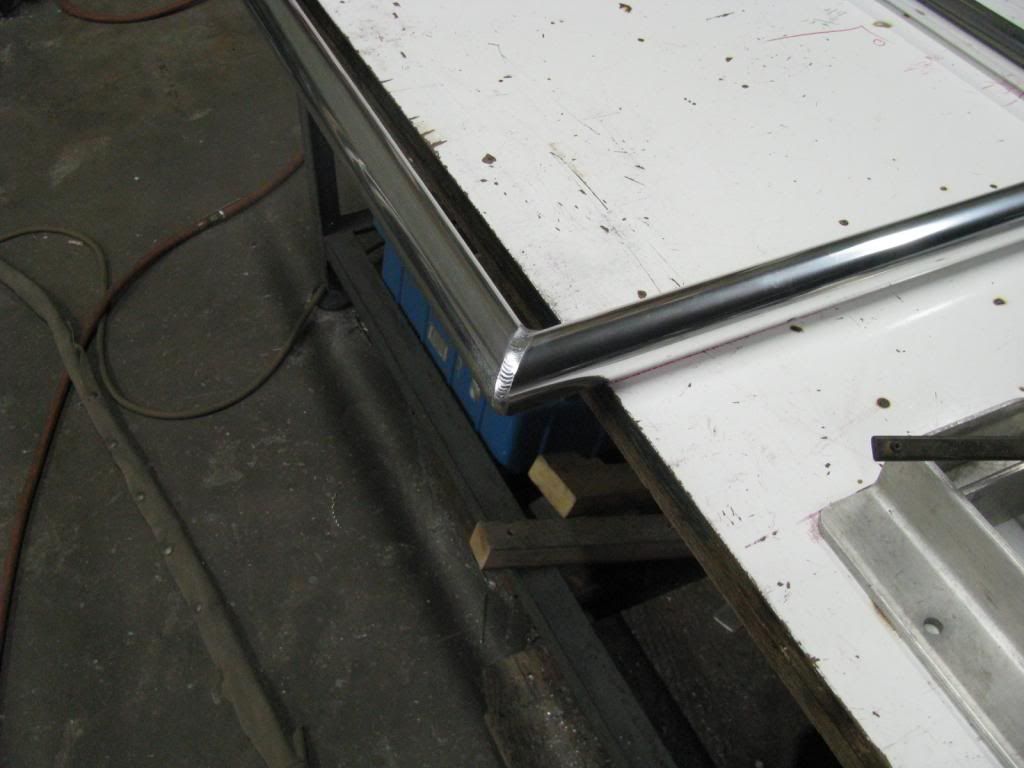
Trying to butt weld small (1 1/2" and 1 1/4") .065 6061 tubing. Pretty sure the problems I'm having are either torch positioning (angle or distance or both) or movement (too fast or too slow).
The only way I can get a consistent bead is to go around the tube like "spot weld, spot weld, spot weld" until it's all the way around. And I know that's not right even though it passes a 35psi dunk test (most of the time anyway).
I do okay on flat butt joints, inside / outside corners, and vertical. But I'm really struggling on round tubing. The shit is killing me. Wasting materials and consumables and my welds aren't improving.
Been watching the videos on youtoob but if Jody has done a tubing-specific vid I can't find it.
Example:
I have worse examples if anybody needs to see those, too.
If your machine has pulse features, now's the time!
If not, be prepared to work the foot pedal like you're playing the church organ. Spot-welding is almost what you're going for. Preheat your area with about 1/4 pedal until you have molten metal, then mash the pedal and feed rod, for about a quarter of a second, then back down to 1/4 pedal, advance, and repeat. As the tubing heat-soaks, you'll either have to go faster or use less pedal (at both ends).
With pulse feature, you can set the machine to do this automatically, and your pedal then controls heat in a more "normal" sense, setting the peak and background currents for you.
A lot of things come into play when welding tubing in any material. Torch and rod angles has a lot to do with it. You have to keep in mind while moving around the tube to twist your wrist to keep the same angle at all times. Try to keep the same angle you would on a flat just projected on a round piece (easier said than done I know but keep it in your mind). Do a few practice runs before lighting up. Also, make sure the part is clean with no burrs on the inside. With it being thin those burs can be a real pain.
I'd be using a #5 standard cup, 3/32 tungsten sharpened to a point with about a 3/32 stick out, and 1/16 rod, Argon around 15 cfh. With using a older Synco machine put the cleaning/penetration on about 4 or 5, and set the amps for around 60-75 playing the pedal as needed. Don't be afraid to give it some heat to start off with but you need to be backing off the pedal as you go around.
Doesn't really seem like you guys are that far apart on your advice. And I do appreciate the heads up on settings.
Been using 3/32 tungstens, at about 80 - 100 amps. Cleaning / penetration I normally keep about 4 (that's another control on this particular machine that doesn't seem to work correctly).
From what Red posted I've been running about two - three times as much stickout as I should be ( was taught 1/4"), so that's at least something. Regulator settings are another variable I need to look into.
Would it help to practice with larger tubing for a minute before going back to the 1 1/4" and 1 1/2"? Just a thought.
When I weld aluminum, I usually have 3/8 to 1/2" stickout, with a gas lens. (Personal preference)
I also have the machine set around 160A for thin stuff, though I'm not using it all. That pulse of power is there when I need it.
Yes, larger diameters (or even flat sheet) of the same thickness, where you can focus on just the weld, rather than following it around a small tube, may help.
Would like to try a gas lense, but the only ones we have here are for like 1/8" Tungsten. Stickout is pretty easy to adjust so I'll fool around with it and see what works.
Like I said before, I do okay on flat sheet and plate, it's tubing that's kicking my ass. Got plenty of 2" and 2 1/2" .065 tube so I'll use all that up before going back to the smaller stuff.
EDIT: I had been told gas lenses were expensive as hell, but you can buy them in kits on eBay for like $30. Dunno, maybe $30 is expensive to some people.
I've done Al with a standard collet-body, but I really prefer a gas lens. The gas flow required for aluminum just seems to work better for me with a diffuser... No edge turbulence to grey or blacken the weld.
I'll also use 1/8" 2% thoriated if the machine is a modern square-wave unit. You can sharpen it with a long taper, then blunt the end to the size you want.
1.5% Lanthanated gets great reviews, though I've never used it.
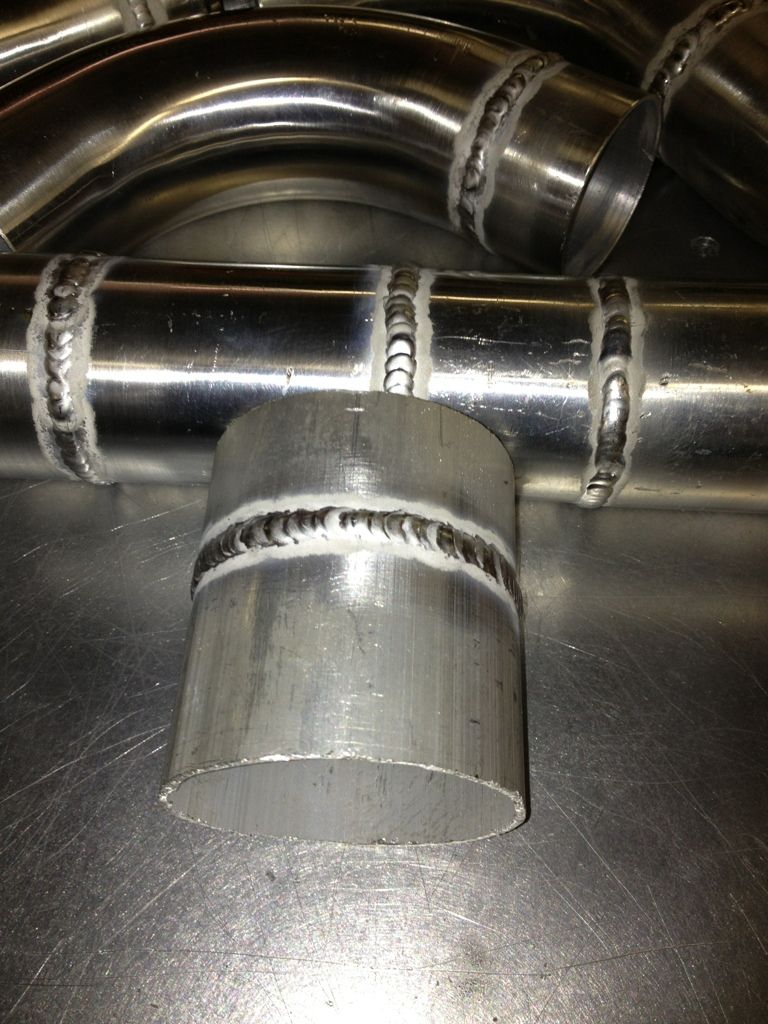
I weld a lot of tubing. Otto's suggestion with the pedal is a good one. That's exactly how I do it when using a pedal. My machine is set up with both a pedal and momentary switch on the torch. If it is just a structural tube, use a chill pin to join them and leave a 3/16" gap(1/16th on thin wall) between the butts. If it's a fluid or pressure tube, grind the sharp edge from the exterior and ream the inside. This is not a straight butt but it should look just like this. I have other photos but they are at a distance and not very clear. This is sched 40 but the pieces are beveled and the sharp edge taken completely off of the outside of the miters. This was welded with 200 (250 syncrowave) amps, manually pulsed with the torch switch. No lens, 1/8th pure.
Many people weld towards themselves in these situations. I go up and away. That way, I end up keeping myself positioned the same as I physically go up and over the pipe, and even sneaking the filler in behind the cup as I start downhill in forward travel. On the downhill side, the torch is more straight in, if not somewhat reverse travel.
Miller ABP 330, Syncrowave 250, Dynasty 300 DX.
Honorary member of the Fraternity of Faded Tee Shirts.
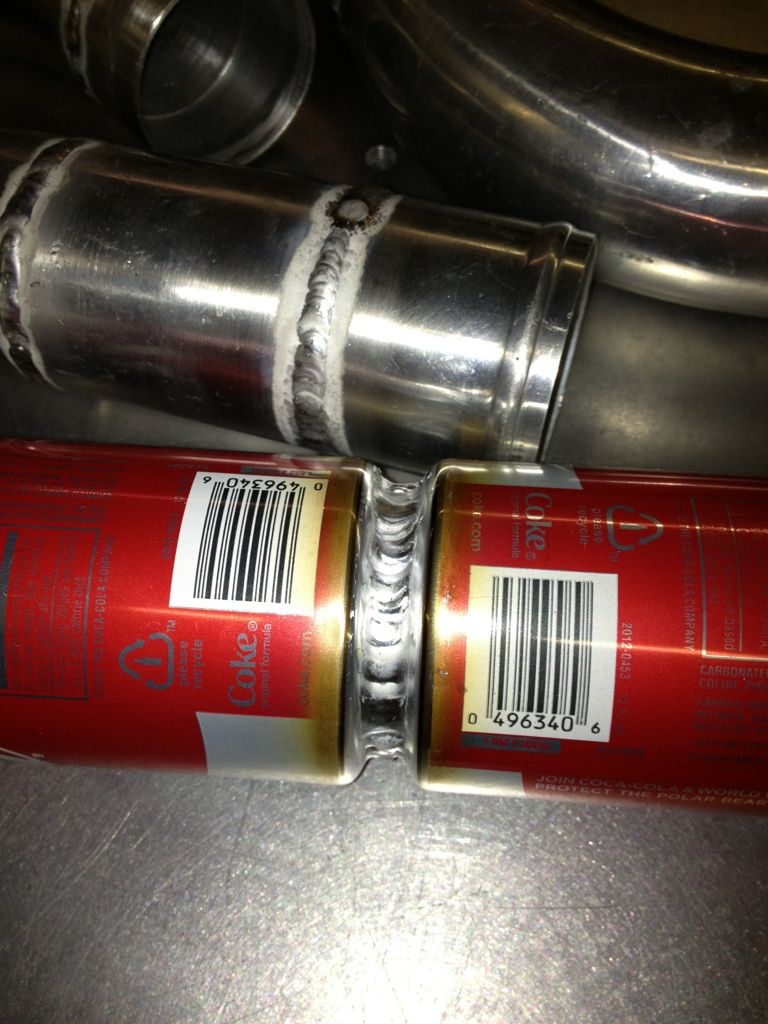
I agree with Steve. Welding is like your own personal handwriting. Whatever works best for you is the best way to go! Me personally, I've never been a big fan of pulsing. It was how I learned to weld aluminum but over the years have got away from it. Nothing wrong with it as TamJeff shows in the photo. (Nice weld TJ!) I found some drop pieces of 6061 .0625 wall tube and thought I'd show with no pulse just feeding the wire. #5 Standard cup, 3/32 tungsten (.250 stick out), 15 Ar and about 5 He.
Keep practicing and remember we all started exactly were you are right know.
Attachments
Optimized-IMG_1326.jpg (56.37 KiB) Viewed 1440 times
Anything under 2", you don't end up having a lot of time for corrections so they do become difficult in the smaller sizes. The tube in the OP is not really that bad if this isn't your day job. I can take a weekend off and blow my first 3 welds of the Monday. There is a heck of a lot worse going on than that and by seasoned welders to boot. I'd say you are right about there, actually, without seeing the inside of the tube. Most of my butts are on 3/4 and 1".
Only reason I use pulse is because by the time you are done tacking small tubes, you have essentially pulsed it part of the way at least. I use fat tacks or double tacks on aluminum anyway. 3" and above I use normal travel as far as I can reach if I have a bunch of them to do. We have raced before using both methods. The time difference on smaller tubes was negligible. With manual pulse, you can offset the speed difference with being able to weld ambidextrously more easily, perhaps, without changing position as much, or dragging a foot pedal around.
Agreed it's really up to the welder and each will have their own approaches and with not fixing what isn't broken for lack of a better term.
Miller ABP 330, Syncrowave 250, Dynasty 300 DX.
Honorary member of the Fraternity of Faded Tee Shirts.
The pic above is a nice looking tube weld. The OP photo is really not that far off from that with a little practice. I started out pulsing to learn, and then found I wasn't letting off the switch as I progressed. LOL. . .every time I get good passes going, the shop phone rings. . .and rings. . . .
Miller ABP 330, Syncrowave 250, Dynasty 300 DX.
Honorary member of the Fraternity of Faded Tee Shirts.
LOL thanks guys. Like I said from the beginning, I have (a lot) worse looking welds if you want or need to see them.
I don't do this for a living, yet, and maybe never will. In the defense industry it helps to have more than a couple of skill sets, or something you can do as a sideline when the company is between contracts.
Practicing on larger tubing would definetly help. The thing that makes tubing harder than flat is you have to constantly change torch angle and maintain a tight arc. Aluminum does not weld good when you long arc. That sync 250 is a awesome I started welding on one of those. 4 is a good setting for your balance. Amps just turn it to like 150 and use the foot peddle. Decider do weld a little better but not necessary on aluminum. A Number 4 or 5 standard cup will do the job just fine set your gas to about 15 cfh
Got back on it this weekend. 2 1/2" tubing (junk eBay intercooler kit), 3/32 tungsten with a #5 gas lens, following the recommendations. Didn't really get anywhere saturday but today I tried turning the heat up a little - to 150 - 175 amps - and kinda had one of those aha moments. Before I was afraid of burning through and kept it turned down, but rocking the pedal keeps that from happening (mostly).
Been doing these for a while. I like leaving them around the shop to piss one of my co-workers off. LOL