My Fellows,
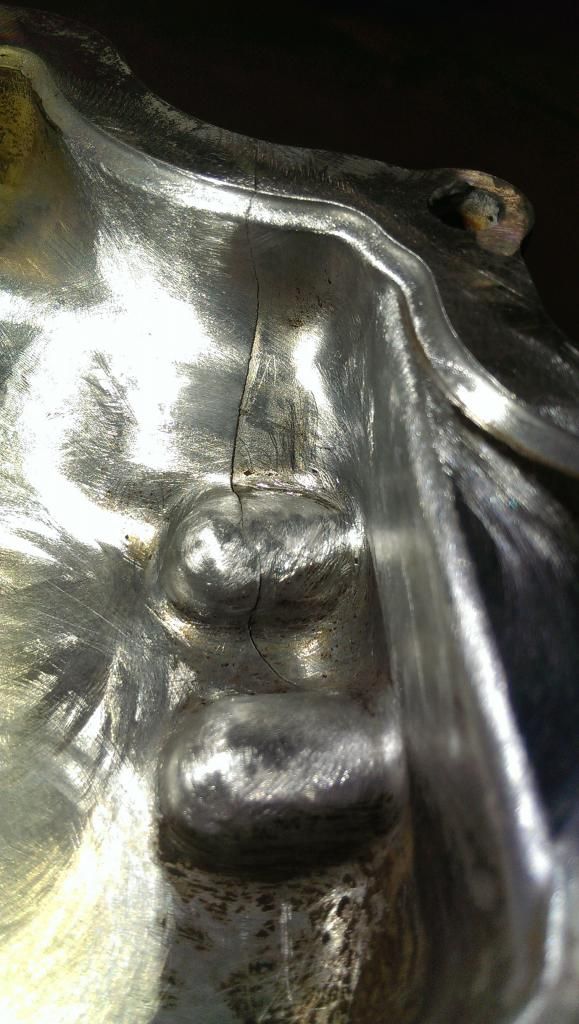
Wish I had more time to think thru this cast alloy trans pan repair. Can you help me? It needs to be welded overnight tonight. The pan supports an exhaust manifold bracket. The failure was due to heavy-handedness on the part of a young tech. (did ya see the timing cover repair?) Been there done that. Here are the photos:
Hi,
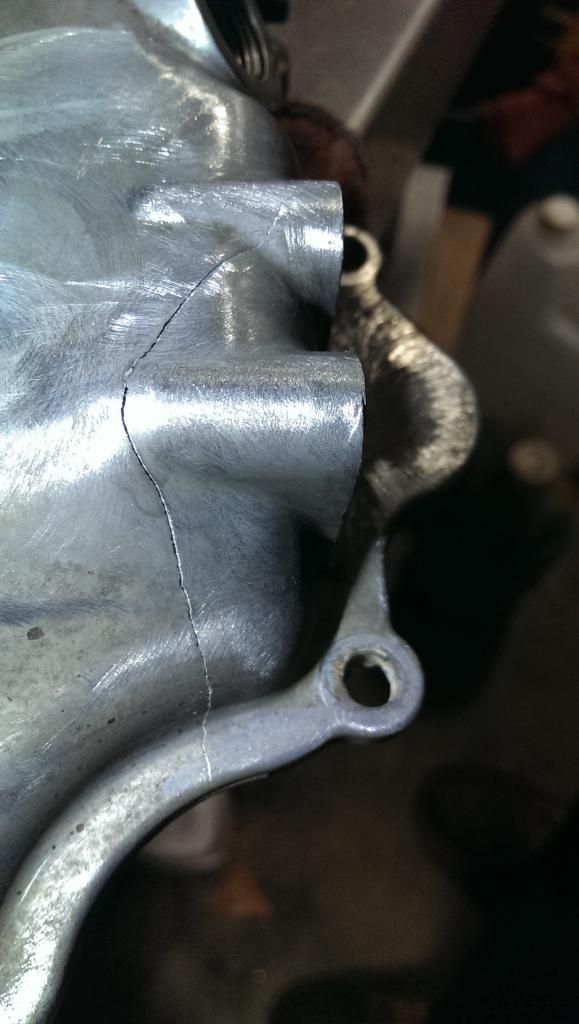
Didn't get the advice soon enough. I understand now how grinding off the weld would have helped. The trans fluid percolated up into the puddle. It was hard to know when to dab the filler (5356) because of the corruption. The crack was grooved and rinsed with plenty of acetone. I did the inside with 3/32 rod #7 cup at about 120amps. The carbonzed oil would actually produce yellow sparks that flew up! Outside I used a 1/16" rod at around 100 amps. Outside was cleaner but some of the schmutz from the inside weld made it thru the crack to the outside I guess. When I got to the crack in the parting surface I noticed the pan had warped to the point that the deck height was .005" to .010" lower on the smaller cracked section. It was filled and filed and lapped until flush on a steel lapping plate.
Here are the pics. Not a pretty sight. The pan does not leak and will support the exhaust bracket.
These welds are like a wife; the best ones are sturdy not purdy.
Don
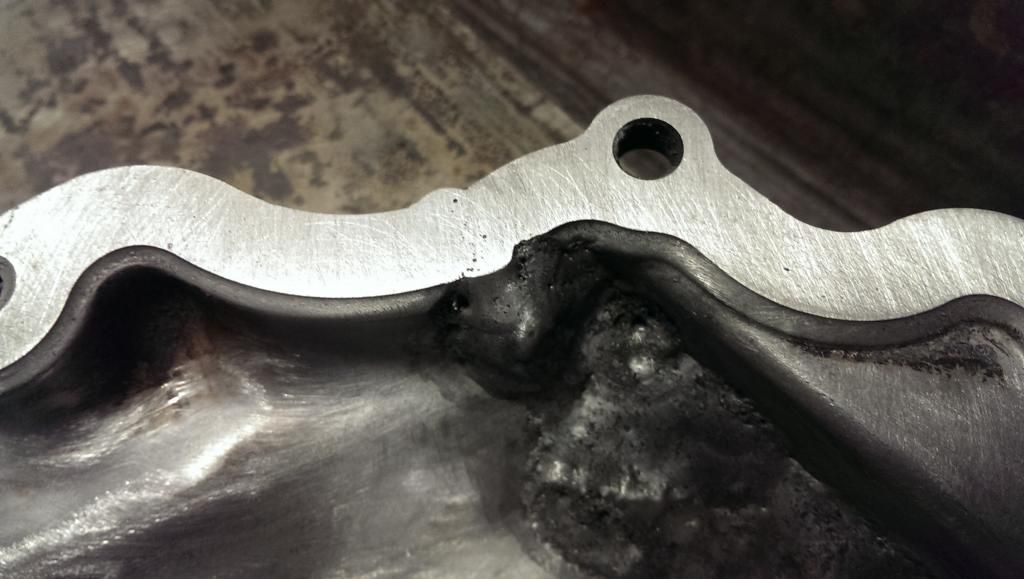
On thin cast parts, don't groove it all at once. I groove it as I go. Usually I just use an 1/8" drill bit and patially groove it. This keeps little sections that act as stops to help keep it from shrinking so much.
You can see where some of it is still left touching without a gap. Also, it is welded from different directions from the ends inward or randomly stitched until the part is mostly subdued. The open root actually saves from overheating the weld zone in this instance. It's almost as if it was sweated together.
Actually, you did rather well for an oily part.
Miller ABP 330, Syncrowave 250, Dynasty 300 DX.
Honorary member of the Fraternity of Faded Tee Shirts.
thanks for the tip on prepping the cracked casting.
now I understand why the piece was so distorted. It must have been overheated.
Next time I will drill more and groove less. Also, I will change the technique to accomplish a cleaner, cooler weld. And that "bubblin' crude" could be machined away as it surfaces.
Gratefully,
Don
Some castings it helps to bolt them down on a torque plate of steel, even if you have to drill and tap the holes to hold it. Only in the case where you can't get a replacement or you don't care about the time it takes. I had a 2'x3'x1/2" steel plate that I used to work cast on with a gazillion threaded holes in it, along with a drawer full of shim stock for irregularities. It just doesn't pay enough these days, in this disposable world we live in.
I see all these shows on TV where these guys are making sick money working primarily with bolt on parts. By that logic, most of us general, scratch fabricators ought to be millionaires by now. We used to make quick molds for missing sections of cast out of white oak heartwood in minutes, by hand, to form the missing sections with out of annealed stock and have it look good too.
The other thing with oily cast is, whenever possible, use a band aid over the damaged section where you can just weld a lap joint onto the clean surface metal, especially if the damage is central to the casting. It will save from contamination, shrinkage will be less and no chasing cracks.
Miller ABP 330, Syncrowave 250, Dynasty 300 DX.
Honorary member of the Fraternity of Faded Tee Shirts.
wash with degreaser 1-2 times, wash with acetone 1 time and then heat up the whole part with BIG propane torch. It will sweat and burn most of the oil and welds SO much nicer.
The time you use in prepping the welds will not go to waist, its time saved from the "weld" time and the fix looks like its done properly, not a half-ass-fast-fast-super-duper-ducktape-fix
I use 4047 filler for almost all alucast repairs. it just works nicer than 4043.. at least in my mind.


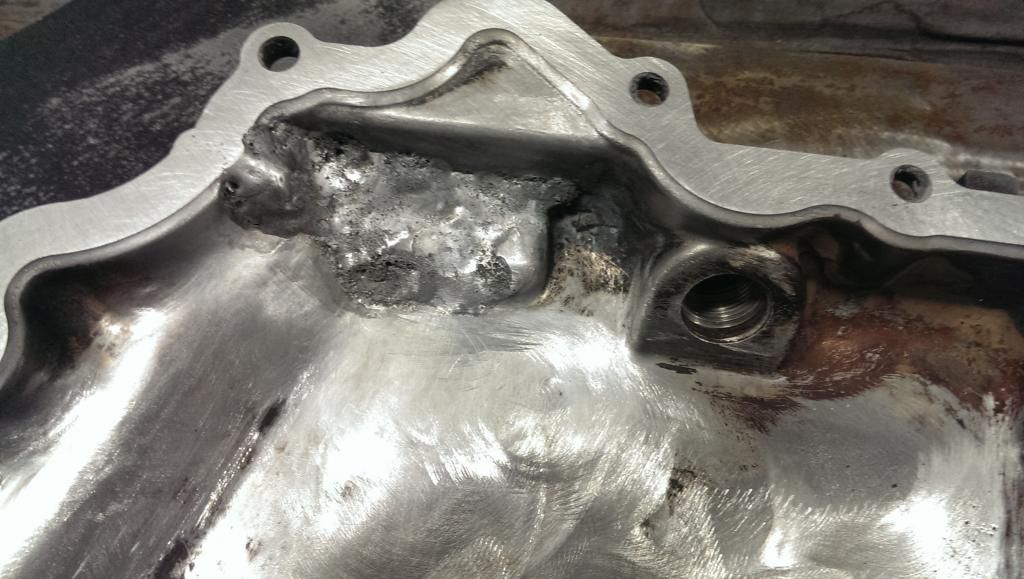
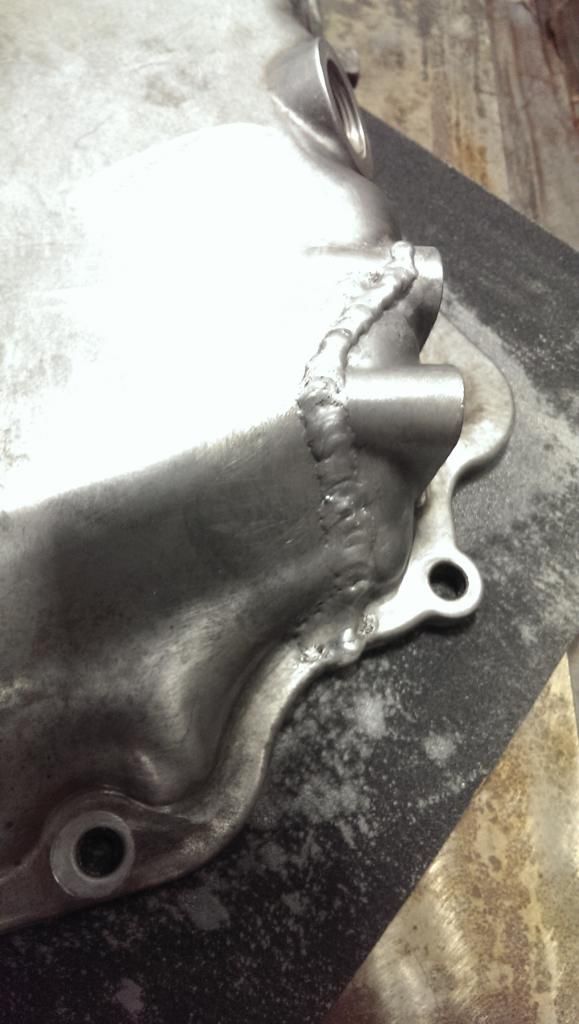
 Not a pretty sight.
