
Mike you are just being too kind. Thin stuff is completely the opposite of what I am used to welding and presents quite a challenge for me. How you guys manage to make such beautiful consistent beads on thin material is beyond me. I can only do it on thicker stuff where you just turn up the heat and move fast.
As far as Coca Cola, in Greece we have normal Coke, Coke Light, Coke Zero and Coke without caffeine.
PS Congratulations on the new family member.
Tig welding tips, questions, equipment, applications, instructions, techniques, tig welding machines, troubleshooting tig welding process
Artie F. Emm
- Artie F. Emm
-
Weldmonger

-
Posts:
-
Joined:Thu Jul 24, 2014 7:53 am
Congratulations! A beautiful daughter adding to a beautiful family. Good on ya!zank wrote:We brought number three (a little girl!) home last week... Here's the gang.
Dave
aka "RTFM"
aka "RTFM"


Congratulations Zank, nice gang there, the boys are in a wonderful age were everything happens so fast.
They will keep you busy a long time
They will keep you busy a long time
Pictures from my scrap collection:
http://forum.weldingtipsandtricks.com/v ... f=9&t=5677
http://forum.weldingtipsandtricks.com/v ... f=9&t=5677
A Chandelier I made a year ago for some show in the west end. Not my best Tig work I have to say, the central Hub is made from Turned EN 1AL shite not nice to weld at all
- Attachments
-
- 877.JPG (73.85 KiB) Viewed 1952 times
-
- 876.JPG (41.74 KiB) Viewed 1952 times
-
- 872.JPG (87.9 KiB) Viewed 1952 times

- TRACKRANGER
-
Weldmonger
-
Posts:
-
Joined:Wed Aug 06, 2014 12:48 am
-
Location:Melbourne, Australia
Looks pretty good. What's the overall height?
EWM Phonenix 355 Pulse MIG set mainly for Aluminum, CIGWeld 300Amp AC/DC TIG, TRANSMIG S3C 300 Amp MIG, etc, etc
Chopin out rusty pipe off ammonia condensers. 4" x 3" shed 40 reducers.
All tig, off a ladder and in the rain hence the tarp.
All tig, off a ladder and in the rain hence the tarp.
- 20150613_120757_resized_1.jpg (96.71 KiB) Viewed 2150 times
- 20150613_150036_resized.jpg (57.03 KiB) Viewed 2150 times
- 20150613_105455_resized (3).jpg (45.77 KiB) Viewed 2150 times
Flat out like a lizard drinkin'

- LtBadd
-
Weldmonger
-
Posts:
-
Joined:Sun Apr 12, 2015 4:00 pm
-
Location:Clearwater FL
-
Contact:
- TRACKRANGER
-
Weldmonger
-
Posts:
-
Joined:Wed Aug 06, 2014 12:48 am
-
Location:Melbourne, Australia
Great job there Vic!
EWM Phonenix 355 Pulse MIG set mainly for Aluminum, CIGWeld 300Amp AC/DC TIG, TRANSMIG S3C 300 Amp MIG, etc, etc
Did some repair to a very well used DR650 Frame.
No idea if the welds are good or not but it sure got the job done.


The strangest thing was the heat affected zone appears to be really large but the zone wipes off with your hand, the frame was media blasted beforehand with AL Oxide so maybe that has something to do with it?
It was quite hard to weld I used er70-02 should of used -06.....
No idea if the welds are good or not but it sure got the job done.
The strangest thing was the heat affected zone appears to be really large but the zone wipes off with your hand, the frame was media blasted beforehand with AL Oxide so maybe that has something to do with it?
It was quite hard to weld I used er70-02 should of used -06.....
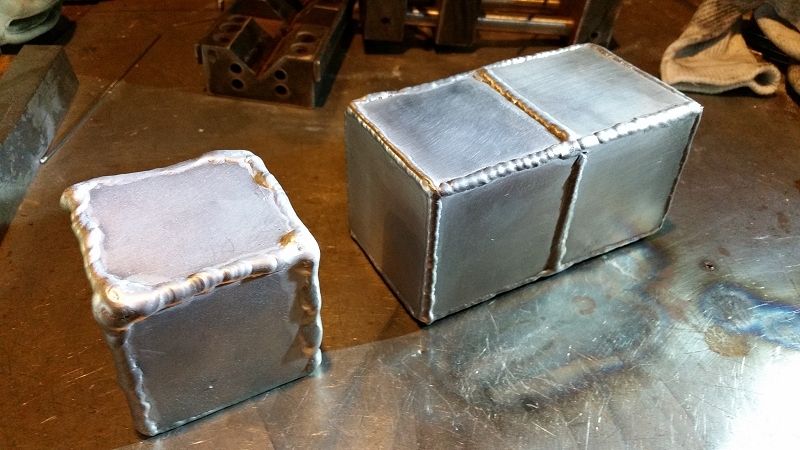
here's some beginner hobbyist comedy for all of you real welders (don't drink milk while viewing this, it will come out your nose). Learning on my own I've gotten decent with steel, but started to play with aluminum recently, which has been a humbling experience. Here are some practice boxes, the frightening one on the left was my first attempt, and the much less scary piece on the right was after a couple of months of ruining lots of aluminum. Not great but still a lot better.
All of this was to learn how to build my own radiator recovery tank for my daily driver, an old unrestored '67 Dodge Coronet. I knew I wasn't good enough to weld up a decent tank yet but just wanted to try a dry run to see how ugly it would be (I have enough aluminum sheet left and two more bungs to build a second one that will hopefully be a lot less ugly than this attempt). Here's what I (almost) finished yesterday...
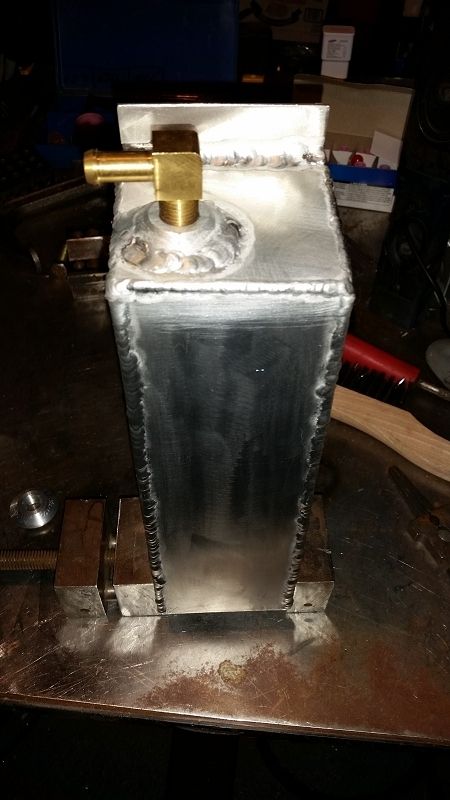
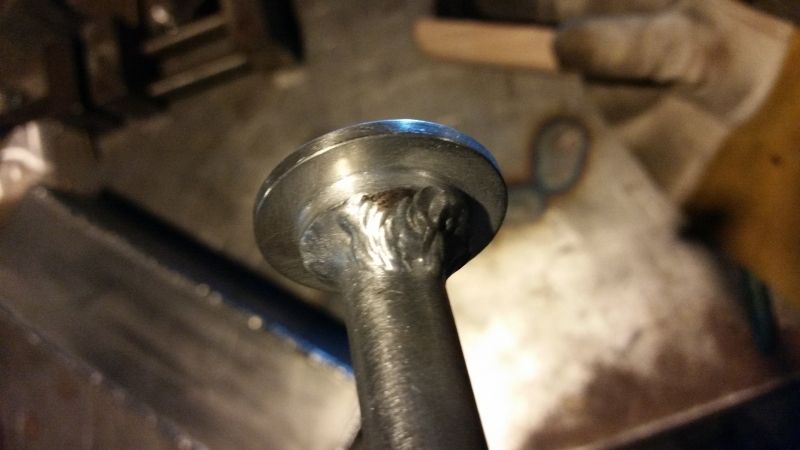
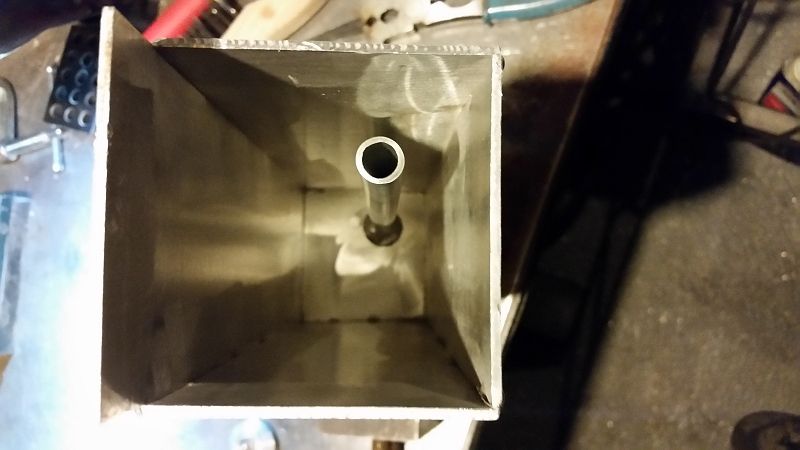
It's a recovery tank instead of just a puke tank, so I designed long aluminum tubes welded into the bungs to allow the coolant to return back into the radiator once it's cooled down... the input tube comes into the top with an inch space on the bottom... if there's too much coolant, there's another tube that's opposite of that tube, that's welded onto a lower bung that reaches almost to the top of the tank with the same inch of space that will let coolant exit the tank if it gets that bad. The fun part was trying to weld the very soft aluminum fuel line (that I used) onto the 6061 bungs. My first arc vaporized the tube immediately, so I had struggled with very short welds, almost like tacking my way around the tube, fighting blowing through the tube and having to fill in my holes on the way, eventually welding the tube onto the bung... That was fun, but got it done...
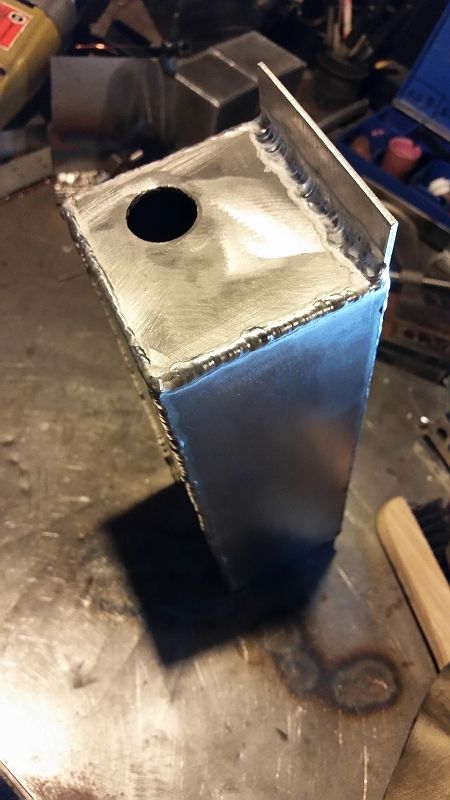
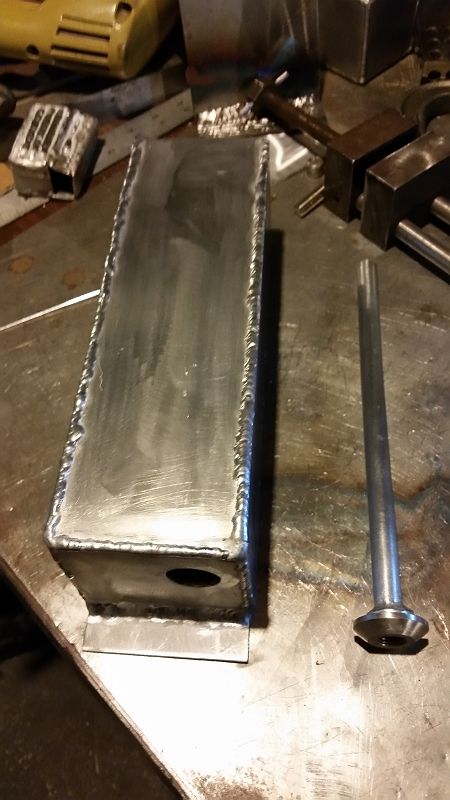
yup a whole lot of ugly right there, but it'll actually work. But I won't be using it, it was just a practice run once I can figure out how to tack well consistently, I won't have big ugly tacks that won't still stand out after running the main bead through them. And yeah, my fillet's are the bad news, still struggling with those too. But gettin' there... practice practice practice right?
All of this was to learn how to build my own radiator recovery tank for my daily driver, an old unrestored '67 Dodge Coronet. I knew I wasn't good enough to weld up a decent tank yet but just wanted to try a dry run to see how ugly it would be (I have enough aluminum sheet left and two more bungs to build a second one that will hopefully be a lot less ugly than this attempt). Here's what I (almost) finished yesterday...
It's a recovery tank instead of just a puke tank, so I designed long aluminum tubes welded into the bungs to allow the coolant to return back into the radiator once it's cooled down... the input tube comes into the top with an inch space on the bottom... if there's too much coolant, there's another tube that's opposite of that tube, that's welded onto a lower bung that reaches almost to the top of the tank with the same inch of space that will let coolant exit the tank if it gets that bad. The fun part was trying to weld the very soft aluminum fuel line (that I used) onto the 6061 bungs. My first arc vaporized the tube immediately, so I had struggled with very short welds, almost like tacking my way around the tube, fighting blowing through the tube and having to fill in my holes on the way, eventually welding the tube onto the bung... That was fun, but got it done...
yup a whole lot of ugly right there, but it'll actually work. But I won't be using it, it was just a practice run once I can figure out how to tack well consistently, I won't have big ugly tacks that won't still stand out after running the main bead through them. And yeah, my fillet's are the bad news, still struggling with those too. But gettin' there... practice practice practice right?
can't believe it took me this many years to buy a diamond wheel for my bench grinder... what a difference

- weldin mike 27
-
Weldmonger
-
Posts:
-
Joined:Fri Apr 01, 2011 10:59 pm
-
Location:Australia; Victoria
I see very little wrong here. Aluminium is a fickle beast, and you are doing fine. Just remember to pressure test your system before driving.
- big gear head
-
Ace

-
Posts:
-
Joined:Thu May 07, 2015 11:46 am
-
Location:KY.
Is that a '67 Buick in your profile pic? I like the '66 and '67 Skylark and GS.
I've been TIG welding for about 30 years and I still have trouble with aluminum. Here is my tip, and it may or may not help you. My biggest problem is holding the torch at the correct angle. I seem to angle the torch in the direction of the weld and I melt the end of the rod before I can dip it into the puddle. It also makes the weld width inconsistent. Try to hold the torch as straight into the weld as you can without leaning it. It makes it harder to see the puddle, but it makes the weld better. Watch Jody's videos and that will help a lot.
I've been TIG welding for about 30 years and I still have trouble with aluminum. Here is my tip, and it may or may not help you. My biggest problem is holding the torch at the correct angle. I seem to angle the torch in the direction of the weld and I melt the end of the rod before I can dip it into the puddle. It also makes the weld width inconsistent. Try to hold the torch as straight into the weld as you can without leaning it. It makes it harder to see the puddle, but it makes the weld better. Watch Jody's videos and that will help a lot.
Freddie
thanks for the tip, I'll try to keep torch straighter and see what happens...big gear head wrote:Is that a '67 Buick in your profile pic? I like the '66 and '67 Skylark and GS.
I've been TIG welding for about 30 years and I still have trouble with aluminum. Here is my tip, and it may or may not help you. My biggest problem is holding the torch at the correct angle. I seem to angle the torch in the direction of the weld and I melt the end of the rod before I can dip it into the puddle. It also makes the weld width inconsistent. Try to hold the torch as straight into the weld as you can without leaning it. It makes it harder to see the puddle, but it makes the weld better. Watch Jody's videos and that will help a lot.
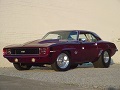
and nope, not a Buick.... it's a '66 Chevy Biscayne, a big B-Body, built it from scratch (chassis, engine, etc) as a street/strip car but it's just strip now... pump gas 406 running low 11's moving 3800 lbs... I see you have a pretty serious looking Camaro there
can't believe it took me this many years to buy a diamond wheel for my bench grinder... what a difference
- big gear head
-
Ace
-
Posts:
-
Joined:Thu May 07, 2015 11:46 am
-
Location:KY.
Small picture, it looked like a Buick, but I can see now that it's a Chevy.
Thanks, Same here. I built this Camaro from a rusted out RS/SS396 body. I built the frame when I was 18 in trade school. Had it 31 years now. It's a 427, 4 speed. I TIG welded the roll bars, rear suspension and the 9 inch Ford rear end housing. The frame was MIG welded. This was my first Pro Street build.
Thanks, Same here. I built this Camaro from a rusted out RS/SS396 body. I built the frame when I was 18 in trade school. Had it 31 years now. It's a 427, 4 speed. I TIG welded the roll bars, rear suspension and the 9 inch Ford rear end housing. The frame was MIG welded. This was my first Pro Street build.
Freddie
GreinTime
- GreinTime
-
Weldmonger
-
Posts:
-
Joined:Fri Nov 01, 2013 11:20 am
-
Location:Pittsburgh, PA
Your closing statement implies that there are more. Where are those pics at!big gear head wrote:Small picture, it looked like a Buick, but I can see now that it's a Chevy.
Thanks, Same here. I built this Camaro from a rusted out RS/SS396 body. I built the frame when I was 18 in trade school. Had it 31 years now. It's a 427, 4 speed. I TIG welded the roll bars, rear suspension and the 9 inch Ford rear end housing. The frame was MIG welded. This was my first Pro Street build.
#oneleggedproblems
-=Sam=-
-=Sam=-
- big gear head
-
Ace
-
Posts:
-
Joined:Thu May 07, 2015 11:46 am
-
Location:KY.
Does this sight host pics? I don't have a picture account on the web anymore. Webshots got sold and all of my pictures went away.
Freddie
Yes it does.
Use the upload attachment when posting. Choode file, then add file and last "place inline" where you want it to show up.
Use the upload attachment when posting. Choode file, then add file and last "place inline" where you want it to show up.
- Screenshot_2015-06-25-15-53-58.png (243.71 KiB) Viewed 2104 times
Pictures from my scrap collection:
http://forum.weldingtipsandtricks.com/v ... f=9&t=5677
http://forum.weldingtipsandtricks.com/v ... f=9&t=5677
GreinTime
- GreinTime
-
Weldmonger
-
Posts:
-
Joined:Fri Nov 01, 2013 11:20 am
-
Location:Pittsburgh, PA
I would start a new topic just to avoid clutter on this one amigo, not that everyone wouldn't appreciate checking out cool carsbig gear head wrote:Does this sight host pics? I don't have a picture account on the web anymore. Webshots got sold and all of my pictures went away.
#oneleggedproblems
-=Sam=-
-=Sam=-
- big gear head
-
Ace
-
Posts:
-
Joined:Thu May 07, 2015 11:46 am
-
Location:KY.
I'll only post pictures of some of the welds and fab work. I know that this isn't a car sight.
Freddie

- R0gueSp3ctre18
-
New Member

-
Posts:
-
Joined:Fri Jun 12, 2015 2:34 pm
-
Location:Roanoke Virginia
Zank, your work has been a huge inspiration for me. Sensational! Keep it up! Now if I can get my aluminum to look half as good as yours.zank wrote:
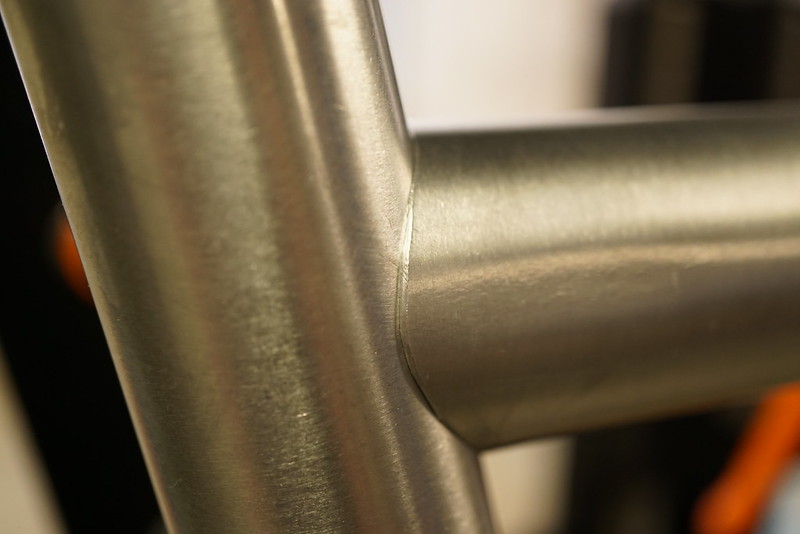
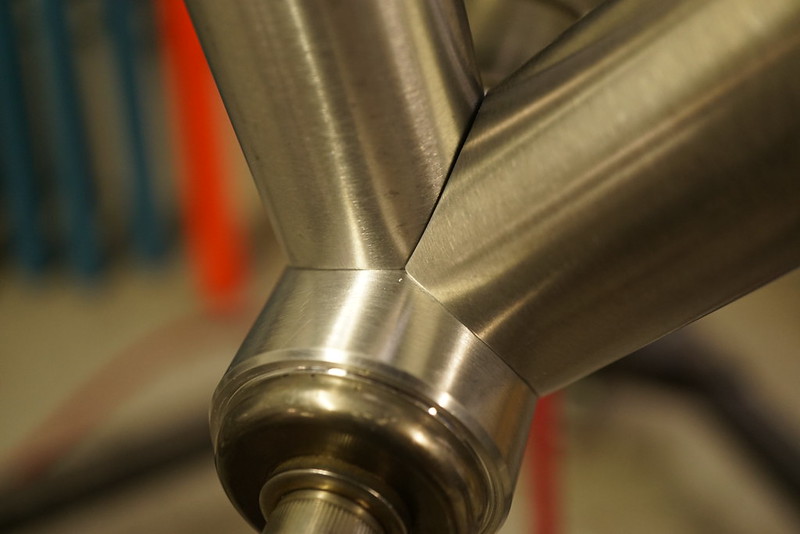
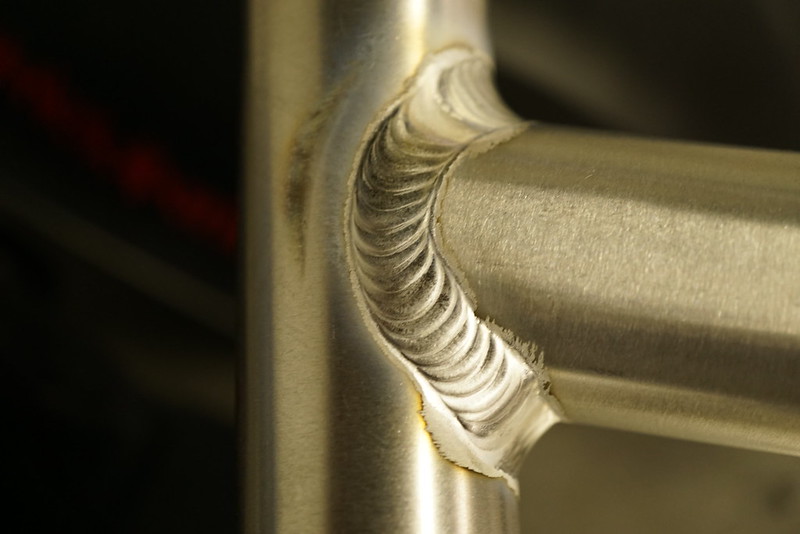
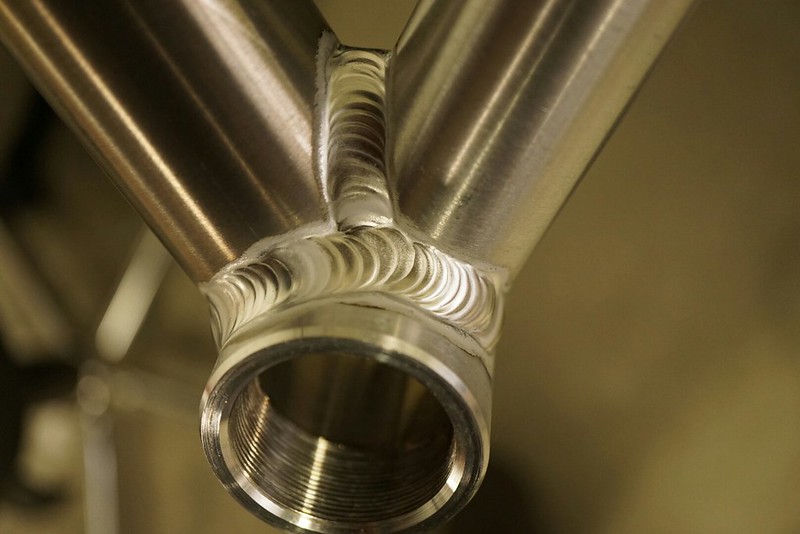
Tight makes right by Mike Zanconato, on Flickr
Tight makes right by Mike Zanconato, on Flickr
Tight makes right by Mike Zanconato, on Flickr
Tight makes right by Mike Zanconato, on Flickr
Tight makes right by Mike Zanconato, on Flickr

GreinTime
- GreinTime
-
Weldmonger
-
Posts:
-
Joined:Fri Nov 01, 2013 11:20 am
-
Location:Pittsburgh, PA
I wasn't trying to get you to not post, we just end up getting off topic a lotbig gear head wrote:I'll only post pictures of some of the welds and fab work. I know that this isn't a car sight.
#oneleggedproblems
-=Sam=-
-=Sam=-
- big gear head
-
Ace
-
Posts:
-
Joined:Thu May 07, 2015 11:46 am
-
Location:KY.
This is my Camaro. I couldn't find any close pics of the welds. I'll have to get some. I've got pictures of some other cars that I built for other people, but I'll save them for later.
- Attachments
-
- DSC01003.JPG (52.63 KiB) Viewed 2004 times
-
- 100_0658.jpg (67.75 KiB) Viewed 2004 times
-
- DSC01019.JPG (56.96 KiB) Viewed 2004 times
Freddie
- TRACKRANGER
-
Weldmonger
-
Posts:
-
Joined:Wed Aug 06, 2014 12:48 am
-
Location:Melbourne, Australia
Some very serious rubber on the back
EWM Phonenix 355 Pulse MIG set mainly for Aluminum, CIGWeld 300Amp AC/DC TIG, TRANSMIG S3C 300 Amp MIG, etc, etc
Return to “Tig Welding - Tig Welding Aluminum - Tig Welding Techniques - Aluminum Tig Welding”
Jump to
- Introductions & How to Use the Forum
- ↳ Welcome!
- ↳ Member Introductions
- ↳ How to Use the Forum
- ↳ Moderator Applications
- Welding Discussion
- ↳ Metal Cutting
- ↳ Tig Welding - Tig Welding Aluminum - Tig Welding Techniques - Aluminum Tig Welding
- ↳ Mig and Flux Core - gas metal arc welding & flux cored arc welding
- ↳ Stick Welding/Arc Welding - Shielded Metal Arc Welding
- ↳ Welding Forum General Shop Talk
- ↳ Welding Certification - Stick/Arc Welding, Tig Welding, Mig Welding Certification tests - Welding Tests of all kinds
- ↳ Welding Projects - Welding project Ideas - Welding project plans
- ↳ Product Reviews
- ↳ Fuel Gas Heating
- Welding Tips & Tricks
- ↳ Video Discussion
- ↳ Wish List
- Announcements & Feedback
- ↳ Forum News
- ↳ Suggestions, Feedback and Support
- Welding Marketplace
- ↳ Welding Jobs - Industrial Welding Jobs - Pipe Welding Jobs - Tig Welding Jobs
- ↳ Classifieds - Buy, Sell, Trade Used Welding Equipment
- Welding Resources
- ↳ Tradeshows, Seminars and Events
- ↳ The Welding Library
- ↳ Education Opportunities