Tig welding tips, questions, equipment, applications, instructions, techniques, tig welding machines, troubleshooting tig welding process
User avatar
  • Posts:
  • Joined:
    Sat Aug 01, 2015 8:38 am
  • Location:
    The Land Down Under

Image

Image

Image

A quick update on this conversation.

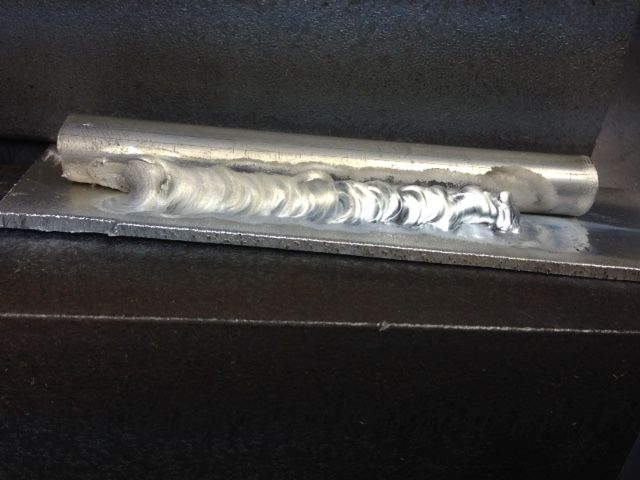
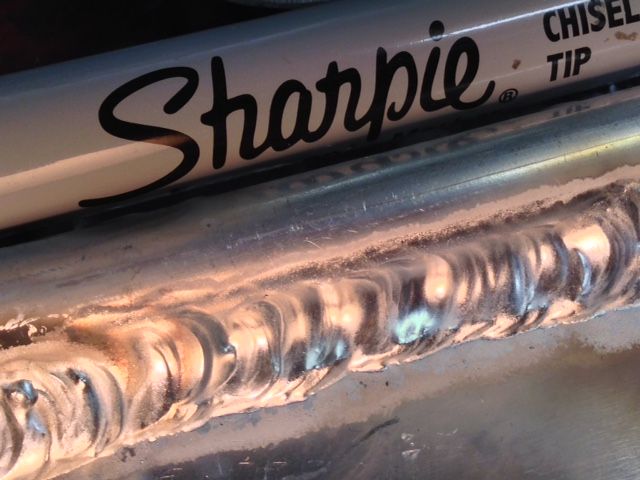
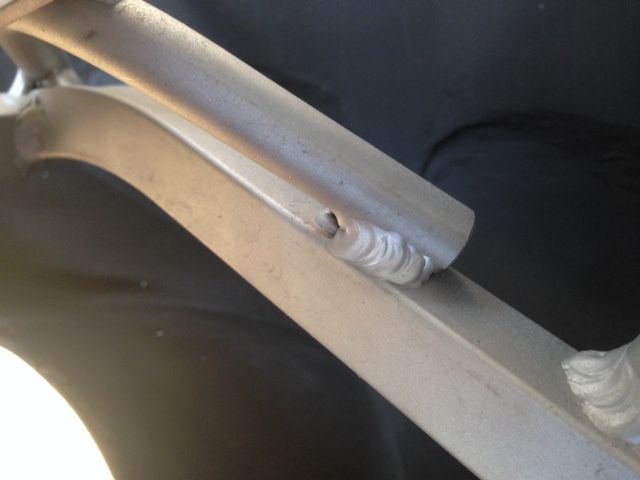
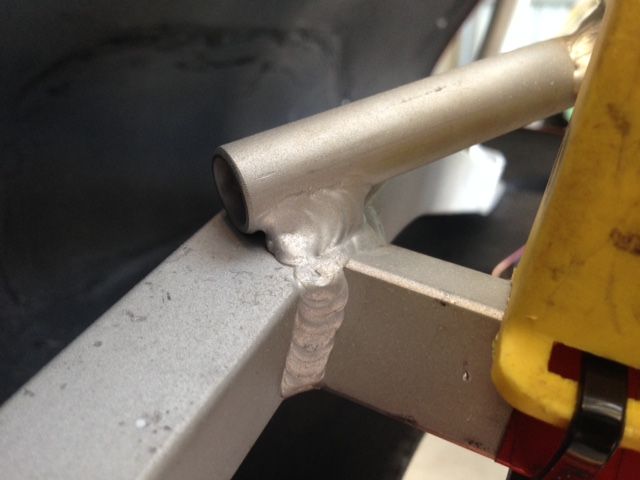
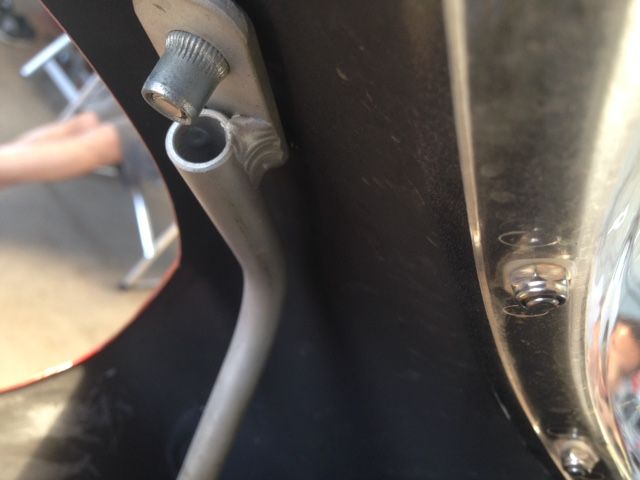
Was out at the race track yesterday helping out some friends and took some shots while there of these welds on a friend's (purchased) front subframe. The round tube you see is only a little bigger in OD than a pencil. I didn't have a vernier calipers, but I'd say it's 1mm wall thickness, max.

This thin, light tube is part of a front subframe that has held up to a lot of racing on one of Australia's roughest road circuits - Mallala Raceway.

It inspires me to see that this can be done. In my normal stubborn way, I shall take all of your tips on board and keep practising until I get this. These tubes are considerably lighter than what I've been attempting...I just need to step up and build my skills.


Kym
User avatar
  • Posts:
  • Joined:
    Sat Aug 01, 2015 8:38 am
  • Location:
    The Land Down Under

Image


Okay, for those who have long attention spans...

...a weekend at the track meant I saw some welded subframes for inspiration. I combined that with the tips some of you good people gave me and this is the result.

Now, I know very well that this looks like a disaster, but for me it is actually a step ahead for a couple of reasons. The tube in the pic is 12mm (about half inch, as thick as a pencil) OD and 1.5mm wall thickness. I know it's an ugly, ugly disaster of a weld, but it' s a start, a huge confidence booster and I'm confident that with more practise I'll nail it.

Stuff I've learned:

* Welding a bead on the plate first, snugging the tube up to it and then making a start welding them together? That is a GOLD tip!

* Control the heat at the puddle - often using rod dips.

* Once one side is welded, the tube is bonded to the plate, acts as a heat sink, and the other side is much easier.

Like I said, looks like a disaster, but I'm smiling. I'm on my way.


Kym
OzFlo
  • Posts:
  • Joined:
    Sat Sep 26, 2015 10:16 pm
  • Location:
    Sydney, Australia

Hey good job Kym!
User avatar
  • Posts:
  • Joined:
    Sat Aug 01, 2015 8:38 am
  • Location:
    The Land Down Under

OzFlo wrote:Hey good job Kym!
Thanks Oz...you are being very kind!

I went out a moment ago and cut the weld in half. Of course there was some 'bridging' here and there, so that's an area I will need to work on...I want a solid weld, obviously. But like so many things in TIG world, that will just mean more practise and some head scratching. A couple more weeks and I think I will be confident enough to try building the actual part (front subframe for race bike).


Kym
Bill Beauregard
  • Posts:
  • Joined:
    Thu Jan 24, 2013 9:32 pm
  • Location:
    Green Mountains of Vermont

I think you need pulse, either machine generated, or foot pedal. I've had best luck with two pieces of rod laid parallel to the tube. Tack in place, then weld the rod to the tube. Before it completely cools, weld the rod to the plate. It requires some preheat on the thicker plate, then weld fast, before the thin stuff saturates with heat.

I had to use tube thick enough to ream with a high speed drill bit to fix warping.
User avatar
  • Posts:
  • Joined:
    Sat Aug 01, 2015 8:38 am
  • Location:
    The Land Down Under

Bill Beauregard wrote:I think you need pulse, either machine generated, or foot pedal. I've had best luck with two pieces of rod laid parallel to the tube. Tack in place, then weld the rod to the tube. Before it completely cools, weld the rod to the plate. It requires some preheat on the thicker plate, then weld fast, before the thin stuff saturates with heat.

I had to use tube thick enough to ream with a high speed drill bit to fix warping.
By 'rod' you mean filler rod, right Bill? I wrote exactly the same thing in my welding notes tonight after cutting the weld in halves and noticing bridging! Will give it a try soon...thanks for your thoughts.


Kym
  • Posts:
  • Joined:
    Thu May 07, 2015 11:46 am
  • Location:
    KY.

Kym, that's not bad. The picture makes it look larger than it actually is, so it's easy to think that it's worse than it is. You are doing several difficult things at the same time here. You are welding close to the edge, which makes it harder to control the heat. You are also welding 2 different shapes and different thicknesses, so it's going to be hard to do it well. I'd have a hard time making that look good. Keep it up. You are not as bad as you think you are.

I agree that pulse might help. Give it a try.
Freddie
User avatar
  • Posts:
  • Joined:
    Sat Mar 30, 2013 11:49 am
  • Location:
    Sweden

I agree, its a very good start.
Little hotter in the beginning so filler flows better. Back off current a bit in the middle to end and it will be shiny there too.
User avatar
  • Posts:
  • Joined:
    Sat Aug 01, 2015 8:38 am
  • Location:
    The Land Down Under

AndersK wrote:I agree, its a very good start.
Little hotter in the beginning so filler flows better. Back off current a bit in the middle to end and it will be shiny there too.

Thanks guys. Anders, I agree that 'hotter, sooner' would improve things. I need to learn finer control of the foot pedal so that I can start hot but back off enough later to control things.

Part of the reason the weld is dull half way along is that I contaminate the tungsten. The arc went to hell, but nothing was going to stop me from completing this weld! In fact my glove was literally smoking as I finished.

Really appreciate your input, guys.


Kym
dunkster
  • Posts:
  • Joined:
    Sun Jun 28, 2015 7:41 pm
  • Location:
    Florida

Hey Kym, if parameters allow for it, you can play with design a bit for a simpler joint.
Here's a couple of my approaches...fwiw:
Attachments
Copy (2) of IMG_0305[1].jpg
Copy (2) of IMG_0305[1].jpg (27.05 KiB) Viewed 1076 times
stay installed 8.jpg
stay installed 8.jpg (64.6 KiB) Viewed 1076 times
ex framie
  • Posts:
  • Joined:
    Sun Aug 09, 2015 1:09 am
  • Location:
    Brisbane QLD Land of oz

Careful Dunk,
You'll turn him into a "fabricator" which means he'll need a bigger shed and more toy's er tools. He's crying poor as it is :D

Nice work on those brackets. Another way to skin a cat.
Pete

God gave man 2 heads and only enough blood to run 1 at a time. Who said God didn't have a sense of humour.....
Bill Beauregard
  • Posts:
  • Joined:
    Thu Jan 24, 2013 9:32 pm
  • Location:
    Green Mountains of Vermont

MosquitoMoto wrote:
Bill Beauregard wrote:I think you need pulse, either machine generated, or foot pedal. I've had best luck with two pieces of rod laid parallel to the tube. Tack in place, then weld the rod to the tube. Before it completely cools, weld the rod to the plate. It requires some preheat on the thicker plate, then weld fast, before the thin stuff saturates with heat.

I had to use tube thick enough to ream with a high speed drill bit to fix warping.
By 'rod' you mean filler rod, right Bill? I wrote exactly the same thing in my welding notes tonight after cutting the weld in halves and noticing bridging! Will give it a try soon...thanks for your thoughts.


Kym
It could be filler, if diameter is large enough. I find the deep gap leaves a valley too deep to reliably fill without overheating the tube. placing a piece of rod in the valley allows me to make two smaller welds without deforming the tube excessively.
dunkster
  • Posts:
  • Joined:
    Sun Jun 28, 2015 7:41 pm
  • Location:
    Florida

ex framie wrote:Careful Dunk,
You'll turn him into a "fabricator" which means he'll need a bigger shed and more toy's er tools. He's crying poor as it is :D

Nice work on those brackets. Another way to skin a cat.
Thanks for the props Pete.

Yeah, just trying to get someone else to experience my pain....muahahhahahaha! :twisted:

- Rusty
User avatar
  • Posts:
  • Joined:
    Sat Aug 01, 2015 8:38 am
  • Location:
    The Land Down Under

Nice work there Dunk - and I can see a couple areas where you have cleverly made things a bit easier for yourself.

Some nice machining and some sweet welding, too! Funny what the necessities of bike racing force us to do, isn't it?

I will persist and hopefully be able to post up some welds that actually look like welds sooner or later. I particularly like Bill's tip on using some rod to help with the joint.

I'll keep you all posted.


Kym
User avatar
  • Posts:
  • Joined:
    Sat Aug 01, 2015 8:38 am
  • Location:
    The Land Down Under

Image

My latest progress.

As you can see by the Sharpie for comparison, this isn't a thick piece of tube I'm welding to the plate.

Weld still not great, but each one I do is just a little better than the last. At the moment the technique that seems to work best is to initially lay down a bead on the plate, then snug the tube up against it, light up on the bead and join the plate to the tube 'via' the bead.

Concentrating now on just making the weld smaller and neater with good penetration.


Kym
  • Posts:
  • Joined:
    Thu May 07, 2015 11:46 am
  • Location:
    KY.

Getting much better.
Freddie
Post Reply