ignatz200 wrote:I'm in agreement with Garry on the low amps. Over here on my side of the pond the rule is 25 amps for every millimeter of thickness for ordinary steel. That would make a minimum setting of 75 amps for the three mm of your thinnest plate.
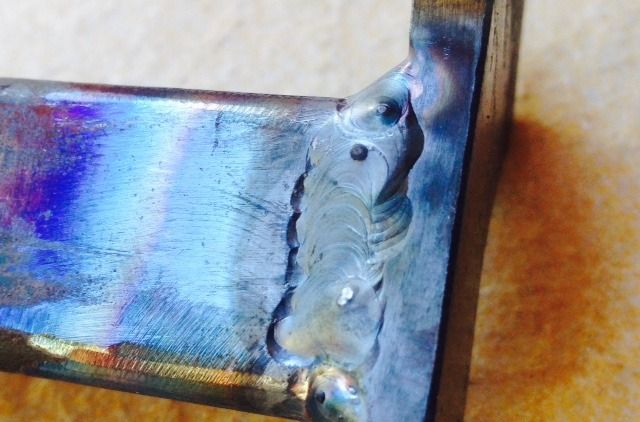
Of course, if you can handle it, upping the amps slightly will allow one (if practiced) to move the puddle along slightly faster with a slightly smaller heat affected zone (HAZ). From your photo it looks like the HAZ has spread out pretty far away from the weld area.
And then, of course, you are joining 3 mm steel to 5 mm steel, so, yeah, I'm pretty much with Garry on his idea of starting out somewhere between 80 and 120 amps.
This is interesting.
After starting my Tig experience definitely moving too slow and at amps too low, lately I've been ramping up, with the thought being that skilled Tig welders (not me yet!) often use high amps to get a puddle going fast, move faster, put less heat into the work.
I started out at 90 amps on this piece and it was way too much - from puddle to melt through in no time, even lighting up on the thick plate. I backed off in 5 amp increments and wound up at 60 amps. Still get a puddle very quickly and can move out nicely, but these are short welds (1 inch long) and I can't go much hotter or I am in trouble. My skills are still very limited.
But that said, I often see amps on videos/web from the U.S that seem very high to me. Most recent one that sticks out to me is Jody welding an outside corner joint on 1mm aluminium at 83 amps. I'd never (again, I have no skills...) be able to weld that piece on any more than 50 amps.
How great a variation is there between machines? Is one machine's '50 amps' often a long way from another's '50 amps?'
Kym