Tig welding tips, questions, equipment, applications, instructions, techniques, tig welding machines, troubleshooting tig welding process
exnailpounder
- exnailpounder
-
Weldmonger

-
Posts:
-
Joined:Thu Dec 25, 2014 9:25 am
-
Location:near Chicago
Speed tack...set up your machine to amps that would normally blow holes in your metal and just stomp the pedal for a split second and she'll tack up. Takes a little practice but its really easy. Jody has a vid about it.
Ifyoucantellmewhatthissaysiwillbuyyouabeer.


That would be ideal but the place where I've failed their test on two separate occasions uses scratch start. Their shop foreman autotogenously gacked my t-joint for me the first time because I just couldn't do it without blowing through. The second time that I tested for them (last Thursday) I just used filler wire.
Raymond
Everlast PowerTIG 255EXT
Everlast PowerTIG 255EXT

- LtBadd
-
Weldmonger
-
Posts:
-
Joined:Sun Apr 12, 2015 4:00 pm
-
Location:Clearwater FL
-
Contact:
On stainless, to do a tack without filler there cannot be any gap, material must be clean and a sharp tungsten. In and out quickRamboBaby wrote:Now how in the heck do I do autogenous tacks? I just can't seem to do it without burning through and those big globby filler tacks look like total crapola!
Richard
Website
Website
HELacey
- HELacey
-
New Member

-
Posts:
-
Joined:Mon Jun 27, 2016 10:40 pm
-
Location:North Carolina, by God!
RamboBaby wrote:Brother!,
I owe you a few pitchers of beer at least!
I started out with my same old BS and then asked myself, "Self, what in the hell are you doing?".
Then I straightened up and just look what happened!
Much better man, I still think your heat may be a little too much. I know you said that's as fast as you can move, so maybe turn the heat down 5 amps or so. As long as that puddle stays fluid you're in good shape!
Cold beer and cash money!
- Skylineauto
-
Workhorse

-
Posts:
-
Joined:Mon Aug 10, 2015 9:45 am
I find having an extremely tight arc helps me every time to get the tack to take along with all that you just mentioned.LtBadd wrote:On stainless, to do a tack without filler there cannot be any gap, material must be clean and a sharp tungsten. In and out quickRamboBaby wrote:Now how in the heck do I do autogenous tacks? I just can't seem to do it without burning through and those big globby filler tacks look like total crapola!
Looking better, for the tacks on the pieces I fuse at the very ends first, then a small tack with filler to the center, this keeps the 1g from pulling away and opening up.
Speed tacking is a good thing to learn, or if you have issue try heating the material/joint with the torch for a few seconds at say half pedal, then stab the pedal to get it to melt/fuse together. The key with thing stainless is, tight joints, clamp or do what ever is needed or the end will peel away. It tight spots I've lit up on the filler rod, then moved over to the material.
Stops and Starts, this will just take hood time..Start about 1/2" back from the end, it will help hide the joint and ensure proper fusion across the joint.
Time to burn some more filler and argon, Stainless especially thin stainless will make even the most skilled welder humble every once in awhile
I weld stainless, stainless and more stainless...Food Industry, sanitary process piping, vessels, whatever is needed, I like to make stuff.
ASME IX, AWS 17.1, D1.1
Instagram #RNHFAB
ASME IX, AWS 17.1, D1.1
Instagram #RNHFAB
exnailpounder
- exnailpounder
-
Weldmonger
-
Posts:
-
Joined:Thu Dec 25, 2014 9:25 am
-
Location:near Chicago
I just got my ass kicked by a 2" fitting on a keg today. Had it all tacked and started taking pics, planned on using pulse and was going to post some pics and after I started I felt like I had never welded in my life. Came out terrible. I am going to wash over my goose shit weld and clean it up but its just funny how you mentioned getting humbled and it was my day in the barrel today. I actually cut up some coupons and welded them up to make sure I didn't come down with Cerebral Palsey it was so bad.Rick_H wrote:Looking better, for the tacks on the pieces I fuse at the very ends first, then a small tack with filler to the center, this keeps the 1g from pulling away and opening up.
Speed tacking is a good thing to learn, or if you have issue try heating the material/joint with the torch for a few seconds at say half pedal, then stab the pedal to get it to melt/fuse together. The key with thing stainless is, tight joints, clamp or do what ever is needed or the end will peel away. It tight spots I've lit up on the filler rod, then moved over to the material.
Stops and Starts, this will just take hood time..Start about 1/2" back from the end, it will help hide the joint and ensure proper fusion across the joint.
Time to burn some more filler and argon, Stainless especially thin stainless will make even the most skilled welder humble every once in awhile
Ifyoucantellmewhatthissaysiwillbuyyouabeer.
That's exactly what happened to me on that welding test. My weld looked like it had been done by a beginner with Parkinson's Disease.exnailpounder wrote: I just got my ass kicked by a 2" fitting on a keg today. Had it all tacked and started taking pics, planned on using pulse and was going to post some pics and after I started I felt like I had never welded in my life. Came out terrible. I am going to wash over my goose shit weld and clean it up but its just funny how you mentioned getting humbled and it was my day in the barrel today. I actually cut up some coupons and welded them up to make sure I didn't come down with Cerebral Palsey it was so bad.
Went out there to weld up a piece this morning. Last night's victory was short lived.
Raymond
Everlast PowerTIG 255EXT
Everlast PowerTIG 255EXT
exnailpounder
- exnailpounder
-
Weldmonger
-
Posts:
-
Joined:Thu Dec 25, 2014 9:25 am
-
Location:near Chicago
I feel your pain man. My coupon welds came out fantastic and I had an emergency job come in for my wifes office and I tig welded it to make sure I didn't have a brain tumor and it all came out fine but that damned keg whooped my ass. I am licking my wounds with a 12 pack right now so I bet that weld will look better in a couple hoursRamboBaby wrote:That's exactly what happened to me on that welding test. My weld looked like it had been done by a beginner with Parkinson's Disease.exnailpounder wrote: I just got my ass kicked by a 2" fitting on a keg today. Had it all tacked and started taking pics, planned on using pulse and was going to post some pics and after I started I felt like I had never welded in my life. Came out terrible. I am going to wash over my goose shit weld and clean it up but its just funny how you mentioned getting humbled and it was my day in the barrel today. I actually cut up some coupons and welded them up to make sure I didn't come down with Cerebral Palsey it was so bad.
Went out there to weld up a piece this morning. Last night's victory was short lived.
Ifyoucantellmewhatthissaysiwillbuyyouabeer.

- Otto Nobedder
-
Weldmonger
-
Posts:
-
Joined:Thu Jan 06, 2011 11:40 pm
-
Location:Near New Orleans
exnailpounder wrote:...it was my day in the barrel today...
I know the joke that's the punchline to, and that is a very bad day!
LMAO!
Steve S
I can't figure out why that stainless is so hard for me to learn. I just ran 9" of weld and 9" of silicon bronze on 14 gauge and only had one little hiccup because I didn't have enough heat when I went to the braze. Started welding at 90 amps but that was just a bit cold due to the backer bar so I settled in @ 95 amps where everything went just fine. Started brazing @ 65 amps but that was really cold so I went up to 75 amps, which was still a bit cold (still a bit like puddy) but it was working so I kept going to keep from having another visual tie in. Still wound up having to tie in because my wrist was getting too far out of position. But with the stainless it's as if I just get lucky on occasion. You can see the hiccup right where the braze ties into the weld.
Sometimes this stuff makes me feel like Smith is whispering in my ear, "Why Mr. Anderson? Why do you persist?". Well, I'm outta stainless so this is where it ends.
It just doesn't seem right that it can be this hard to learn.
This can be a real drain on your confidence.
Sometimes this stuff makes me feel like Smith is whispering in my ear, "Why Mr. Anderson? Why do you persist?". Well, I'm outta stainless so this is where it ends.
It just doesn't seem right that it can be this hard to learn.
This can be a real drain on your confidence.
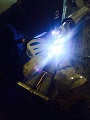
- Attachments
-
- tmp_11937-20160725_190853605109235.jpg (54.25 KiB) Viewed 863 times
-
- tmp_11937-20160725_1909581680690721.jpg (36.37 KiB) Viewed 863 times
Raymond
Everlast PowerTIG 255EXT
Everlast PowerTIG 255EXT
exnailpounder
- exnailpounder
-
Weldmonger
-
Posts:
-
Joined:Thu Dec 25, 2014 9:25 am
-
Location:near Chicago
Thats a good joke isn't it?Otto Nobedder wrote:exnailpounder wrote:...it was my day in the barrel today...
I know the joke that's the punchline to, and that is a very bad day!
LMAO!
Steve S
Ifyoucantellmewhatthissaysiwillbuyyouabeer.
Ill admit I googled it...quite funnyexnailpounder wrote:Thats a good joke isn't it?Otto Nobedder wrote:exnailpounder wrote:...it was my day in the barrel today...
I know the joke that's the punchline to, and that is a very bad day!
LMAO!
Steve S
I weld stainless, stainless and more stainless...Food Industry, sanitary process piping, vessels, whatever is needed, I like to make stuff.
ASME IX, AWS 17.1, D1.1
Instagram #RNHFAB
ASME IX, AWS 17.1, D1.1
Instagram #RNHFAB
exnailpounder
- exnailpounder
-
Weldmonger
-
Posts:
-
Joined:Thu Dec 25, 2014 9:25 am
-
Location:near Chicago
I used to weld for a guy who was in the Navy on a sub and he told me that joke and I still remember his goofy laugh as he told the joke.
Ifyoucantellmewhatthissaysiwillbuyyouabeer.
GreinTime
- GreinTime
-
Weldmonger
-
Posts:
-
Joined:Fri Nov 01, 2013 11:20 am
-
Location:Pittsburgh, PA

Rambo, this is on 3x1x0.125 polished tubing (which makes it a real bitch at first because you see the weld happening in the reflection off both pieces at the same time lol) Total time: Roughly 20 seconds, dragging the cup along the bottom piece (whole piece gets refinished after we weld it) resolution is dog shit because I've dropped my phone so many times, and it doesn't focus, but color was rose the whole length. Some of my other welds on the piece are gold/silver/blue/purple/green depending on how fast I was humping along. Ripples were created using filler rod only, movement speed was kept relatively steady.
What I think will help you most is figuring out how to just slide your hand along and keep the torch in a "static" position, only making minor adjustments with your wrist/fingers. Only reason I mention that is you stating that you had to tie in due to your wrist being out of position.
Also of note, I don't know if you've ever tried swiping the rod through the gap between your tungsten and the work piece to establish an arc, but it negates the "scratch" from scratch start if you have the gap small enough that the arc can jump the gap. Once established, you can wash a little bit to create the autogenous tacks, and then just roll your wrist out to break the arc, rather than violently lift your hand away.
Keep up the good work, you're definitely improving!
Sent from my SM-G900V using Tapatalk
#oneleggedproblems
-=Sam=-
-=Sam=-
I thought about it for a little bit and now realize why the stuff is so much harder to learn how to weld:
I can't just sit there and run practice beads over and over like I did with aluminum. This thin stuff is pretty much a one shot deal, then it's on to the next piece. It's easier to overheat than just about anything else as well.
I can't just sit there and run practice beads over and over like I did with aluminum. This thin stuff is pretty much a one shot deal, then it's on to the next piece. It's easier to overheat than just about anything else as well.
Yep, I've tried it many times but my machine isn't capable of initiating the arc that way. It's supposed to have lift tig capability but that feature absolutely does not work. If I set it to lift tig then it will scratch start about 20% - 30% of the time but mostly the electrode just gets stuck. Last time I took the test scratch starting was not an issue.GreinTime wrote:Also of note, I don't know if you've ever tried swiping the rod through the gap between your tungsten and the work piece to establish an arc, but it negates the "scratch" from scratch start if you have the gap small enough that the arc can jump the gap.
Raymond
Everlast PowerTIG 255EXT
Everlast PowerTIG 255EXT
rambo
i don't use scratch or lift start but
just a thought, can you light up
on copper strip and move to the stainless.
craig
i don't use scratch or lift start but
just a thought, can you light up
on copper strip and move to the stainless.
craig
htp invertig 221
syncrowave 250
miller 140 mig
hypertherm plasma
morse 14 metal devil
syncrowave 250
miller 140 mig
hypertherm plasma
morse 14 metal devil
The lift TIG on some of the Everlast machines works more like a roll TIG. If you just try and touch the tungsten to the work it will stick. Try resting the cup at and angle on your work, roll your wrist /torch so the torch contacts the workpiece and lights up and immediately roll back and start welding. Here is a video illustrating this. https://youtu.be/kUX1zfT04eA
Sent from my VK815 using Tapatalk
Sent from my VK815 using Tapatalk
Return to “Tig Welding - Tig Welding Aluminum - Tig Welding Techniques - Aluminum Tig Welding”
Jump to
- Introductions & How to Use the Forum
- ↳ Welcome!
- ↳ Member Introductions
- ↳ How to Use the Forum
- ↳ Moderator Applications
- Welding Discussion
- ↳ Metal Cutting
- ↳ Tig Welding - Tig Welding Aluminum - Tig Welding Techniques - Aluminum Tig Welding
- ↳ Mig and Flux Core - gas metal arc welding & flux cored arc welding
- ↳ Stick Welding/Arc Welding - Shielded Metal Arc Welding
- ↳ Welding Forum General Shop Talk
- ↳ Welding Certification - Stick/Arc Welding, Tig Welding, Mig Welding Certification tests - Welding Tests of all kinds
- ↳ Welding Projects - Welding project Ideas - Welding project plans
- ↳ Product Reviews
- ↳ Fuel Gas Heating
- Welding Tips & Tricks
- ↳ Video Discussion
- ↳ Wish List
- Announcements & Feedback
- ↳ Forum News
- ↳ Suggestions, Feedback and Support
- Welding Marketplace
- ↳ Welding Jobs - Industrial Welding Jobs - Pipe Welding Jobs - Tig Welding Jobs
- ↳ Classifieds - Buy, Sell, Trade Used Welding Equipment
- Welding Resources
- ↳ Tradeshows, Seminars and Events
- ↳ The Welding Library
- ↳ Education Opportunities