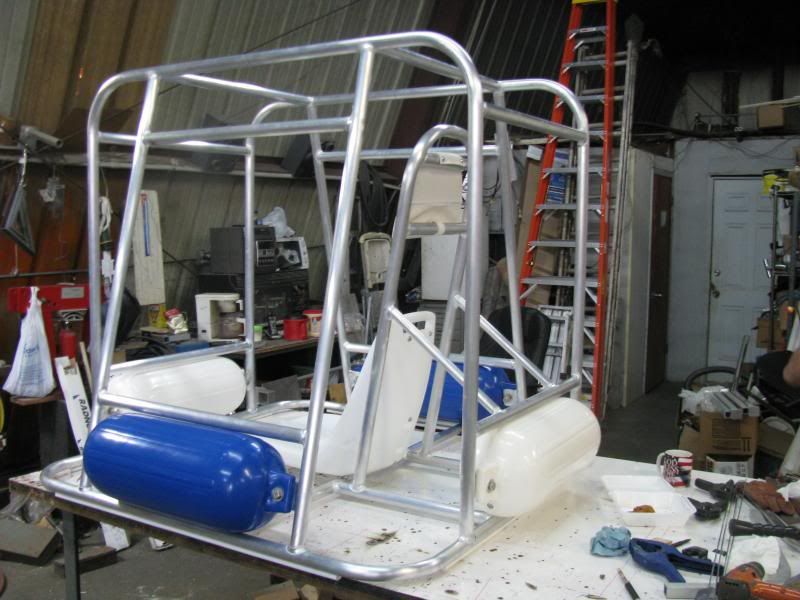
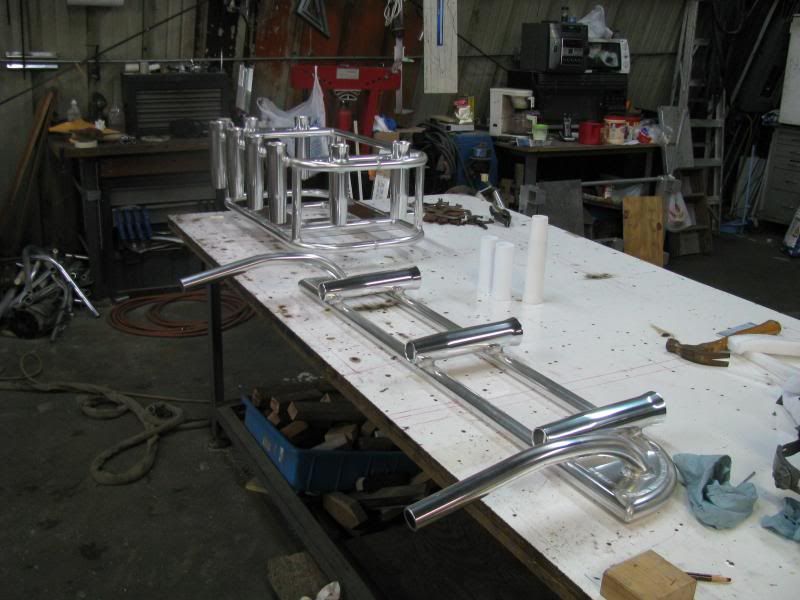
Sure looks good to me. I know what a pain in the ass welding anodized is. Great job!Warrenh wrote:
These are some anodized legs for cable rails. They fit on the outside of stairs on a deck overlooking the beach. 1/8th stainless cable ran horizontally is used for pickets (for lack of a better term). Any suggestions for improving the weld appearance is apreciated.
Practice does not make perfect, perfect practice makes perfect.
Sent from my SCH-I545 using Tapatalk
Tig welding tips, questions, equipment, applications, instructions, techniques, tig welding machines, troubleshooting tig welding process
exnailpounder
- exnailpounder
-
Weldmonger

-
Posts:
-
Joined:Thu Dec 25, 2014 9:25 am
-
Location:near Chicago
Ifyoucantellmewhatthissaysiwillbuyyouabeer.
Thanks.exnailpounder wrote:Sure looks good to me. I know what a pain in the ass welding anodized is. Great job!Warrenh wrote:
These are some anodized legs for cable rails. They fit on the outside of stairs on a deck overlooking the beach. 1/8th stainless cable ran horizontally is used for pickets (for lack of a better term). Any suggestions for improving the weld appearance is apreciated.
Practice does not make perfect, perfect practice makes perfect.
Sent from my SCH-I545 using Tapatalk
Sent from my SCH-I545 using Tapatalk
- Mattwho777
-
Active Member

-
Posts:
-
Joined:Wed Apr 19, 2017 6:38 pm
-
Location:Texas
BBQ build from old propane tank.
30" O.D.
Work in progress. Used Mig,Tig,and Stick
Using Everlasting 164SI & Lincoln 140


Sent from my MotoG3 using Tapatalk
30" O.D.
Work in progress. Used Mig,Tig,and Stick
Using Everlasting 164SI & Lincoln 140


Sent from my MotoG3 using Tapatalk
- Otto Nobedder
-
Weldmonger

-
Posts:
-
Joined:Thu Jan 06, 2011 11:40 pm
-
Location:Near New Orleans
Here's what I welded today. This is the third of four identical welds. The pipe was worn halfway through from rattling in loose mounts for years, so I cut 3 1/4" off each end, and replaced the 3003 with 5052. It will get new Stauff clamps, and be secure and tight for many years.
- PBU.jpg (31.86 KiB) Viewed 2522 times
- IMG_2127.JPG (47.05 KiB) Viewed 2407 times
Intake reducer .082 aluminum
Not sure what grade he ordered parts from China and it he couldn't get a reply. Welded it with 4043
- Attachments
-
- IMG_2125.JPG (38.04 KiB) Viewed 2407 times
I have more questions than answers
Josh
Josh
This is a 40 year old 2inch steam line that runs about 200 psi steam. It got a pin hole eroded in the side. But they need to run stem for a week or two yet. So patched over it till they shut it down for the summer then I'll cut out the tee. Going to replace it with a proper 90 and demo out a bunch of unused main line.
Not real pretty but it was wedged in a rack up about 30 ft in a ceiling. As soon as I lit up on it the hole opened up enough I could have thrown a quarter through it. Standard steam erosion from being a tight radius turn.
Not real pretty but it was wedged in a rack up about 30 ft in a ceiling. As soon as I lit up on it the hole opened up enough I could have thrown a quarter through it. Standard steam erosion from being a tight radius turn.
- Attachments
-
- IMG_2140.JPG (45.18 KiB) Viewed 2407 times
-
- IMG_2137.JPG (32.35 KiB) Viewed 2407 times
-
- IMG_2135.JPG (48.13 KiB) Viewed 2407 times
I have more questions than answers
Josh
Josh
- LtBadd
-
Weldmonger

-
Posts:
-
Joined:Sun Apr 12, 2015 4:00 pm
-
Location:Clearwater FL
-
Contact:
Well done, you were lucky enough to be able to patch it up given the condition of the materialPoland308 wrote:This is a 40 year old 2inch steam line that runs about 200 psi steam. It got a pin hole eroded in the side. But they need to run stem for a week or two yet. So patched over it till they shut it down for the summer then I'll cut out the tee. Going to replace it with a proper 90 and demo out a bunch of unused main line.
Not real pretty but it was wedged in a rack up about 30 ft in a ceiling. As soon as I lit up on it the hole opened up enough I could have thrown a quarter through it. Standard steam erosion from being a tight radius turn.
Richard
Website
Website
Hi mate, just came in to ask, if it is not hard, can you show us the accessories and tricks you use to get all those tubes straight and lined up, before you apply your 50$ welds on `em?5th Street Fab wrote:Stuff from this week
Made me an adjustable rest to prop my hands on when tig welding. It quickly attaches or detaches from my bench and so far I'm very happy with it. Made entirely from stuff out of my scrap bin except the bolt and nut. I would apologize about the mess, but just like desks a clean workbench is a sign of a sick mind 
Really I just haven't taken the time to cleanup yet in this shot. Not a particularly difficult or original idea but it definitely makes my work easier.
Cheers
-EB
Really I just haven't taken the time to cleanup yet in this shot. Not a particularly difficult or original idea but it definitely makes my work easier.
Cheers
-EB
- Attachments
-
- IMG_0160.JPG (68.61 KiB) Viewed 2497 times
We are not lawyers nor physicians, but welders do it in all positions!
Miller Dynasty 280DX
Lincoln 210 MP
Miller 625 X-Treme
Hobart Handler 150
Victor Oxygen-acetylene torch
Miller/Lincoln Big 40-SA200 hybrid
Miller Dynasty 280DX
Lincoln 210 MP
Miller 625 X-Treme
Hobart Handler 150
Victor Oxygen-acetylene torch
Miller/Lincoln Big 40-SA200 hybrid
- 5th Street Fab
-
Guide

-
Posts:
-
Joined:Sun Jan 15, 2017 1:08 am
Sure everything here is tacked together with a spool gun or pulsed mig. To keep all the pipes aligned I'll use a straight piece of c channel that I notch for all the perpendicular pipes to pass through.that way you know they're in line. Once everything is tacked strong I'll cut spacers to fit in between each pipe. Then I'll clamp everything down to the table with big pipe clamps and weld it all out in position.cherwolf wrote:Hi mate, just came in to ask, if it is not hard, can you show us the accessories and tricks you use to get all those tubes straight and lined up, before you apply your 50$ welds on `em?5th Street Fab wrote:Stuff from this week
Basically it comes down to securing it down and sequencing your welds so the shrinkage will oppose each other. Then let it cool before unclamping it.
Sent from my SM-G920V using Tapatalk
Farmwelding
- Farmwelding
-
Weldmonger

-
Posts:
-
Joined:Thu Mar 10, 2016 11:37 pm
-
Location:Wisconsin
Sorry Josh but your tractor plans just got stolen. I've seen very tough designs to make and this looks fairly simple so when I get around to it-I'll make it.
A student now but really want to weld everyday. Want to learn everything about everything. Want to become a knower of all and master of none.
Instagram: @farmwelding
Nick
Instagram: @farmwelding
Nick
Farmwelding
- Farmwelding
-
Weldmonger

-
Posts:
-
Joined:Thu Mar 10, 2016 11:37 pm
-
Location:Wisconsin
I'm just gonna assume you live or used to live in a farm. Whereabouts at in Iowa?Poland308 wrote:It's got more detail. It's a work in progress.
A student now but really want to weld everyday. Want to learn everything about everything. Want to become a knower of all and master of none.
Instagram: @farmwelding
Nick
Instagram: @farmwelding
Nick
- Bisdremis K.
-
New Member

-
Posts:
-
Joined:Mon May 01, 2017 1:48 am
-
Location:Thessaloniki Greece
This is for HELO DUNKER school , this is for the first stage of the water training .this picture brought me memoriesTamJeff wrote:A helicopter water rescue trainer for the local PD.
Some other odds and ends.
failure is a great teacher
I've had to do that here in a pinch to keep running or order materials. I blew through at 30 amps! Luckily I was able to make a patch and find some better material, but had to work fast and be ready to feed the filler.Poland308 wrote:Yeah I was worried about not being enough metal left to work with. But they said try so I tried.
Nice work, I know how frustrating that can be, especially in the ceiling!
I weld stainless, stainless and more stainless...Food Industry, sanitary process piping, vessels, whatever is needed, I like to make stuff.
ASME IX, AWS 17.1, D1.1
Instagram #RNHFAB
ASME IX, AWS 17.1, D1.1
Instagram #RNHFAB
@GreinTime Looking good Sam, lots of progress from the beginning!! Nice work! How's your dad, don't see him post much?
I weld stainless, stainless and more stainless...Food Industry, sanitary process piping, vessels, whatever is needed, I like to make stuff.
ASME IX, AWS 17.1, D1.1
Instagram #RNHFAB
ASME IX, AWS 17.1, D1.1
Instagram #RNHFAB
GreinTime
- GreinTime
-
Weldmonger

-
Posts:
-
Joined:Fri Nov 01, 2013 11:20 am
-
Location:Pittsburgh, PA
He's good, just busy with work. And thanks man!Rick_H wrote:@GreinTime Looking good Sam, lots of progress from the beginning!! Nice work! How's your dad, don't see him post much?
Sent from my VS995 using Tapatalk
#oneleggedproblems
-=Sam=-
-=Sam=-
- Bisdremis K.
-
New Member

-
Posts:
-
Joined:Mon May 01, 2017 1:48 am
-
Location:Thessaloniki Greece
- DSC04119.JPG (23.29 KiB) Viewed 2382 times
failure is a great teacher
Hi, Bisdremis. Welcome to the forum. Your welds looks like theyre coming along nicely. Keep practicing.
Cheers
-E
Cheers
-E
We are not lawyers nor physicians, but welders do it in all positions!
Miller Dynasty 280DX
Lincoln 210 MP
Miller 625 X-Treme
Hobart Handler 150
Victor Oxygen-acetylene torch
Miller/Lincoln Big 40-SA200 hybrid
Miller Dynasty 280DX
Lincoln 210 MP
Miller 625 X-Treme
Hobart Handler 150
Victor Oxygen-acetylene torch
Miller/Lincoln Big 40-SA200 hybrid
Return to “Tig Welding - Tig Welding Aluminum - Tig Welding Techniques - Aluminum Tig Welding”
Jump to
- Introductions & How to Use the Forum
- ↳ Welcome!
- ↳ Member Introductions
- ↳ How to Use the Forum
- ↳ Moderator Applications
- Welding Discussion
- ↳ Metal Cutting
- ↳ Tig Welding - Tig Welding Aluminum - Tig Welding Techniques - Aluminum Tig Welding
- ↳ Mig and Flux Core - gas metal arc welding & flux cored arc welding
- ↳ Stick Welding/Arc Welding - Shielded Metal Arc Welding
- ↳ Welding Forum General Shop Talk
- ↳ Welding Certification - Stick/Arc Welding, Tig Welding, Mig Welding Certification tests - Welding Tests of all kinds
- ↳ Welding Projects - Welding project Ideas - Welding project plans
- ↳ Product Reviews
- ↳ Fuel Gas Heating
- Welding Tips & Tricks
- ↳ Video Discussion
- ↳ Wish List
- Announcements & Feedback
- ↳ Forum News
- ↳ Suggestions, Feedback and Support
- Welding Marketplace
- ↳ Welding Jobs - Industrial Welding Jobs - Pipe Welding Jobs - Tig Welding Jobs
- ↳ Classifieds - Buy, Sell, Trade Used Welding Equipment
- Welding Resources
- ↳ Tradeshows, Seminars and Events
- ↳ The Welding Library
- ↳ Education Opportunities


