Tig welding tips, questions, equipment, applications, instructions, techniques, tig welding machines, troubleshooting tig welding process
- big gear head
-
Ace

-
Posts:
-
Joined:Thu May 07, 2015 11:46 am
-
Location:KY.
You might try drilling a hole in it. If the metal comes off of the bit shiny and doesn't try to stick to the bit then it might be 7075. If it sticks to the bit and is kind of dull then it's probably 6061.
If it still has it's original finish then 7075 is on the gray side where 6061 is brighter silver.
You could also get some aluminum that you know is 7075 and 6061 and compare it.
If it still has it's original finish then 7075 is on the gray side where 6061 is brighter silver.
You could also get some aluminum that you know is 7075 and 6061 and compare it.
Freddie
- subwayrocket
-
Ace
-
Posts:
-
Joined:Thu Aug 13, 2015 11:38 pm
-
Location:Scranton/WilkesBarre, Pennsylvania
I have some 7075 plate and bar here . I welded a beveled butt joint out of some 1/4" , it welded very nice...not much different than 6061 .
I've kept it sitting here about 2 months, been watching it for the latent cracking I've read about.
Some of the cutoffs in the batch had a label that said AMi 7075 .
I've kept it sitting here about 2 months, been watching it for the latent cracking I've read about.
Some of the cutoffs in the batch had a label that said AMi 7075 .
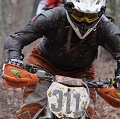
I've welded tabs on motocross handle bars and the weld
looked real nice. looked like nice penetration and haz.
whacked it with a hammer and it broke in the middle of
the weld. 7075
looked real nice. looked like nice penetration and haz.
whacked it with a hammer and it broke in the middle of
the weld. 7075
htp invertig 221
syncrowave 250
miller 140 mig
hypertherm plasma
morse 14 metal devil
syncrowave 250
miller 140 mig
hypertherm plasma
morse 14 metal devil
- jumpinjackflash
-
Guide

-
Posts:
-
Joined:Sun Feb 02, 2014 6:14 pm
-
Location:Near Mt Airy
Welded these out today after getting some of my issues out of the way. Now if I could only see to weld. I think this is a huge improvement over what I have been doing myself.  All of the welds are not perfect....but they are going to be glass beaded, epoxied , and bolted on the plane. Minimal if any, very sparse oxidation on inside of .040" upright pieces. Pulley brackets are finally done. If I would have known building a tungsten grinder would have helped me this much...I would have built it before I had the weld machine!!! Still paying for education I guess
- Attachments
-
- 1128151817.jpg (37.32 KiB) Viewed 1906 times
-
- 1128151816.jpg (30.97 KiB) Viewed 1906 times
Building an airplane is at times somewhat like a divorce.....with the exception that she doesn't leave
J.J. Flash
J.J. Flash
AFR_Autoworks
- AFR_Autoworks
-
Workhorse

-
Posts:
-
Joined:Mon Nov 30, 2015 2:35 am
-
Location:Red Deer, Alberta, Canada
My first go at titanium! Really excited about this stuff. I know there is a bit of colour there which is not acceptable in most industries. I will need more practice before I try anything structural. I would be using it more for exhausts and intakes.
- Attachments
-
- image.jpeg (36.08 KiB) Viewed 2047 times
-
- image.jpeg (39.88 KiB) Viewed 2047 times
-
- image.jpeg (39.47 KiB) Viewed 2047 times
-
- image.jpeg (40.69 KiB) Viewed 2047 times

- MosquitoMoto
-
Weldmonger

-
Posts:
-
Joined:Sat Aug 01, 2015 8:38 am
-
Location:The Land Down Under
Sweet!
Love seeing welding in titanium. Sure looks like you're getting a handle on it fast.
Kym
Love seeing welding in titanium. Sure looks like you're getting a handle on it fast.
Kym
Welder kurt
- Welder kurt
-
Active Member

-
Posts:
-
Joined:Sun Aug 16, 2015 10:11 pm
-
Location:Greenhill Al
- Mild steel to nod cast
- image.jpeg (86.14 KiB) Viewed 2021 times
- Attachments
-
- image.jpeg (57.74 KiB) Viewed 2021 times

- LtBadd
-
Weldmonger
-
Posts:
-
Joined:Sun Apr 12, 2015 4:00 pm
-
Location:Clearwater FL
-
Contact:
For an exhaust I think this will be more then acceptable, it's not an aircraft component, also the inside looks to be well purged so it'll probably outlast the vehicle.AFR_Autoworks wrote:My first go at titanium! Really excited about this stuff. I know there is a bit of colour there which is not acceptable in most industries. I will need more practice before I try anything structural. I would be using it more for exhausts and intakes.
Good work
Richard
Website
Website
AFR_Autoworks
- AFR_Autoworks
-
Workhorse
-
Posts:
-
Joined:Mon Nov 30, 2015 2:35 am
-
Location:Red Deer, Alberta, Canada
Thanks! I really hope to become allot more comfortable with this stuff. It is certainly fun to weld. Tacking it is a different story though. I had a friend hold a #8 gas lense to the backside of each tack for me. It sucked but I am sure I will develope a better method.
- MosquitoMoto
-
Weldmonger
-
Posts:
-
Joined:Sat Aug 01, 2015 8:38 am
-
Location:The Land Down Under
That really made me smile! Whatever gets the job done, right?AFR_Autoworks wrote:I had a friend hold a #8 gas lense to the backside of each tack for me. It sucked but I am sure I will develope a better method.
Kym
- 107c9c68df3001788c1ff3db8540a7f8.jpg (91.2 KiB) Viewed 1841 times
It' not fancy. It's not pretty. It's not even that good but I'm learning so that's a positive.
The nice thing about laying out your beads in that pattern is it allows you to practice tying in to the bead you just stopped on. Practice starting up where you stopped its real world application is on anything to thick or to long to weld all at once. With practice you can get to where you can't hardly tell where the joint is. From a start or stop.
I have more questions than answers
Josh
Josh

- Braehill
-
Weldmonger
-
Posts:
-
Joined:Sat Jul 06, 2013 11:16 am
-
Location:Near Pittsburgh,Pennsylvania. Steel Buckle of the Rust Belt
OzFlo,
Your welds look good for only having your welder just over a week.
I would never recommend this for a critical weld but I do suggest it for practice. Slowly cut your gas back until your welds start to deteriorate, then set it just above there. This does a couple things, it shows you what it looks like when you don't have enough gas coverage and it teaches you to maintain a proper torch angle throughout the length of the weld. As you know, gas is at a premium, but it's important to recognize when it's not doing it's job, either through too low or too high of a flow rate. You'll be surprised by how low you can set your flow rate in calm air and a short stick out, but it requires proper torch angle to do it.
Len
Now go melt something.
Instagram @lenny_gforce
Len
Instagram @lenny_gforce
Len
- MosquitoMoto
-
Weldmonger
-
Posts:
-
Joined:Sat Aug 01, 2015 8:38 am
-
Location:The Land Down Under
This is great advice - teaches you stuff, and might just save you some argon, too.Braehill wrote:OzFlo,
Your welds look good for only having your welder just over a week.
I would never recommend this for a critical weld but I do suggest it for practice. Slowly cut your gas back until your welds start to deteriorate, then set it just above there. This does a couple things, it shows you what it looks like when you don't have enough gas coverage and it teaches you to maintain a proper torch angle throughout the length of the weld. As you know, gas is at a premium, but it's important to recognize when it's not doing it's job, either through too low or too high of a flow rate. You'll be surprised by how low you can set your flow rate in calm air and a short stick out, but it requires proper torch angle to do it.
Len
Kym
Josh I'll definitely try to do that. I did notice that there were lots of gaps..
Len thanks for the advice. As my welds deteriorate anyway without changing gas flows I might just try to get some consistency first and then give your suggestion a shot.
Cheers,
Flo
Len thanks for the advice. As my welds deteriorate anyway without changing gas flows I might just try to get some consistency first and then give your suggestion a shot.
Cheers,
Flo
Fixed or more like fabricated a luggage rack for a couple riding two up through south america.
The before and after is pretty telling. The original rack looked like that after only 450 miles riding from San Francisco to Los Angeles.


The before and after is pretty telling. The original rack looked like that after only 450 miles riding from San Francisco to Los Angeles.
- MosquitoMoto
-
Weldmonger
-
Posts:
-
Joined:Sat Aug 01, 2015 8:38 am
-
Location:The Land Down Under
Nice work.
Luggage racks for bikes are always a challenge. You know they will be overloaded, you know the roads will be rough. Building something strong enough is a heck of a skills test. Hope we get an update one day in how this one goes!
Kym
Luggage racks for bikes are always a challenge. You know they will be overloaded, you know the roads will be rough. Building something strong enough is a heck of a skills test. Hope we get an update one day in how this one goes!
Kym
I am not expecting as much since they only speak German and don't really update their blog etc.MosquitoMoto wrote:Nice work.
Luggage racks for bikes are always a challenge. You know they will be overloaded, you know the roads will be rough. Building something strong enough is a heck of a skills test. Hope we get an update one day in how this one goes!
Kym
I made it out of .120 wall 3/4 square tubing. Knowing they are young and stupid I built it appropriately.
- MosquitoMoto
-
Weldmonger
-
Posts:
-
Joined:Sat Aug 01, 2015 8:38 am
-
Location:The Land Down Under
I'm sure it's in for a beating.
I stared for a long while at a collection of steel tube recently, considering welding together a luggage rack for my bike for the ride from South Australia to Victoria for the MotoGP at Phillip Island. I gave up on the idea eventually as I am still fairly new to welding and thought the risk of failure was just too great. Maybe next year!
Kym

Nothing special here but figured I'd post something. I put up a safety small court yard alloy fence using premade panels bought from Bunning's locally. I had to cut down the gate to the limited size requirement I had to work with and weld it together again. I used my sliding compound miter saw to cut the section out of the gate and this gave a really nice square cut that needed no touching up to get a pretty much zero gap fit up. I have no idea what the alloy is but I suspect it is a average at best grade given the fence panel costing.
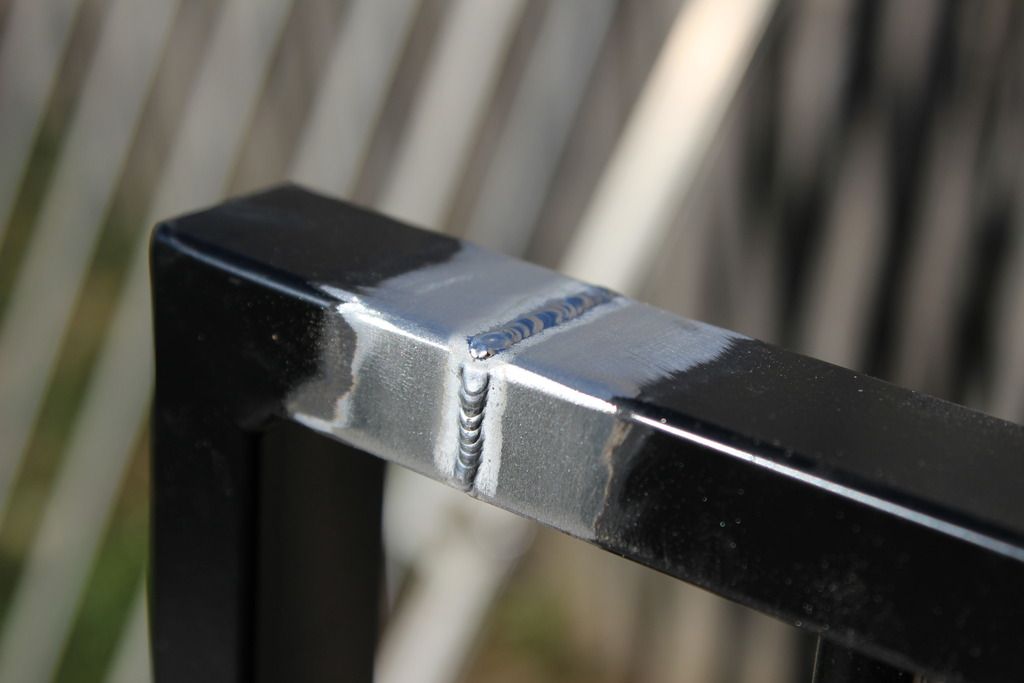
The welds are not special but I was just happy to not have it turn to a pool of crud before my eyes.
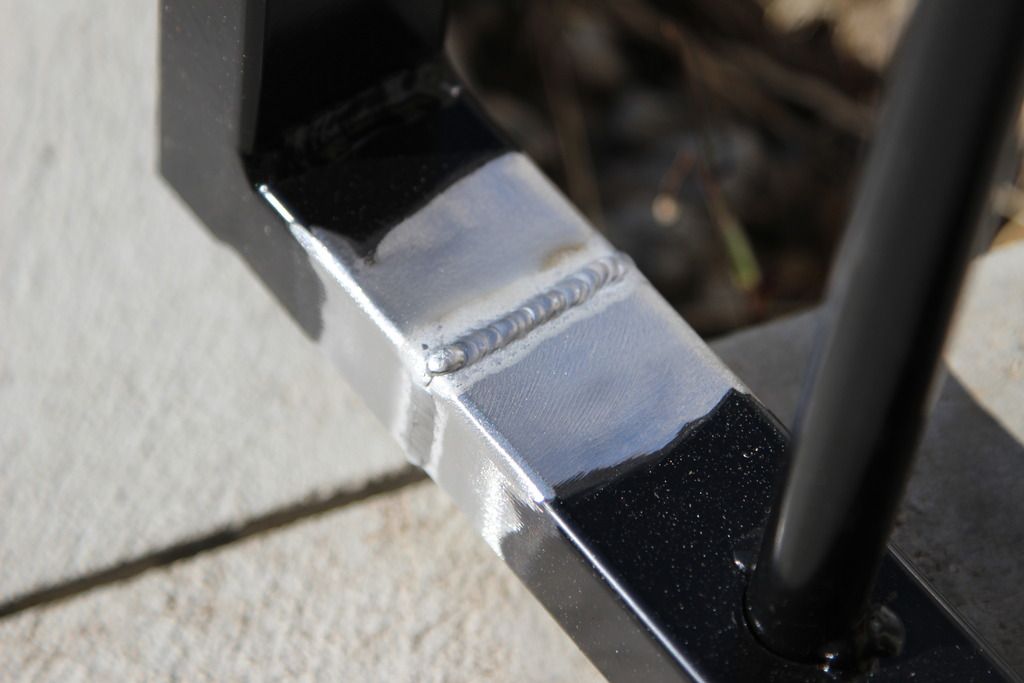
And the main reason for the fence, looks like she is in jail lol .
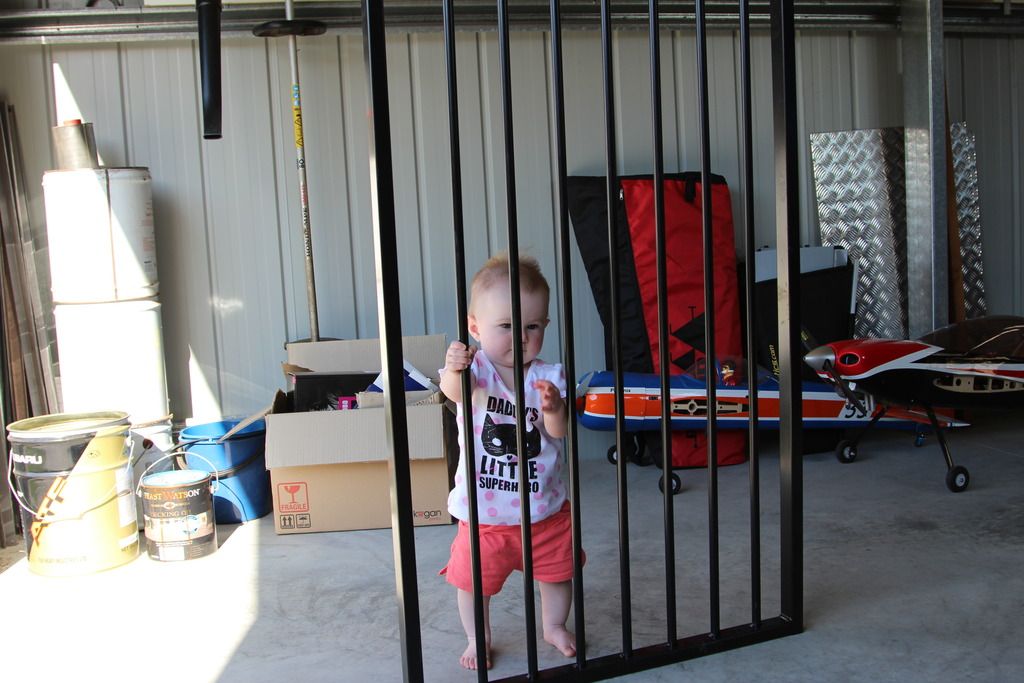
The welds are not special but I was just happy to not have it turn to a pool of crud before my eyes.
And the main reason for the fence, looks like she is in jail lol .
- LtBadd
-
Weldmonger
-
Posts:
-
Joined:Sun Apr 12, 2015 4:00 pm
-
Location:Clearwater FL
-
Contact:
Actually that looks pretty good for the time you've been welding, I think you have skills!! Keep moving forwardOzFlo wrote:107c9c68df3001788c1ff3db8540a7f8.jpgI've had my welder for just over a week and this is what I have been up to.. 6mm mild steel plate, 2.4mm (3/32") ER70S-2 filler, 150 amps, 2.4mm Lanthanated Tungsten, gas lens with #8 cup on a 26 air cooled torch, approx 9 lpm flowrate..
It' not fancy. It's not pretty. It's not even that good but I'm learning so that's a positive.
Richard
Richard
Website
Website
- MosquitoMoto
-
Weldmonger
-
Posts:
-
Joined:Sat Aug 01, 2015 8:38 am
-
Location:The Land Down Under
It's an Aldi one I bought a few years back to build a deck out the back of our house. I had planned on buying a 400-600 doolar good brand unit. I saw this one in the catalogue and went for a look, it actually looked better then a few of the name brand dearer units so I grabbed one, from memory it was sub 200 bucks. Still going like a charm and cuts thin wall alloy with care like a hot knife through butter ! Have to remember this trick, works awesome.MosquitoMoto wrote:Jaso -
Nice work. What sort of sliding compound mitre saw do you have?
Kym
- MosquitoMoto
-
Weldmonger
-
Posts:
-
Joined:Sat Aug 01, 2015 8:38 am
-
Location:The Land Down Under
That's handy to know, Jaso. Last question, I promise...what blade do you use?jaso1 wrote:It's an Aldi one I bought a few years back to build a deck out the back of our house. I had planned on buying a 400-600 doolar good brand unit. I saw this one in the catalogue and went for a look, it actually looked better then a few of the name brand dearer units so I grabbed one, from memory it was sub 200 bucks. Still going like a charm and cuts thin wall alloy with care like a hot knife through butter ! Have to remember this trick, works awesome.MosquitoMoto wrote:Jaso -
Nice work. What sort of sliding compound mitre saw do you have?
Kym
Kym
Return to “Tig Welding - Tig Welding Aluminum - Tig Welding Techniques - Aluminum Tig Welding”
Jump to
- Introductions & How to Use the Forum
- ↳ Welcome!
- ↳ Member Introductions
- ↳ How to Use the Forum
- ↳ Moderator Applications
- Welding Discussion
- ↳ Metal Cutting
- ↳ Tig Welding - Tig Welding Aluminum - Tig Welding Techniques - Aluminum Tig Welding
- ↳ Mig and Flux Core - gas metal arc welding & flux cored arc welding
- ↳ Stick Welding/Arc Welding - Shielded Metal Arc Welding
- ↳ Welding Forum General Shop Talk
- ↳ Welding Certification - Stick/Arc Welding, Tig Welding, Mig Welding Certification tests - Welding Tests of all kinds
- ↳ Welding Projects - Welding project Ideas - Welding project plans
- ↳ Product Reviews
- ↳ Fuel Gas Heating
- Welding Tips & Tricks
- ↳ Video Discussion
- ↳ Wish List
- Announcements & Feedback
- ↳ Forum News
- ↳ Suggestions, Feedback and Support
- Welding Marketplace
- ↳ Welding Jobs - Industrial Welding Jobs - Pipe Welding Jobs - Tig Welding Jobs
- ↳ Classifieds - Buy, Sell, Trade Used Welding Equipment
- Welding Resources
- ↳ Tradeshows, Seminars and Events
- ↳ The Welding Library
- ↳ Education Opportunities