Page 4 of 5
Re: Razor Blades
Posted: Fri Aug 26, 2016 7:57 pm
by LtBadd
maker of things wrote:OK, Ifeel like this is a little bit of a cheat. I used pulse, so it's not all man, the machine did kick in some effort here, but I was able to use .035 mig wire on both kinds of razor blades. I do think the fixed #9 gold shade helped. I also basically used laywire technique and lit off with the wire on top of the blades at the start. So while I don't feel it's 100% in the spirit of this challenge, it was an excellent demonstration of how good pulse can be on thin material. Need to get some smaller filler so I can try these again for real.
Maker, to an extent I disagree with you, using pulse is using a tool you have to complete the weld, no different then using clamps or any other tool.
I understand the reason you brought this up, but when it comes to thin material you need a new set of tools, perhaps pulse is one of them.
Now damnit where are my blades? Looks like I have to buy some!
Re: Razor Blades
Posted: Fri Aug 26, 2016 8:55 pm
by sedanman
I just did this as a joke. It worked better than I could have hoped for. I stick welded these together with my Esab 161 set to approximately 38 amps using Lincoln 1/16" 6013 with a box cutter blade as a backing plate.
Re: Razor Blades
Posted: Fri Aug 26, 2016 8:59 pm
by sedanman
I expected the razor blades to vaporize.
Re: Razor Blades
Posted: Sat Aug 27, 2016 8:08 am
by sedanman
Stick welded another pair with 3/32" maintenance rod (no idea what it really is but there's definitely some stainless in it) the flux is thick and blue and the rod has to be dragged on it's side or it worm holes like no other.
Re: Razor Blades
Posted: Sat Aug 27, 2016 8:12 am
by Yzdrew170
This is the best one I have. I have been through a lot of blades practicing. I used 3/32 2% lanth at 20 amps with 3/32 filler. Clamped blades down to a copper bar. Lit up on the copper and then moved to the blades after the arc stabilized. Also had to keep the filler rod in the arc when arc got close to the blades to keep from melting the tips away. I used a stainless filler. I spent several hours in the garage trying this after watching Jodys video.
Re: Razor Blades
Posted: Wed Aug 31, 2016 5:12 am
by maker of things
Got some supplies for the weekend.

- IMG_20160830_152552099.jpg (80.62 KiB) Viewed 1408 times
Re: Razor Blades
Posted: Wed Aug 31, 2016 7:23 am
by exnailpounder
It's been awful quiet in the razor welding community.
Re: Razor Blades
Posted: Wed Aug 31, 2016 7:07 pm
by Poland308
Lol that's because this is an ass kicker. I went through 30 blades to get he few good ones I posted.
Re: Razor Blades
Posted: Wed Aug 31, 2016 7:23 pm
by RocketSurgeon
Ok, I have to give it my best shot.
Though, I may go with the fusion instead of the filler.
Re: Razor Blades
Posted: Wed Aug 31, 2016 10:08 pm
by exnailpounder
RocketSurgeon wrote:Ok, I have to give it my best shot.
Though, I may go with the fusion instead of the filler.
NO WAY!!! Filler..filler...filler...

Re: Razor Blades
Posted: Thu Sep 01, 2016 2:26 am
by GreinTime
Can we get back to the fact that sedanman made most of you look like rank amateurs with a stick weld?
Sent from my SM-G900V using Tapatalk
Re: Razor Blades
Posted: Thu Sep 01, 2016 2:27 am
by GreinTime
I really don't have room to talk, as I haven't put in a pic in the contest (we currently have no razor blades at work and I'm too lazy to wake up early enough to go to the store lol
Sent from my SM-G900V using Tapatalk
Re: Razor Blades
Posted: Thu Sep 01, 2016 8:20 am
by exnailpounder
GreinTime wrote:Can we get back to the fact that sedanman made most of you look like rank amateurs with a stick weld?
Sent from my SM-G900V using Tapatalk
He did, didn't he.
Maybe thats why everyone quit.
Re: Razor Blades
Posted: Thu Sep 01, 2016 8:21 am
by exnailpounder
We are going to have to weld beer cans next so no one can stick weld them and make us all look like asses
Re: Razor Blades
Posted: Thu Sep 01, 2016 9:10 am
by maker of things
This is supposed to be the TIG portion of the forum so I just mentally blocked sedanman's stick welds so I wouldn't get discouraged.

If anyone else wants to go crazy, I tried this.
15 amps ac .04 2%lanth .06 silicon bronze filler. Definitely not a success, but the blade is stuck on there a little.


- IMG_20160827_074243954.jpg (71.53 KiB) Viewed 1350 times
Re: Razor Blades
Posted: Thu Sep 01, 2016 9:27 am
by exnailpounder
I like the way you think.
Re: Razor Blades
Posted: Fri Sep 02, 2016 2:05 am
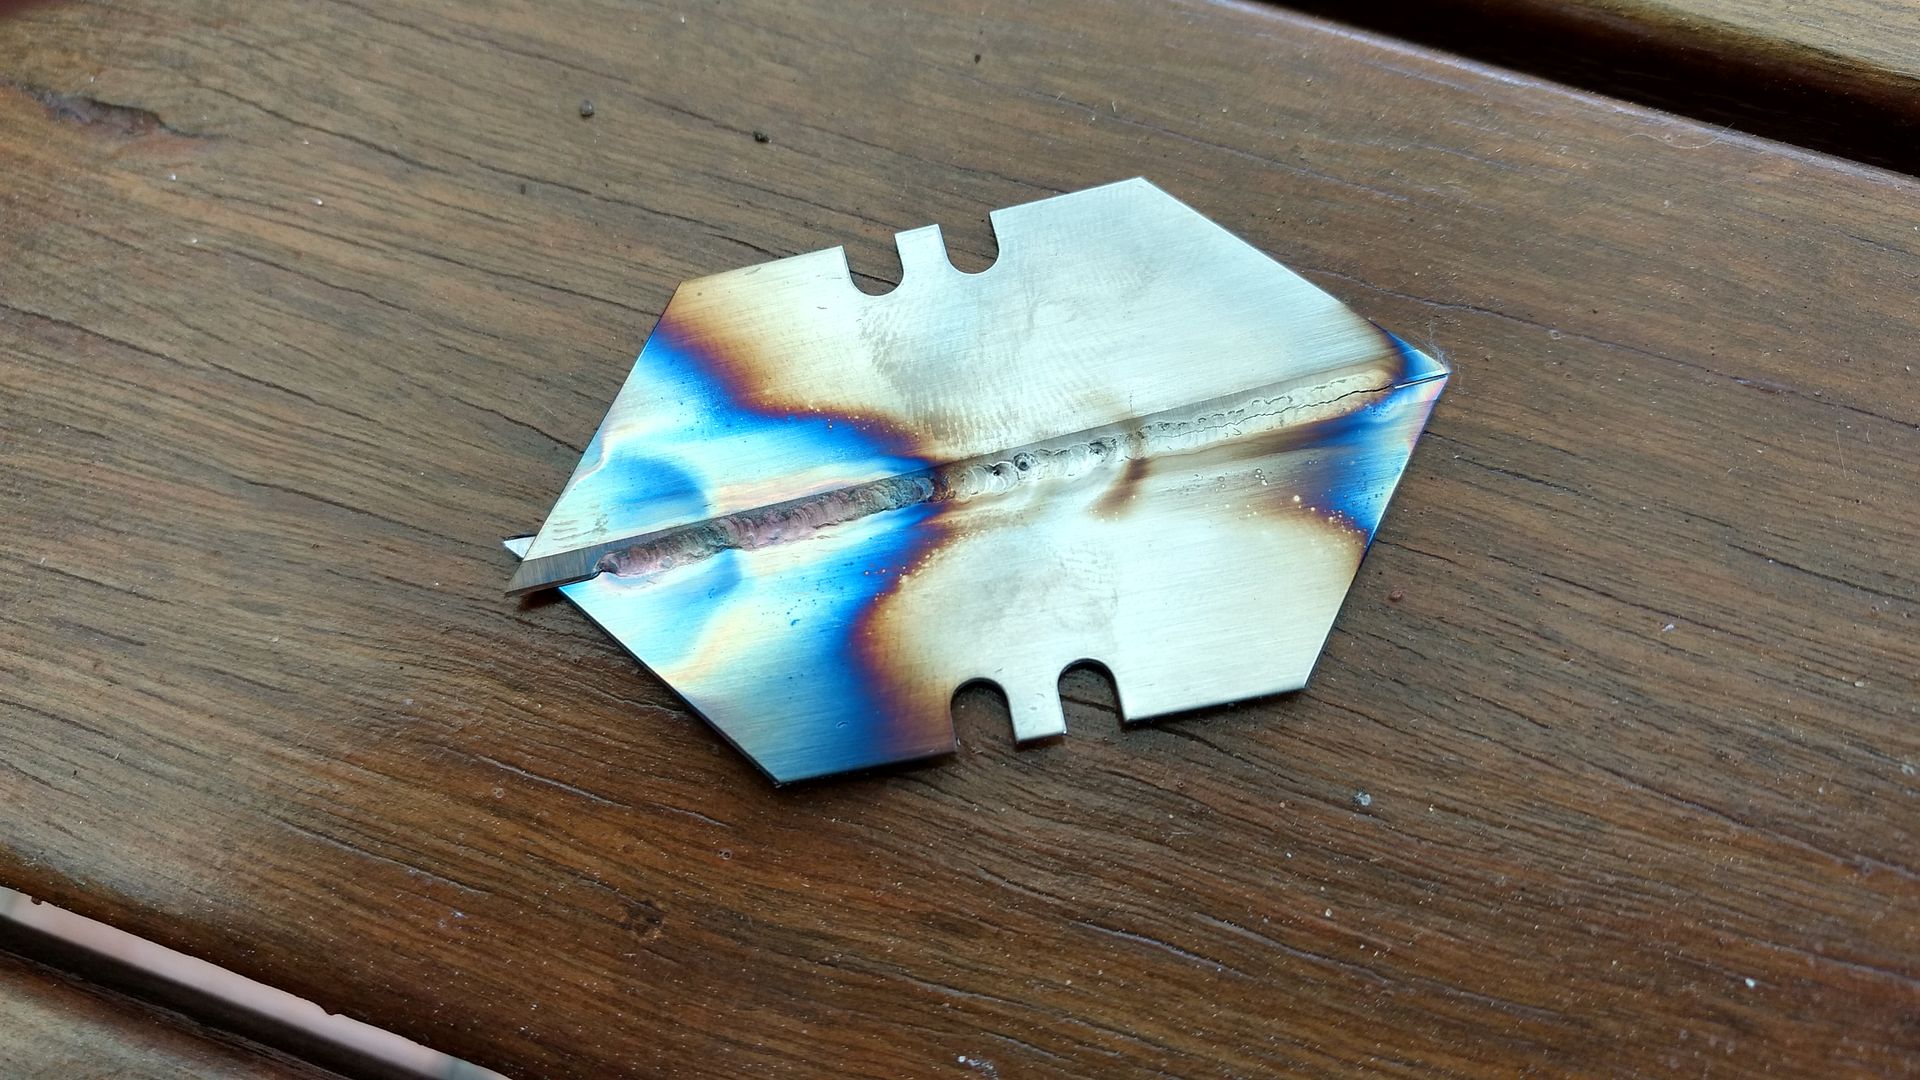
by GreinTime
This is the backside of one pass, with another pass right beside it on the other edge of the blade. Using a Syncrowave 250 set at 20a using 0.035 308l. I think I still have it set for super-crypta'wonder hot start from welding 1/2Al the other day. I'll try again with a Dynasty tomorrow if I get a chance, and I'll weld a pair with my Power TIG 250ex at home this weekend for comparison.

Sent from my SM-G900V using Tapatalk
Re: Razor Blades
Posted: Sun Sep 11, 2016 1:23 pm
by maker of things
Fianally got time to try the .023 mig wire filler. 15 amps 10cfh #8 gas lens .040 tungsten

- IMG_20160911_110554107_HDR.jpg (48.78 KiB) Viewed 1451 times
outside corner with filler.

- IMG_20160911_110335639.jpg (33.24 KiB) Viewed 1451 times
outisde corner autogenous

- IMG_20160911_110305958.jpg (67.27 KiB) Viewed 1451 times
Re: Razor Blades
Posted: Sun Sep 11, 2016 4:11 pm
by exnailpounder
Not bad! Now lets see an INSIDE corner weld

Re: Razor Blades
Posted: Sun Sep 11, 2016 7:18 pm
by Saz
WOW!
Re: Razor Blades
Posted: Sun Sep 11, 2016 7:50 pm
by MosquitoMoto
Here's my humble second effort at this - finally using clean blades! Fusion welding, 5 amps to start and then up to around 14 amps using the pedal. Very sharp 1.6mm, 2% Lanthanated electrode.
Have to admit what I'm finding most challenging is fixing the blades in such a way that they won't move, (they obviously moved in this weld) but most of all...finding a helmet setting so that I can see properly! Arc is tiny and I find that at the low settings my helmet is 'switching' in and out. 90% of the challenge for me seems to be finding helmet settings that let me see what I'm doing.
Thoroughly enjoying giving it a shot though.
Kym
Re: Razor Blades
Posted: Sun Sep 11, 2016 8:20 pm
by sedanman
Kym, Turn the delay setting to maximum. This should help with the flickering . I have to work on pop cans for the next challenge
Re: Razor Blades
Posted: Sun Sep 11, 2016 10:26 pm
by exnailpounder
Kym...your welds look great! My hood challenged me too...I felt like I welded with no shield at all I had my hood down so low.
Worse than that is I had a thick job next day( about 180 amps) and forgot to turn up my shade and got flashed BIG TIME...you would think that we would learn something at some point but I think welders have hard heads
Re: Razor Blades
Posted: Sun Sep 11, 2016 11:52 pm
by MosquitoMoto
Thanks for the encouragement guys.
Sedanman, my hood is cranked to maximum delay but still flickering now and then. Maybe I've reached the limits of what this helmet is capable of, who knows. Probably won't trade up to a bigger $$ hood just so I can weld razor blades!
(But then again).
Irony...I'd been welding with used blades and getting bad results. Ordered a big pack of new blades onlines. They arrived, and to my horror I find that the package is swimming in machine oil! So, very careful acetone cleaning before welding. Sheesh.
Love this challenge though. Makes me want to keep trying until I nail a really good weld.
Kym
Re: Razor Blades
Posted: Mon Sep 12, 2016 5:20 am
by maker of things
5 amps is pretty low for an autodarkening hood. Wouldn't be too hard to bock even a portion of the light and cause the hood to undarken. I think a fixed 8 shade gold lens would be ideal. My 9 wasn't bad but a little tricky to see through before arc start. I don't think it showed well in the pic but I ended up making a hold down fork from 3/32 stainless and used one clamp on the end where it is bent 180. That applied light pressure that holds the blades down but they could still be aligned after clamping.
It is a fun challenge, but I'm really dreading the overhead tee