
I recently picked up some really nice 6061 scrap from a machine shop. There's a lot of 1/2" thick pieces that are appx 2x4 and then several smaller pieces of 1/4" stuff. I want to get some practice with thicker material. So far I'm certain I have the material part covered but am not sure where to go next.
I have an Everlast 250EX with water cooler, 1/8 tungsten, a #8 cup, 1/8" 4043 filler, and a tank of argon. My machine has a full range of adjustment in a/c freq, pulse, balance, and foot pedal control.
I have the opportunity for several different joint combinations 1/2 to 1/2, 1/4 to half, 1/4 to 1/8, in lap, fillet, butt, outside edge, etc.
I do have a little aluminum experience with 1/8" and lighter material.
Where should I start without F'n up too much of this scrap?
Thanks to all!
Nils
Tig welding tips, questions, equipment, applications, instructions, techniques, tig welding machines, troubleshooting tig welding process
noddybrian
- noddybrian
-
Weldmonger

-
Posts:
-
Joined:Thu Jan 24, 2013 12:13 pm
Hi - in general settings if unsure the Miller welding calculator on their website is always a good starting point.
Had you anything in particular - I assume as you've some ally time you got the basics down of setting the machine.
As this is all fairly thick I'd keep the frequency low - particularly on the 1/2" - no 2 machines are the same so have a play - but unless the arc wanders really badly try 50 / 60 Hz - if it does - increase it a little at a time till it's steady -it's an inverter so slight flat on a sharpened 2% lanthanated or thoriated tungsten works - sounds like your already set up pretty well - as this is new material & you'll be at or near max power keep the cleaning action to a minimum ( probably 75% or so - just well clean the metal with solvent & wash well in hot soapy water as from a machine shop it's likely to have cutting oils on which play havoc with tig ).
I'm not an expert on ally - but if it were me I'd start with 1/4" > 1/4" set up on a piece of angle iron to form an open outside corner - this requires no prep & is the easiest joint to start with - you can also fill it in one pass - if not yet steady at rod feeding use the thickest filler you have ( 1/8" is OK ) and try to arrange something like a block of wood to rest your forearm on that will allow you to slide it along for more uniform " dabbing " - I'd use the foot pedal set to allow max amps when needed - put a REALLY big tack on one end - enough to fill the corner - then turn round & weld from the other end - this makes it easier to finish without a crater - the pieces are quite small though thick(ish) so it's going to take a while at or near max to form a puddle - but the heat will build very quickly -so start backing off as soon as the heat builds- try to only apply enough heat to allow filler to be added.
After that I'd say a lap joint would be next - avoid butt joints till your more comfortable - after a couple of lap joints you can use the same pieces again for a T fillet. - once your happy there move on to the 1/2" pieces.
Last thoughts - you may need a bit more gas than you've been using due to the increased heat / cup size & torch angle will become more critical - as the power goes up it is easy to get enough heat travel from the torch to melt the filler rod outside / before the gas cover where it turns into an ugly discoloured blob - so check the angle - increase stick out if needed to allow sufficient view of the puddle - also remember as the power goes up especially on ally take suitable precautions to avoid " sun burn / crispy skin " .
Good luck & if you have anything more specific there are plenty of experienced ally guys here will help.
If there is any size to the pieces at all, you will need to preheat and add helium. I have to run both the Dynasty 300 and my 250 syncrowave in tandem to weld it or I would have to get a 300 amp torch for the dynasty. I do run the Dynasty at 50 hz and it helps a lot, especially just starting out. If I were to try to run continuous on long welds at 250 amps on 250 amp torches, I would and have burnt the power cables up. I use an oxy/fuel torch to keep it hot between passes.
I often have to weld pretty large bits of aluminum like this I-beam below which was 3/8" and i really have to work on it and I cannot stop once I get it hot. I alternate between both machines every 5 minutes. This is where you will often find the limitations of "duty cycle" of the machine at max amps.
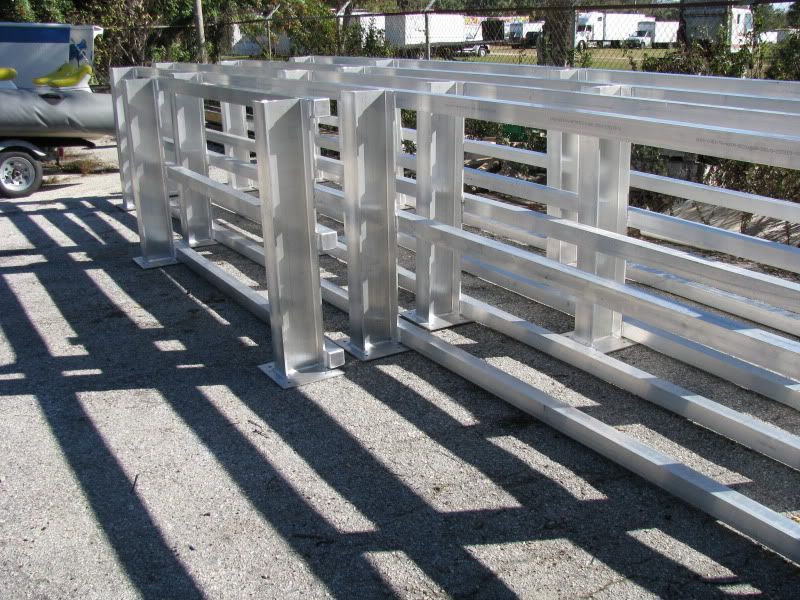
I often have to weld pretty large bits of aluminum like this I-beam below which was 3/8" and i really have to work on it and I cannot stop once I get it hot. I alternate between both machines every 5 minutes. This is where you will often find the limitations of "duty cycle" of the machine at max amps.
Miller ABP 330, Syncrowave 250, Dynasty 300 DX.
Honorary member of the Fraternity of Faded Tee Shirts.
Honorary member of the Fraternity of Faded Tee Shirts.

- Otto Nobedder
-
Weldmonger
-
Posts:
-
Joined:Thu Jan 06, 2011 11:40 pm
-
Location:Near New Orleans
Sound and solid advice.
My go-to at work for aluminum is a Miller 250DX, no "pulse" or other advanced funtions. No freq. control.
For 3/8, any weld over 1.5" has helium. I'll bull through a short weld with a preheat. For extended 3/8", I use about 25-30% helium. To weld 1/2", I go 50%.
The client I do this work for supplies the helium, essentially unlimited, though. (Welding is NOT it's primary use... Leak detection is.)
Steve S
Went full power on the 1/2 inch fillet. Man did my glove get hot! Had to change to my SMAW gloves. Kranked up the argon to just a little over 20. Set the a/c hz to just under 50 and the balance to just below 30% DCEP. The 1/8" thoriated worked pretty well using a #8 cup.
All and all not too bad but there is room for improvement.
All and all not too bad but there is room for improvement.
- Attachments
-
- 1/4 Lap
- DSCN5338.JPG (121.18 KiB) Viewed 1241 times
-
- 1/2 inch fillet
- DSCN5333.JPG (122.68 KiB) Viewed 1241 times
-
- 1/2 inch
- DSCN5336.JPG (121.84 KiB) Viewed 1241 times
Everlast PowerTig 250EX, PowerTig 185 Micro, PowerArc 160STH, Miller Trailblazer 301G, Millermatic 140 Auto-Set
- Otto Nobedder
-
Weldmonger
-
Posts:
-
Joined:Thu Jan 06, 2011 11:40 pm
-
Location:Near New Orleans
Looks like you're well on your way with aluminum!
This stuff is a big part of how Jody sells Tigfingers! HOT work...
Steve S
This stuff is a big part of how Jody sells Tigfingers! HOT work...
Steve S
That's a heck of a lot nicer than what I have been repairing in the last few years. I was beginning to think there was no aluminum TIG welders outside of factories. Just about everything is MIG these days. Which brings me to another point. I was beginning to think there was a shortage of spool gun'rs. 75% of the welds I am seeing look like someone that does not weld aluminum on a daily basis. It's really hard to believe with how much is made from it these days.
Keep at it like that. You will be in high demand once the word gets out if it hasn't already.
Keep at it like that. You will be in high demand once the word gets out if it hasn't already.
Miller ABP 330, Syncrowave 250, Dynasty 300 DX.
Honorary member of the Fraternity of Faded Tee Shirts.
Honorary member of the Fraternity of Faded Tee Shirts.
- Otto Nobedder
-
Weldmonger
-
Posts:
-
Joined:Thu Jan 06, 2011 11:40 pm
-
Location:Near New Orleans
Hell, I even got to TIG a li'l aluminum today.
Proves practice makes a difference... The first inch was all out of whack, as I was not used to the need to build the heat...
This was a simple gusset on 3/16 5360(?), that could have been stitched, but after the "fail" of the first inch (right, in the pic), it was ON!
1/8" 5356 filler, manual pulse (pedal), about 2 Hz, 225 peak at about 33%.
Miller 250DX, and didn't bother with a tungsten change for a gusset... 2% thoriated, 90% balance.
I was real happy with parts of it, but the left-hand stuff aggravated me, for sheer lack of practice.
Steve S
Proves practice makes a difference... The first inch was all out of whack, as I was not used to the need to build the heat...
- GEDC0905.JPG (159.7 KiB) Viewed 1208 times
1/8" 5356 filler, manual pulse (pedal), about 2 Hz, 225 peak at about 33%.
Miller 250DX, and didn't bother with a tungsten change for a gusset... 2% thoriated, 90% balance.
I was real happy with parts of it, but the left-hand stuff aggravated me, for sheer lack of practice.
Steve S
Shoot, man. . .nothing wrong with that. Bet you were wishing you had a couple more of those to do for getting the hang of it on the last few inches. It's nice to be able to view large welds for a change I reckon.
Miller ABP 330, Syncrowave 250, Dynasty 300 DX.
Honorary member of the Fraternity of Faded Tee Shirts.
Honorary member of the Fraternity of Faded Tee Shirts.
- Otto Nobedder
-
Weldmonger
-
Posts:
-
Joined:Thu Jan 06, 2011 11:40 pm
-
Location:Near New Orleans
Yeah, I'd like to have built three more just like it, and taken a picture of the last one... 
It amazes me how much difference "staying current" makes in the appearance of a weld.
This was my first aluminum in about three months.
Steve S
It amazes me how much difference "staying current" makes in the appearance of a weld.
This was my first aluminum in about three months.
Steve S
Very nice, Steve! Looks like you did a little patch work on that leading edge too. Also, are the tie-ins in the corners? The welds are so clean it's hard to say for sure. Only 10% cleaning, did that effect your heat much? Looks tricky with all those curves, but you made it look easy!
My next challenge is going to be doing an edge weld along a 1/4" and 1/8" stacked together plate. Any ideas on torch position, etc?
My next challenge is going to be doing an edge weld along a 1/4" and 1/8" stacked together plate. Any ideas on torch position, etc?
Everlast PowerTig 250EX, PowerTig 185 Micro, PowerArc 160STH, Miller Trailblazer 301G, Millermatic 140 Auto-Set
- Otto Nobedder
-
Weldmonger
-
Posts:
-
Joined:Thu Jan 06, 2011 11:40 pm
-
Location:Near New Orleans
Nils,
Yes, each corner is a tie-in. The visible weld is 8 inches, total, so the corners were tight. I alternated working left- and right-handed to get into the corners, so there's two starts on each outside corner, and two stops each inside corner.
That inch on the right is where I started, and with three months since I TIGged anything but SS, I instinctively tried to push too fast before the heat built up in the part (no preheat on a small part like that), and wound up over-feeding, with a "lumpy" weld, so once everything was hot, I washed it in, again with manual pulse. If I'd ground out the excess filler before washing it, I could probably have hidden it, but for the application (no one will see this weld as installed) it wasn't worth the effort, and I decided to live with it and share it here for whatever "education" value it has.
As to your question on the edge-weld, what position will you be doing it in? "Dealer's choice"? Or, more likely, laying flat for for a 3G weld position (minus the groove)? If the latter, which plate is on top? Is it to be an autogenous weld, or filler added?
This doesn't make too much difference, really. In that 3G position, you'll probably prefer to push the weld slighty, with more "up" than "forward", so the arc-force puts metal where you want it, and advance the torch rather quickly in a fairly long step (wider spaced dimes than in a 1G or 1F) so the metal solidifies before it sags (beware getting too much heat going, where the metal chills slowly and sags behind the main puddle).
More accurately, the puddle will sag slightly before it chills, anyway, so using the arc-force to push it upward a bit before advancing will allow it to settle where you want it. This will likely make more sense when you actually do it, than it does reading it.
Steve S
Manual pulse makes sense in applications like that or for those who don't get to weld aluminum or the same types of joints every day. Especially with shops that really can't keep a full time aluminum specialist on hand for that single purpose. I can weld traditionally and beautifully with the foot pedal but it takes me an hour of practice each time. On smaller parts, by the time you figure in all the sizable tacks that aluminum requires, you end up being in good part welding that way anyway. Bump welding is often practical in such applications as well. Especially when you are trying to keep the welds of 4-5 different welders consistent if they all have to be working on sub assemblies of a single project, or you only get one crack at the joint for a tightly figured materials bill where there is no room for error.
I have gotten shakier in my old age. I used to be able to float a torch with impeccable precision and controlled breathing. Nowadays, the 2 cups of coffee it takes just to get my motor running each day plays hell with free floating a tig torch. I can do it if I concentrate but, I do not find such intense focus enjoyable these days. Sitting on a stool at a bench, no problem. Standing with the back slightly bent for hours on end is not an old man's game and I am in good physical condition for my age.
I have gotten shakier in my old age. I used to be able to float a torch with impeccable precision and controlled breathing. Nowadays, the 2 cups of coffee it takes just to get my motor running each day plays hell with free floating a tig torch. I can do it if I concentrate but, I do not find such intense focus enjoyable these days. Sitting on a stool at a bench, no problem. Standing with the back slightly bent for hours on end is not an old man's game and I am in good physical condition for my age.
Miller ABP 330, Syncrowave 250, Dynasty 300 DX.
Honorary member of the Fraternity of Faded Tee Shirts.
Honorary member of the Fraternity of Faded Tee Shirts.
I think a neat feature on my machine would be a torch mounted switch that allowed me to turn on or off my pulse mode. That way I could start my puddle without the pulse, then when I had it going I could switch into the pulse mode with all my settings preset, then finishing it up by going back into standard mode.
Everlast PowerTig 250EX, PowerTig 185 Micro, PowerArc 160STH, Miller Trailblazer 301G, Millermatic 140 Auto-Set

- weldin mike 27
-
Weldmonger
-
Posts:
-
Joined:Fri Apr 01, 2011 10:59 pm
-
Location:Australia; Victoria
Hey,
I know that some of the the high end Euro machines allow you to have two settings in the "log" and switch between them with a double tap of the the switch. dont know if this would apply to pulse though. 5k out of the wallet and you are laughing .
Mick
I know that some of the the high end Euro machines allow you to have two settings in the "log" and switch between them with a double tap of the the switch. dont know if this would apply to pulse though. 5k out of the wallet and you are laughing .
Mick
Return to “Tig Welding - Tig Welding Aluminum - Tig Welding Techniques - Aluminum Tig Welding”
Jump to
- Introductions & How to Use the Forum
- ↳ Welcome!
- ↳ Member Introductions
- ↳ How to Use the Forum
- ↳ Moderator Applications
- Welding Discussion
- ↳ Metal Cutting
- ↳ Tig Welding - Tig Welding Aluminum - Tig Welding Techniques - Aluminum Tig Welding
- ↳ Mig and Flux Core - gas metal arc welding & flux cored arc welding
- ↳ Stick Welding/Arc Welding - Shielded Metal Arc Welding
- ↳ Welding Forum General Shop Talk
- ↳ Welding Certification - Stick/Arc Welding, Tig Welding, Mig Welding Certification tests - Welding Tests of all kinds
- ↳ Welding Projects - Welding project Ideas - Welding project plans
- ↳ Product Reviews
- ↳ Fuel Gas Heating
- Welding Tips & Tricks
- ↳ Video Discussion
- ↳ Wish List
- Announcements & Feedback
- ↳ Forum News
- ↳ Suggestions, Feedback and Support
- Welding Marketplace
- ↳ Welding Jobs - Industrial Welding Jobs - Pipe Welding Jobs - Tig Welding Jobs
- ↳ Classifieds - Buy, Sell, Trade Used Welding Equipment
- Welding Resources
- ↳ Tradeshows, Seminars and Events
- ↳ The Welding Library
- ↳ Education Opportunities