Tig welding tips, questions, equipment, applications, instructions, techniques, tig welding machines, troubleshooting tig welding process

Hi I am trying to do some beginner type welding. just running a bead with a TIG welder from Eastwood 200 AC/DC. I've set it in AC I'm welding 1/8" thick 6061 using the proper filler material and I'm using the green band tungsten and it is 1. I understand some pooling is in order but melting the part altogether seems insane. I know I'm doing something wrong but I think it's perhaps that I am using 3/32" tungsten rather than 1/16"? could that be correct? gas flow cfh is 15-20;; amps @ 110;; clearance effect is somewhere between 0 and -3 I believe that is also known on some machines as balance. I've had it on 3 which is supposed to be leaning more towards penetration rather than cleaning. However both melt it. So the only thing I can assume is wrong is the size of the tungsten rod. However when I want to run a bead on 1/2" thick material it only arcs and burns the material brown/white. I'm severely confused. sorry for the inexperience but I am a cnc machinist by trade not a welder and i am looking to learn all that i can. i'm using "pure" argon gas.

- Otto Nobedder
-
Weldmonger

-
Posts:
-
Joined:Thu Jan 06, 2011 11:40 pm
-
Location:Near New Orleans
Welcome!
First, don't even attempt 1/2" with that Eastwood 200 until you've figured out the 1/8". Consider it "out of range" until you accumulate some success with thicknesses your machine is more comfortable with.
You do NOT have too large a tungsten. If anything, you may need to go to 1/8" until you establish control, and sort it out. 3/32 should be fine for 1/8" 6061.
Also, you need more amps. With the balance set "neutral", you'd need about 70% more amps than you would for a similar DC steel weld. With the balance set toward penetration (I recommend) you'll still need about 50% more amps than a similar steel weld in DC.
You're going to get a wide puddle... and it'll take a minute. Unlike steel, it may take several seconds to get a puddle on both halves of the weld hot enough to take filler and tie together. Don't start at the end of the piece, or you'll melt it to hell. For practice, start at the middle and work out toward each end.
Just some thoughts to start working from...
Steve S

- weldin mike 27
-
Weldmonger
-
Posts:
-
Joined:Fri Apr 01, 2011 10:59 pm
-
Location:Australia; Victoria
Hey,
Also give the Al a good brush with a new Stainless steel wire brush, this sometimes is a big thing that trips new starters up. Cleans the metal and breaks up the Alum oxide on the surface.
Mick
Also give the Al a good brush with a new Stainless steel wire brush, this sometimes is a big thing that trips new starters up. Cleans the metal and breaks up the Alum oxide on the surface.
Mick
sorry guys I guess my problem is that I just straight watched it melt before my eyes in a matter of seconds. The worst part was that I'd dab the filler stick on the edge of the puddle and itd melt right into everything. I've never seen 1/8" of material liquify like that in a second. I'm using about 110 amps. Is that too much?
edit: i'm starting to think my problem is that I am trying to run a bead across the top surface of 1/8" aluminum on the end and it's a strip that is only .75" wide. so perhaps that's why I am liquifying it in 5 seconds?
edit: i'm starting to think my problem is that I am trying to run a bead across the top surface of 1/8" aluminum on the end and it's a strip that is only .75" wide. so perhaps that's why I am liquifying it in 5 seconds?
- MinnesotaDave
-
Weldmonger
-
Posts:
-
Joined:Sun Oct 27, 2013 10:57 pm
-
Location:Big Lake/Monticello MN, U.S.A.
That is different. The little piece will saturate with heat quickly and melt.gotwelds wrote:sorry guys I guess my problem is that I just straight watched it melt before my eyes in a matter of seconds. The worst part was that I'd dab the filler stick on the edge of the puddle and itd melt right into everything. I've never seen 1/8" of material liquify like that in a second. I'm using about 110 amps. Is that too much?
edit: i'm starting to think my problem is that I am trying to run a bead across the top surface of 1/8" aluminum on the end and it's a strip that is only .75" wide. so perhaps that's why I am liquifying it in 5 seconds?
Practice on an 1/8" aluminum scrap about 6 x 8 inches or bigger.
It will be much easier to work with.
Use enough heat to form a puddle in about 3 seconds and start practicing.
Look up the aluminum drill from Jody's site. (Welding-tv.com or this one)
Dave J.
Beware of false knowledge; it is more dangerous than ignorance. ~George Bernard Shaw~
Syncro 350
Invertec v250-s
Thermal Arc 161 and 300
MM210
Dialarc
Tried being normal once, didn't take....I think it was a Tuesday.
Beware of false knowledge; it is more dangerous than ignorance. ~George Bernard Shaw~
Syncro 350
Invertec v250-s
Thermal Arc 161 and 300
MM210
Dialarc
Tried being normal once, didn't take....I think it was a Tuesday.
how then do you weld thing gauge aluminum without burning straight through?
i'm trying to weld aluminum cosmetic "spikes" to the end of my aluminum handle bars on my buddy's bicycle. the spikes insert into the thin gauge tubing and make sort of an endcap. I just need to weld the crack in between where the spikes protrude from the handle bar tubing.
i successfully welded ss and regular steel today... aluminum must be very tricky.
- Otto Nobedder
-
Weldmonger
-
Posts:
-
Joined:Thu Jan 06, 2011 11:40 pm
-
Location:Near New Orleans
gotwelds,
You have a foot pedal remote for that Eastwood? Thin aluminum is much easier with heat control, and very thin sections almost require it, especially if you're new to aluminum.
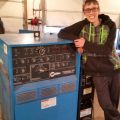
Is this your machine?
http://www.eastwood.com/tig-welders-eas ... elder.html
Steve S
You have a foot pedal remote for that Eastwood? Thin aluminum is much easier with heat control, and very thin sections almost require it, especially if you're new to aluminum.
Is this your machine?
http://www.eastwood.com/tig-welders-eas ... elder.html
Steve S

In the PowerTig 200 DX manual, page 27, "Tungsten Selection Guide For An Inverter", pure tungsten (Green coded) is not recommended in an inverter type machine.
BUT, I strongly suggest, before you do anything, you watch the three part video series Jody did on the Everlast settings. He does a great job of covering balance settings, pulse setup, and 2T/4T operations. Also there are many excellent aluminum videos in general to watch.
Once you have acquired this information your quest will be much easier and less frustrating.
Nils
Everlast PowerTig 250EX, PowerTig 185 Micro, PowerArc 160STH, Miller Trailblazer 301G, Millermatic 140 Auto-Set
I apologize, I misread the OP, it is an Eastwood unit not an Everlast. But, the pure tungsten may not be compatible with the Eastwood inverter either. I would try some Red coated or Blue and see how it does.
Everlast PowerTig 250EX, PowerTig 185 Micro, PowerArc 160STH, Miller Trailblazer 301G, Millermatic 140 Auto-Set
yes that is my machine and I do have a foot pedal. I noticed that my electrode was arcing all over the place and then i got it up close and the arc was perfect. I actually ran a good aluminum bead yesterday but I've noticed that I have to be extremely fast when running the bead otherwise i will deform the part significantly. I'm slowing getting the hang of it as well as using my Balance for cleaning vs penetration. I've noticed more penetration has helped me with my arc.Otto Nobedder wrote:gotwelds,
You have a foot pedal remote for that Eastwood? Thin aluminum is much easier with heat control, and very thin sections almost require it, especially if you're new to aluminum.
Is this your machine?
http://www.eastwood.com/tig-welders-eas ... elder.html
Steve S
the green works decently but I agree with you that perhaps the red would work better. I watched a video in which the welder used DC to ball up the end of the tungsten using a red electrode and then switched to AC. how do you ball it up on red with DC?? use no gas? or what? that part confused me.Nils wrote:I apologize, I misread the OP, it is an Eastwood unit not an Everlast. But, the pure tungsten may not be compatible with the Eastwood inverter either. I would try some Red coated or Blue and see how it does.
i understand that on AC the green electrode automatically balls up but I am not sure if the red does as well?
It is my understanding, with inverters, balling up the electrode is not necessary. That is an old procedure for transformer type machines. The manual for my Everlast explains tungsten preparation to taper it appx 2.5 times its thickness and leave a rounded point. With your balance set somewhere around 30% EP the tungsten should maintain its shape. Everlast measures ac balance as a percent of EP, Miller is percent of EN. Eastwood, don't know. BUT, how it's measured is whatever. The concept of how much heat you're pulling up into the torch (EP), is the cleaning of the oxide film, and is the same universally regardless of how it's measured.gotwelds wrote:the green works decently but I agree with you that perhaps the red would work better. I watched a video in which the welder used DC to ball up the end of the tungsten using a red electrode and then switched to AC. how do you ball it up on red with DC?? use no gas? or what? that part confused me.Nils wrote:I apologize, I misread the OP, it is an Eastwood unit not an Everlast. But, the pure tungsten may not be compatible with the Eastwood inverter either. I would try some Red coated or Blue and see how it does.
i understand that on AC the green electrode automatically balls up but I am not sure if the red does as well?
Everlast PowerTig 250EX, PowerTig 185 Micro, PowerArc 160STH, Miller Trailblazer 301G, Millermatic 140 Auto-Set
- MinnesotaDave
-
Weldmonger
-
Posts:
-
Joined:Sun Oct 27, 2013 10:57 pm
-
Location:Big Lake/Monticello MN, U.S.A.
I have an old school machine but I don't bother balling the electrode. It will ball as I weld anyway.gotwelds wrote:the green works decently but I agree with you that perhaps the red would work better. I watched a video in which the welder used DC to ball up the end of the tungsten using a red electrode and then switched to AC. how do you ball it up on red with DC?? use no gas? or what? that part confused me.Nils wrote:I apologize, I misread the OP, it is an Eastwood unit not an Everlast. But, the pure tungsten may not be compatible with the Eastwood inverter either. I would try some Red coated or Blue and see how it does.
i understand that on AC the green electrode automatically balls up but I am not sure if the red does as well?
I grind it, then put a flat spot on it then weld. I use 2% thoriated and 2% lanthanated.
But if you want to ball the tip, switch to DC+ and strike an arc, it will ball up quickly.
On DC- (used for steel) it maintains the sharp point.
Dave J.
Beware of false knowledge; it is more dangerous than ignorance. ~George Bernard Shaw~
Syncro 350
Invertec v250-s
Thermal Arc 161 and 300
MM210
Dialarc
Tried being normal once, didn't take....I think it was a Tuesday.
Beware of false knowledge; it is more dangerous than ignorance. ~George Bernard Shaw~
Syncro 350
Invertec v250-s
Thermal Arc 161 and 300
MM210
Dialarc
Tried being normal once, didn't take....I think it was a Tuesday.

No need to ball the tungsten even if you are using an transformer or solid state machine. Use green tungsten ground blunt and light up. The EP part of the cycle will ball it just fine and that way the ball will not be any larger than it needs to be. On an inverter, sharpen and blunt the very end and weld, just make sure the tungsten is not pure or zirconated. Practically any other tungsten will work for you. Red, Gray, Gold, Purple etc.
Return to “Tig Welding - Tig Welding Aluminum - Tig Welding Techniques - Aluminum Tig Welding”
Jump to
- Introductions & How to Use the Forum
- ↳ Welcome!
- ↳ Member Introductions
- ↳ How to Use the Forum
- ↳ Moderator Applications
- Welding Discussion
- ↳ Metal Cutting
- ↳ Tig Welding - Tig Welding Aluminum - Tig Welding Techniques - Aluminum Tig Welding
- ↳ Mig and Flux Core - gas metal arc welding & flux cored arc welding
- ↳ Stick Welding/Arc Welding - Shielded Metal Arc Welding
- ↳ Welding Forum General Shop Talk
- ↳ Welding Certification - Stick/Arc Welding, Tig Welding, Mig Welding Certification tests - Welding Tests of all kinds
- ↳ Welding Projects - Welding project Ideas - Welding project plans
- ↳ Product Reviews
- ↳ Fuel Gas Heating
- Welding Tips & Tricks
- ↳ Video Discussion
- ↳ Wish List
- Announcements & Feedback
- ↳ Forum News
- ↳ Suggestions, Feedback and Support
- Welding Marketplace
- ↳ Welding Jobs - Industrial Welding Jobs - Pipe Welding Jobs - Tig Welding Jobs
- ↳ Classifieds - Buy, Sell, Trade Used Welding Equipment
- Welding Resources
- ↳ Tradeshows, Seminars and Events
- ↳ The Welding Library
- ↳ Education Opportunities