DSM8 wrote:Oscar wrote:Yea small diameter round tubing is always tricky. I need to practice on some right now in fact

Try getting it shiny bright down to bare metal and use longer pieces on the transverse piece, and you will likely get better welds (less grayish oxidation). What size cup are you using? I'd use no smaller than #8 since there is no place for argon to get trapped like when doing corner/fillet joints.
I think it was a #8 with a gas lens. Also in an area with no drafts for the very reason you mentioned.
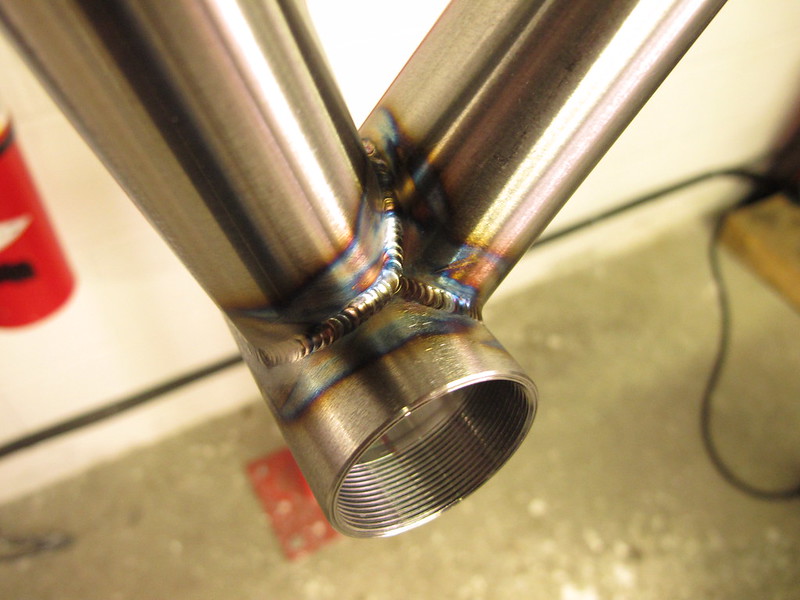
So then what DOES a good weld on this material look like?
even with video, it's hard to capture detail, so I'm not meaning to say it looks bad. Thing is, once you brush it, you remove all visible traces of oxidation. Not that it's a bad thing, not like it's stainless steel or anything.
Basically it should look like a nice clean carbon steel weld, somewhat shiny if there is enough gas coverage and post-flow.
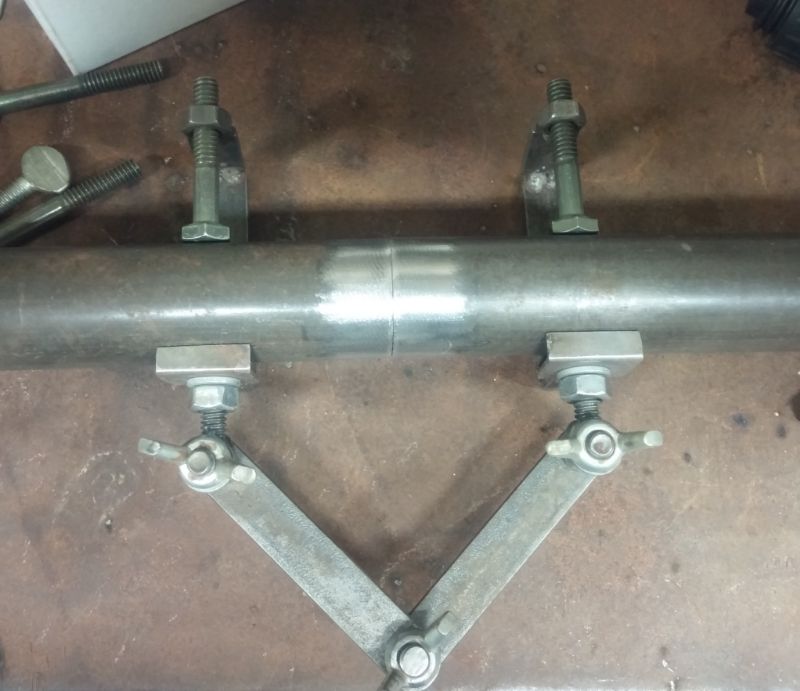
Edit: just whipped this up, from some pieces laying around....1-1/8" OD, 16ga wall
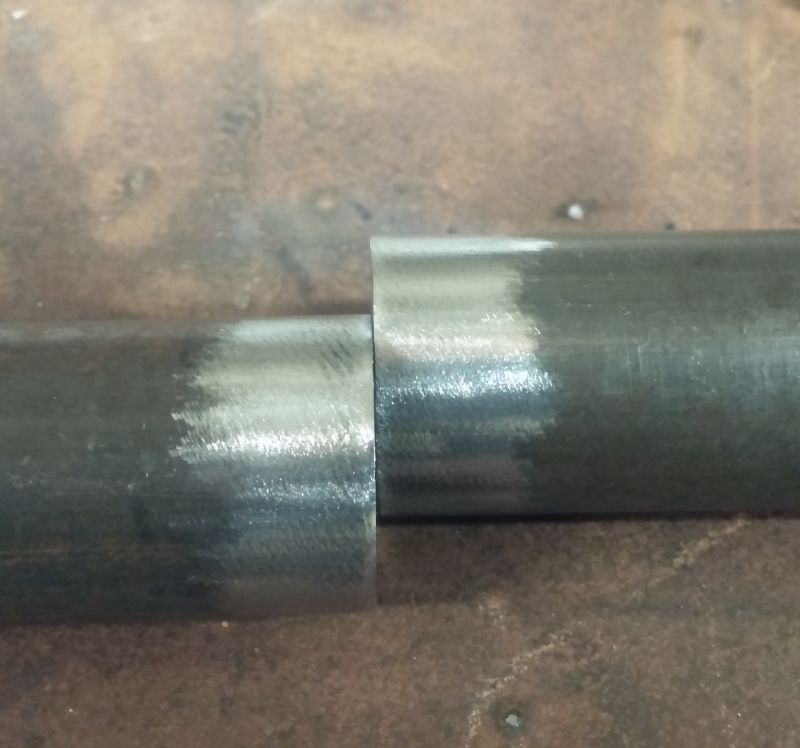
Clean and shiny witha roloc flapper
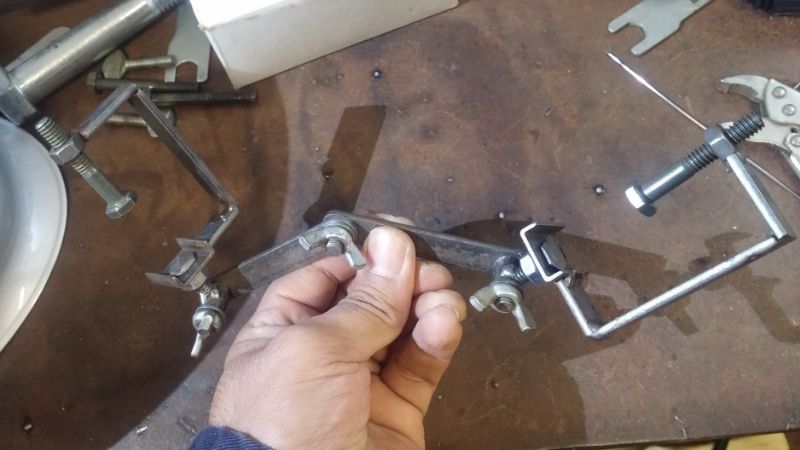
Holding them in a tube-holding jig-thingee I made for exhaust stuff
Small tacks around
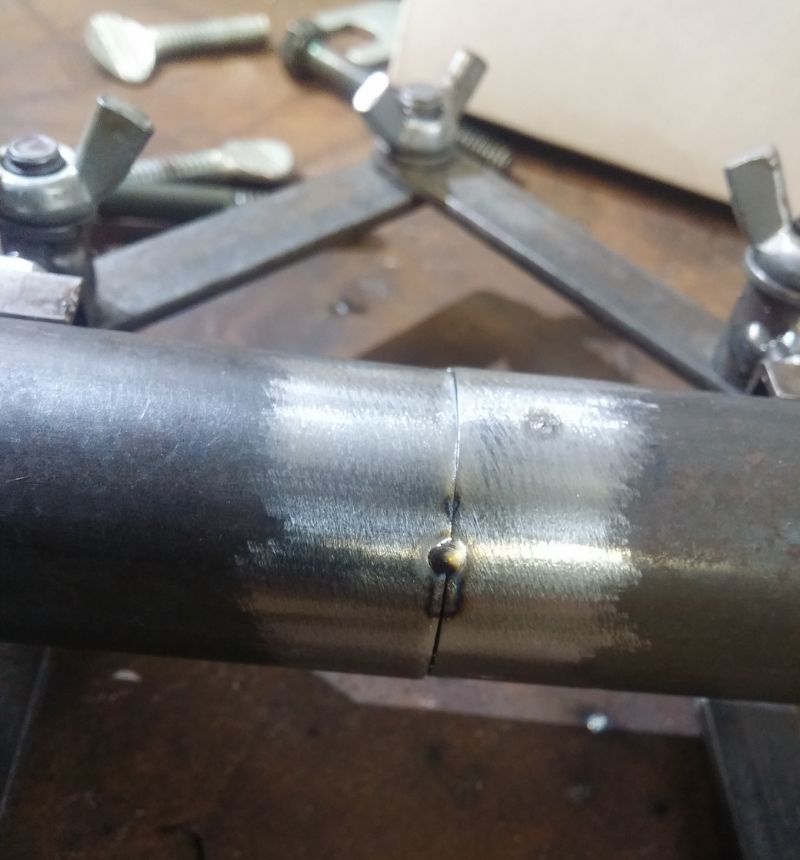
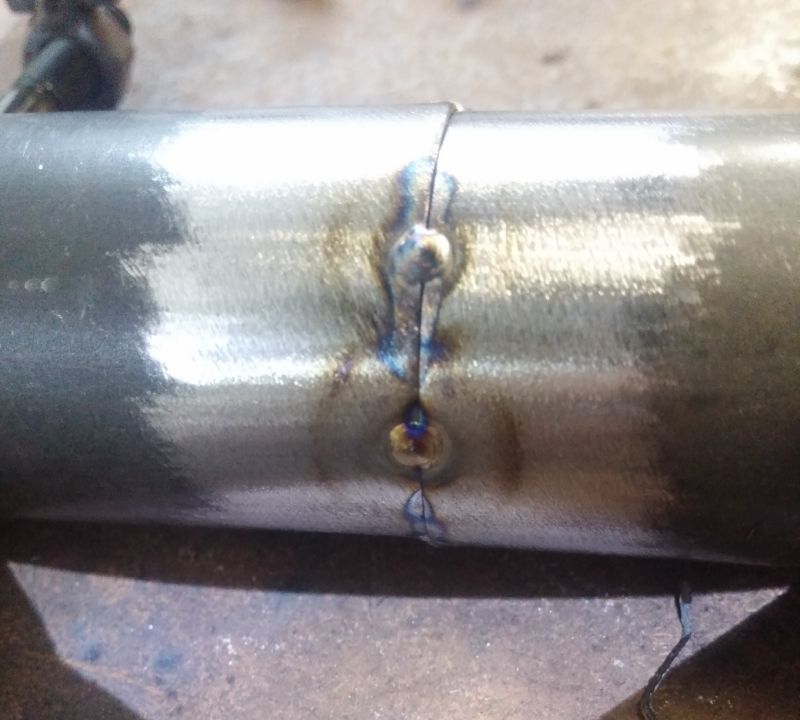
Doing about 1/2" around the tube before I had to re-position it, back-stepping. 60A on the welder, using foot-pedal, but no pulsing of any kind.
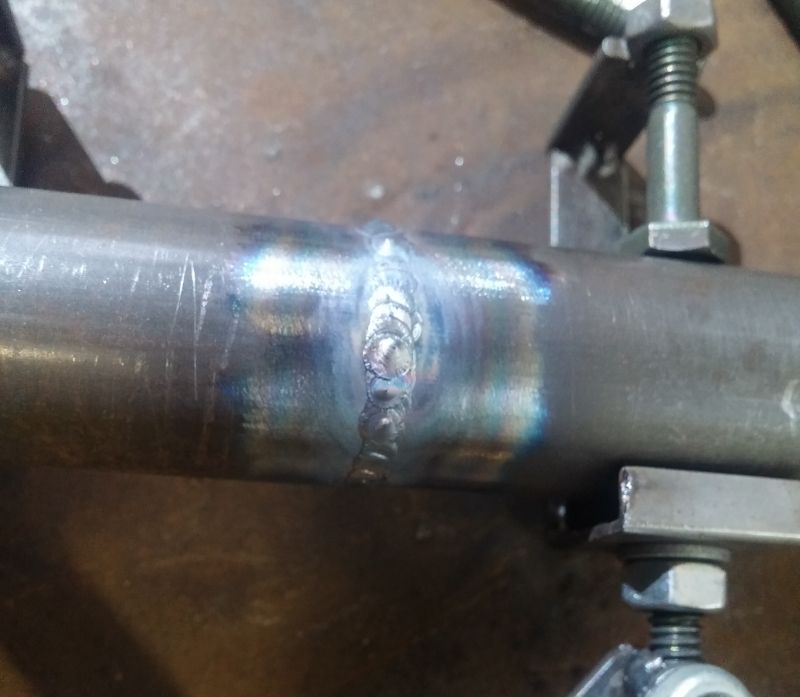
I used some ER70-S6 I had laying around just scotch-brite'd it and wiped it with acetone.
Yup, it's always a challenge, that's for sure!