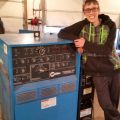
I bought a Miller Multimatic 200 Series a few months ago. I live on a farm/ranch and just wanted to learn welding instead of searching and hiring people when I needed something to be fixed/fabricated. Pretty much every night I have gone down to the barn and did random joining of scrap metals. I believe I was getting some success and the welds started to progressively look better. I decided I wanted to build a cart for my welder. I purchased 1.5 x 1.5 carbon steel tubing that is 1/8" thick. Again, I cut up a bunch of pieces and just practiced joining them together. When I got to the point that I believe I knew what I was doing I tried to attach the legs to a piece of plate (for the casters). The welds didn't look that great and I was able to break apart the part, regrind it and do it again. However, this time I took the machine off of automatic since it felt the wire was coming out to fast for me (or I am too slow?). I dropped the automatic speed of 255 wfs to 220 wfs where it felt controllable for me. I practiced on eight scrap pieces until I thought I had it down. I did a test part exactly as I would for the cart. Ground the welds to a furniture finish (this is the desire finish I want to learn) and then put it in a vice and whacked at it with a hammer until it came apart. Looking at the the separation it doesn't look like I'm getting good saturation (is that the right word?). I did ground down the tube to 45 edges before placing it on the plate (which I removed the mill scale) before welding thinking I would create more "bit" (again - I have no clue to the correct terminology). I've attached pictures of the failure. The machine settings are: 17V, 220 wfs, .030", 1/8" and I am using mixed gas. Any tips, pointers, corrections would be greatly appreciated!
Last edited by KEVCON on Sat Jun 02, 2018 2:01 pm, edited 1 time in total.
Increasing your wire feed speed is the equivalent to increasing the amps. Try about 18 v and 240 on the wire speed. There was a chart that got posted a while back showing the coralation between wire diameter/ feed speed/ and volts. I don’t have a link to post it but hopefully someone else will.
It is my experience that the MultiMatic “Autoset” parameters are pretty cold. It’s also critical that you set the correct diameter of wire you’re running. Your welds are cold, plain and simple. How far you’re holding the gun from the work does effect penetration.
It would also be a LOT better if you didn’t grind the fillet weld down so we can see the toes (edges of the welds). And if you do grind the weld for appearance, you are reducing its strength. I get you want “pretty”, but important that you make it strong first. Pretty comes later.
i agree with the above, its really cold. top pics show it well where the weld just lay on the surface of the tube and didn't penetrate at all.
you also see the rust/millscale. that does not help. clean the metal, it really does make things a lot easier. you want to be welding on nice bright shiny metal.
This is great stuff. I'll try these suggestions tonight when I get back home.
I do know I have the correct wire diameter set (.030) and I believe I have the right gas flow as well (I have a new flow meter that I want to install this weekend with the ball in the tube instead of the original needle valve).
Attached are the eight welds that I practiced on before performing the failed weld shown in the original post (marked 1 through 8 - 8 being the best). From a newbie standpoint I thought the beads were looking good. I had my face to the part, watching the bead and making sure it was touching/filling in the tube to the base plate. As for "stick out" (is that the right term) I think was no more than 1/2". I've been trying to get as close to the part as possible.
I did grind the mill scale off completely with a 60 grit wheel until is as shiny. I think what you see, which looks bad, is me just smoking the metal. Or could it be from me dropping the part into a bucket of water?
I'll move the voltage up incrementally until it looks right and do another destructive test. I'll also make sure the parts are super clean of any containment and that I bevel the part ends to get better "saturation" (right word?).
KEVCON wrote:
I'll move the voltage up incrementally until it looks right and do another destructive test. I'll also make sure the parts are super clean of any containment and that I bevel the part ends to get better "saturation" (right word?).
Remember though, volts are not penetration (depth of fusion). Saturation is not the right word.
Wire feed speed controls amps, which controls penetration.
Dave J.
Beware of false knowledge; it is more dangerous than ignorance. ~George Bernard Shaw~
Syncro 350
Invertec v250-s
Thermal Arc 161 and 300
MM210
Dialarc
Tried being normal once, didn't take....I think it was a Tuesday.
The faster the wire speed the better the penetration? Ugh...it just seems like the speed is running away from me. I guess it is back to practice, practice, practice. Thank you for the clarification on penetration (depth of fusion). I now understand "cold" as well, which is why my destructive testing broke so cleanly.
KEVCON wrote:The faster the wire speed the better the penetration? Ugh...it just seems like the speed is running away from me. I guess it is back to practice, practice, practice. Thank you for the clarification on penetration (depth of fusion). I now understand "cold" as well, which is why my destructive testing broke so cleanly.
It's about balance. Need enough amps (WFS) to penetrate. Need enough volts to run right.
Yes, cold meant not enough penetration (depth of fusion) so the bead just lays on the surface.
Very common incorrect weld when dealing with mig.
Dave J.
Beware of false knowledge; it is more dangerous than ignorance. ~George Bernard Shaw~
Syncro 350
Invertec v250-s
Thermal Arc 161 and 300
MM210
Dialarc
Tried being normal once, didn't take....I think it was a Tuesday.
KEVCON wrote:The faster the wire speed the better the penetration? Ugh...it just seems like the speed is running away from me. I guess it is back to practice, practice, practice. Thank you for the clarification on penetration (depth of fusion). I now understand "cold" as well, which is why my destructive testing broke so cleanly.
It's about balance. Need enough amps (WFS) to penetrate. Need enough volts to run right.
Yes, cold meant not enough penetration (depth of fusion) so the bead just lays on the surface.
Very common incorrect weld when dealing with mig.
and the kicker is that a cold weld that just lays on the surface can look perfect. thats why its always best to test welds rather than rely on appearance.
with mig its easy to do a good looking bad weld.
one of the reasons i much prefer to learn with stick.
To help yourself along, scribe a line on the plate and on the tube, equal distance from the seam, say 1/8" to 3/16". Do this on all 4 sides.
Now, start your arc aimed directly into the seam. Work the puddle to the scribed line on the flat plate, then whip up to the tube and allow the puddle to fill to the scribed line, then down to the flat plat, filling to the line, and so on.
This is designed to teach you that whatever you do to one side of a weld, you MUST do to the other. The scribed lines help guide you to loiter long enough to fill the weld and get the penetration needed and not worry so much about "pretty". It helps your timing and rhythm too. Flat, 1..2.., whip up, hold, 1...2..., whip down, hold, 1...2... and so on.
Soon you will begin to "see" the puddle actually burn into the base material and that will become your guide (reading the puddle) for heat control, timing, movement.
Personally, with 1/8" tubing, I'd be using 0.024 wire. 0.030 is a LOT of wire poking out of there darn quick. There can be no d!ck beating with MIG. Burn it and churn your weld.
I re-set my mig to 19V and 250. I think I had no problem with the speed this time. Maybe I can bump that up a little more. I do know that going from 17V to 19V caused three things in my newbie assessment: (1) The welder fan turned on a lot (fan?), (2) I got a lot of splatter that I was never getting before and (3) the welds looked different - flatter?
I welded the four sides. I put it into the vice and whacked away. Nothing gave (good sign).
I then ground down the outside welds and lightly ground the inside welds. I put it back in the vice and whacked away at it again. Nothing gave again.
I'm thinking I should turn down the voltage some? See if I can increase the speed where I can still control it? What do you think?
If you really want to see and understand the results, cut the leg of the tube off about 1” above the weld. Then, cut that section into 4 pieces. This will let you polish and etch the welds and base materials to see the resulting penetration, and any porosity you may have trapped.
Your welds look much better, but looks with MIG can be deceiving. Cut and etch is the truth every time.
Your last picture shows you ground the outside edge welds down flat. The fact that there’s only a hole at the end of your weld after the grinding shows that you got penetration. That’s good. Remember that mig will almost always have some spatter, it’s a side effect of the process.if you can lightly scrape or brush away the spatter with a wire brush then on that front it’s about as much as you can hope for with mig.
If you don't quit grinding all your weld metal away you're never going to get it strong enough to keep smacking it with a hammer. Step....away...from...the...grinder. Grinder is for prep, not finish. If there's more weld metal than you want, don't put so much in. You are in control of that. There's a reason why there is a standard for concave/convex welds. It provides strength and should follow the standard for a proper bead. If you're intent on testing it's strength by beating it, stop grinding all the metal away.
You're welding 1/8 to the thicker 5/8 plate. Your arc should strike the 5/8 first just off center of the weld line. You want to concentrate your heat to the thicker part so you penetrate both the thicker plate and the thinner. If you hit it directly in the middle, and you're set correctly, you'll blow through the 1/8th. If you aren't blowing through hitting it in the center, then it's way too cold and you'll never penetrate the 5/8. You set the machine for 1/8th, but you are welding 5/8 and should concentrate on that while letting the toes wet in on the 1/8th.
The second one you posted looks the best of the lot
It's a process of learning and you'll get it, but don't form bad habits early wanting to grind everything you weld. You should practice using the grinder for prep only. Once you have the welds done correctly you won't have to grind it. It'll lay in there with minimal excess and a quick shave will make it how you want. Keep practicing! Good luck.
1957 Lincoln Idealarc 300, Miller 211 v1 mig, Lincoln 3350, CK Worldwide CK17FV, 9FV
One1 wrote:
You're welding 1/8 to the thicker 5/8 plate. Your arc should strike the 5/8 first just off center of the weld line. You want to concentrate your heat to the thicker part so you penetrate both the thicker plate and the thinner. If you hit it directly in the middle, and you're set correctly, you'll blow through the 1/8th. If you aren't blowing through hitting it in the center, then it's way too cold and you'll never penetrate the 5/8. You set the machine for 1/8th, but you are welding 5/8 and should concentrate on that while letting the toes wet in on the 1/8th.
This is very true. But, you also must consider when you have something like 1/8” tubing welded to 5/8” pads, this is not a superior structural element. Thus, the absolute penetration into the 5/8” plate is not critical. If the tubes were to be a structural element into structural plate, I dare say the tubes would be a lot thicker material.
I don’t recall this practice being setup with 5/8” plate though...
Regardless of the thickness in reality. The weld if engineered would either be figured as a fillet, that would be unground. Or it would be gapped and full penetration. The weld only needs to be as thick as the thinner of the two metals, unless your engineering an over sized fillet for reinforcement of specific directional stresses. Or trying to spread out a stress load.


