I have been wanting to share some of the weldments I have the opportunity to work on and also wanted to start a thread similar to the "What I welded today/whenever" thread in the TIG section. So here it goes. Everyone share some of your MIG welded project pictures or show what you work on (if allowed).
These are test stands for a machine we have been prototyping for the past 5 years. 30" pipe will go through the holes on rollers. These are just elaborate roller stands similar and smaller to ones to be used in the final application. Each weighs 3300lbs, stands 12'-3" tall and is a royal pain in the rear to flip for welding!
-Jonathan
mig and flux core tips and techniques, equipment, filler metal
- Superiorwelding
-
Weldmonger

-
Posts:
-
Joined:Thu Jan 24, 2013 10:13 pm
-
Location:Eddy, TX
- Attachments
-
- test roller 2.JPG (85.55 KiB) Viewed 6207 times
-
- test roller.JPG (81.76 KiB) Viewed 6207 times
Instagram- @superiorwelding/@learntotig
Twitter- @_JonathanLewis
https://www.learntotig.com
https://www.superiorweldandfab.com
https://www.youtube.com/+SuperiorWeldin ... ATHANLEWIS
Twitter- @_JonathanLewis
https://www.learntotig.com
https://www.superiorweldandfab.com
https://www.youtube.com/+SuperiorWeldin ... ATHANLEWIS
- Braehill
-
Weldmonger

-
Posts:
-
Joined:Sat Jul 06, 2013 11:16 am
-
Location:Near Pittsburgh,Pennsylvania. Steel Buckle of the Rust Belt
This younger generation seems fixated on building roll cages, I focus my efforts on learning to stay upright.
Len
Sent from my iPhone using Tapatalk
Len
Sent from my iPhone using Tapatalk
Now go melt something.
Instagram @lenny_gforce
Len
Instagram @lenny_gforce
Len
- Superiorwelding
-
Weldmonger

-
Posts:
-
Joined:Thu Jan 24, 2013 10:13 pm
-
Location:Eddy, TX
Maybe we are installing them for fear of the older driversBraehill wrote:This younger generation seems fixated on building roll cages, I focus my efforts on learning to stay upright.
Len
ZfrkS62- Looks like you are doing good. What are you using the Corolla for? I have mentioned this before, but I hope to install a cage some day, looks like a challenge to be conquered!
Instagram- @superiorwelding/@learntotig
Twitter- @_JonathanLewis
https://www.learntotig.com
https://www.superiorweldandfab.com
https://www.youtube.com/+SuperiorWeldin ... ATHANLEWIS
Twitter- @_JonathanLewis
https://www.learntotig.com
https://www.superiorweldandfab.com
https://www.youtube.com/+SuperiorWeldin ... ATHANLEWIS
- Braehill
-
Weldmonger

-
Posts:
-
Joined:Sat Jul 06, 2013 11:16 am
-
Location:Near Pittsburgh,Pennsylvania. Steel Buckle of the Rust Belt
@Jonathan,
In my mind the most feared driver should be the old man who has taken his Viagra on the way home from the drugstore on the other side of town
@ZfrkS62,
I don't see those little links in that roll cage for hooking up a car seat so it probably will not be 50 state legal soon if big brother has anything to say. . Nice job though.
Len
In my mind the most feared driver should be the old man who has taken his Viagra on the way home from the drugstore on the other side of town
@ZfrkS62,
I don't see those little links in that roll cage for hooking up a car seat so it probably will not be 50 state legal soon if big brother has anything to say.
Len
Now go melt something.
Instagram @lenny_gforce
Len
Instagram @lenny_gforce
Len
Chumpcar/24 Hours of Lemons mainly. Local SCCA has created a slot in Improved Touring for the crapcan racers to fit into. Fittingly, they named it IT-J (Improved Touring JunkerSuperiorwelding wrote:Maybe we are installing them for fear of the older driversBraehill wrote:This younger generation seems fixated on building roll cages, I focus my efforts on learning to stay upright.
Len
ZfrkS62- Looks like you are doing good. What are you using the Corolla for? I have mentioned this before, but I hope to install a cage some day, looks like a challenge to be conquered!
- Superiorwelding
-
Weldmonger

-
Posts:
-
Joined:Thu Jan 24, 2013 10:13 pm
-
Location:Eddy, TX
I had to cut down 12 exhaust systems for some CAT engines. I made this manual positioner a year or two ago out of scrap and use it for little jobs like this. Works very well if you don't want to set up on positioner. I have bronze welded inside the pipe for better contact. Only draw back is it can get hot when used a lot. I simple tacked it to a piece of scrap tube and tacked the exhaust on. Using my left hand, rotated it away from me and it worked very well. I didn't even think to get a picture of one done. Sorry.
-Jonathan
-Jonathan
- Attachments
-
- manual positioner.JPG (138.21 KiB) Viewed 6095 times
Instagram- @superiorwelding/@learntotig
Twitter- @_JonathanLewis
https://www.learntotig.com
https://www.superiorweldandfab.com
https://www.youtube.com/+SuperiorWeldin ... ATHANLEWIS
Twitter- @_JonathanLewis
https://www.learntotig.com
https://www.superiorweldandfab.com
https://www.youtube.com/+SuperiorWeldin ... ATHANLEWIS
nickwarner
- nickwarner
-
New Member

-
Posts:
-
Joined:Thu Jan 09, 2014 4:12 pm
Superiorwelding, Are your edges radiused where the strap goes through it? A somewhat sharp edge could slice right into that strap. Straps give no warning before they fail. Had a splice place on a tub girder bridge come crashing down a few months back because the strap rubbed the plate on the upper flange and cut it. Thankfully no injuries to my guys that were installing it but it can happen. I've only been back on the floor for 2 weeks this year and on restrictions still due to a piece of c-channel breaking several bones in my foot. With 3300 pounds on tap it has the potential to be a widowmaker and the insurance guys and OSHA dicks wouldn't be nice to your boss for that.
Just something to look at. I would rather read future posts from you than an obituary and we all know in this industry the only things that can't kill you can still maim the hell out of you. Perhaps some old carpet remnants to cushion where the strap contacts the edges might be in order. Cheap to have, easy to use. We lift completed bridge sections that weight 190,000 pounds with straps and have carpet chunks around for edge protectors on every lift. Works great. Never been an incident.
Nice job on the fab work. I really need to get a camera. Just finishing a big job for Green Bay and this summer have an arch bridge for Kentucky. Some rather boring plate girders to fill in the time for Ohio DOT but for those of you that have never seen SAW done I'd like to get some video. Imagine never seeing the arc and welding without a welding hood on. Its a weird thing.
- Superiorwelding
-
Weldmonger

-
Posts:
-
Joined:Thu Jan 24, 2013 10:13 pm
-
Location:Eddy, TX
nickwarner,
First I will say that I appreciate your concern on my, as well as others safety! Yes all corners are radiused and put in a position where they would have the least amount of strain. These straps were also brand new. Also know that when a cover on our straps is cut or burned/melted in any way, it goes in the trash. We take safety very seriously! I want to be around for many more years as well.
Get some pictures up if you are allowed, would like to see some of your work. Thanks again.
-Jonathan
Instagram- @superiorwelding/@learntotig
Twitter- @_JonathanLewis
https://www.learntotig.com
https://www.superiorweldandfab.com
https://www.youtube.com/+SuperiorWeldin ... ATHANLEWIS
Twitter- @_JonathanLewis
https://www.learntotig.com
https://www.superiorweldandfab.com
https://www.youtube.com/+SuperiorWeldin ... ATHANLEWIS
Very cool, brings back memories of big lifts when I was on the rail. I always liked to put something between the straps and its contact points also. Only takes an extra second and provides some extra piece of mind.
Edited to add: any close ups on the cage?
Edited to add: any close ups on the cage?
Wes917 wrote: Edited to add: any close ups on the cage?
This is all I have on this computer. I have to find the flash drive with everything else on it.
[attachment=0]1392084084292.jpg[/attachment
- Attachments
-
- 1392084084292.jpg (24.63 KiB) Viewed 2563 times
Greg From K/W
- Greg From K/W
-
Ace

-
Posts:
-
Joined:Sun Nov 27, 2011 8:55 pm
That is some cool stuff. I hope to be doing big stuff like that brace. Glad your work is so aware of safety hazards.
- Superiorwelding
-
Weldmonger

-
Posts:
-
Joined:Thu Jan 24, 2013 10:13 pm
-
Location:Eddy, TX
I did some vertical up roots for a bracket the other day. It came out good except for the top where I didn't grind down the tacks before welding. Anyway thought I would share this with everyone. These were done on a 350MP using .045 wire and I think 160ipm and .94 trim.
Yes, I/we put safety as our top priority. I am not perfect, but I try my absolute best.
-Jonathan
Yes, I/we put safety as our top priority. I am not perfect, but I try my absolute best.
-Jonathan
- Attachments
-
- vertical up left.JPG (106.74 KiB) Viewed 2532 times
-
- vertical up.JPG (119.75 KiB) Viewed 2532 times
-
- vertical up right.JPG (101.96 KiB) Viewed 2532 times
Instagram- @superiorwelding/@learntotig
Twitter- @_JonathanLewis
https://www.learntotig.com
https://www.superiorweldandfab.com
https://www.youtube.com/+SuperiorWeldin ... ATHANLEWIS
Twitter- @_JonathanLewis
https://www.learntotig.com
https://www.superiorweldandfab.com
https://www.youtube.com/+SuperiorWeldin ... ATHANLEWIS
Greg From K/W
- Greg From K/W
-
Ace

-
Posts:
-
Joined:Sun Nov 27, 2011 8:55 pm
Hey nothing wrong with those welds. Look pretty dam good to me. I hope that I can pop things out looking that good once I get my mig up and running.
- Superiorwelding
-
Weldmonger

-
Posts:
-
Joined:Thu Jan 24, 2013 10:13 pm
-
Location:Eddy, TX
We have been working on this 30" pipe for testing purposes. There is 211'-6" sitting here with more to come. Once testing is done, this pipe will either be sent back or scrapped.
-Jonathan
-Jonathan
- Attachments
-
- test pipe.JPG (109.85 KiB) Viewed 2501 times
Instagram- @superiorwelding/@learntotig
Twitter- @_JonathanLewis
https://www.learntotig.com
https://www.superiorweldandfab.com
https://www.youtube.com/+SuperiorWeldin ... ATHANLEWIS
Twitter- @_JonathanLewis
https://www.learntotig.com
https://www.superiorweldandfab.com
https://www.youtube.com/+SuperiorWeldin ... ATHANLEWIS
- Superiorwelding
-
Weldmonger

-
Posts:
-
Joined:Thu Jan 24, 2013 10:13 pm
-
Location:Eddy, TX
Well I didn't get to finish these, I tacked them together and someone else came and took them to weld, but thought I would throw them up anyway. The center block on each is 6"x3.5"x4". These are all 1018 CR.
-Jonathan
-Jonathan
- Attachments
-
- tie bar ends 2.JPG (135.6 KiB) Viewed 2464 times
-
- tie bar ends.JPG (132.53 KiB) Viewed 2464 times
Instagram- @superiorwelding/@learntotig
Twitter- @_JonathanLewis
https://www.learntotig.com
https://www.superiorweldandfab.com
https://www.youtube.com/+SuperiorWeldin ... ATHANLEWIS
Twitter- @_JonathanLewis
https://www.learntotig.com
https://www.superiorweldandfab.com
https://www.youtube.com/+SuperiorWeldin ... ATHANLEWIS
- Superiorwelding
-
Weldmonger

-
Posts:
-
Joined:Thu Jan 24, 2013 10:13 pm
-
Location:Eddy, TX
Cricket,Cricket wrote:Do you preheat massive pieces like those or rely on "softness" of 1018? I am just qurious as I might have a similar project to weld soon.
Sorry for the delay in response. Yes we did pre-heat and post-heat these to 200*F. We only did this so there would be no chance of cracking and to allow a even cool down, eliminating stress points. 1018 does not normally need heated before weld, but we have found it best to take the chill out of very thick parts like this. Also the 1018 was chosen for the machining and strength.
As for the "softness" 1018 it actually has a higher tensile and yield strength than A36 and is less ductile.
-Jonathan
Instagram- @superiorwelding/@learntotig
Twitter- @_JonathanLewis
https://www.learntotig.com
https://www.superiorweldandfab.com
https://www.youtube.com/+SuperiorWeldin ... ATHANLEWIS
Twitter- @_JonathanLewis
https://www.learntotig.com
https://www.superiorweldandfab.com
https://www.youtube.com/+SuperiorWeldin ... ATHANLEWIS
- Superiorwelding
-
Weldmonger

-
Posts:
-
Joined:Thu Jan 24, 2013 10:13 pm
-
Location:Eddy, TX
Well I TIG welded these and didn't get a picture of the final product, but thought I would share a example of a proof of concept that I did for a local company. Can't tell you what it is (don't think you would guess it in a million years) but it is here for your looking.
-Jonathan
-Jonathan
- Attachments
-
- proof of concept 2.JPG (118.71 KiB) Viewed 2384 times
-
- proof of concept.JPG (131.12 KiB) Viewed 2384 times
Instagram- @superiorwelding/@learntotig
Twitter- @_JonathanLewis
https://www.learntotig.com
https://www.superiorweldandfab.com
https://www.youtube.com/+SuperiorWeldin ... ATHANLEWIS
Twitter- @_JonathanLewis
https://www.learntotig.com
https://www.superiorweldandfab.com
https://www.youtube.com/+SuperiorWeldin ... ATHANLEWIS
This piece of metal has seen 20 years of abuse.
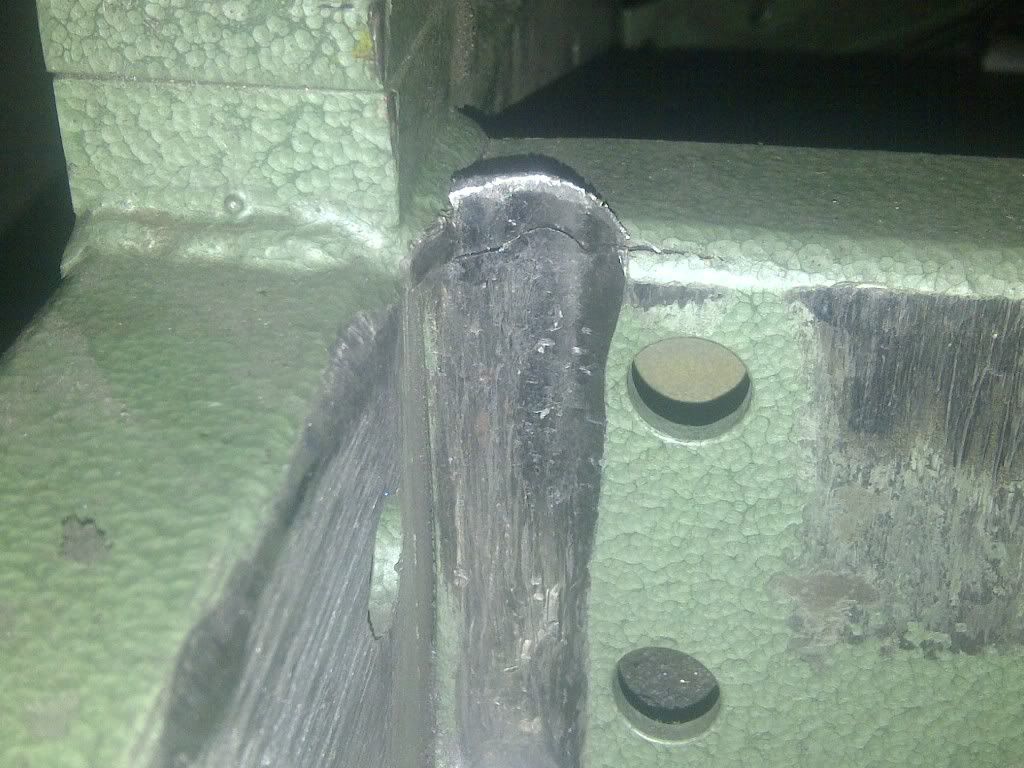
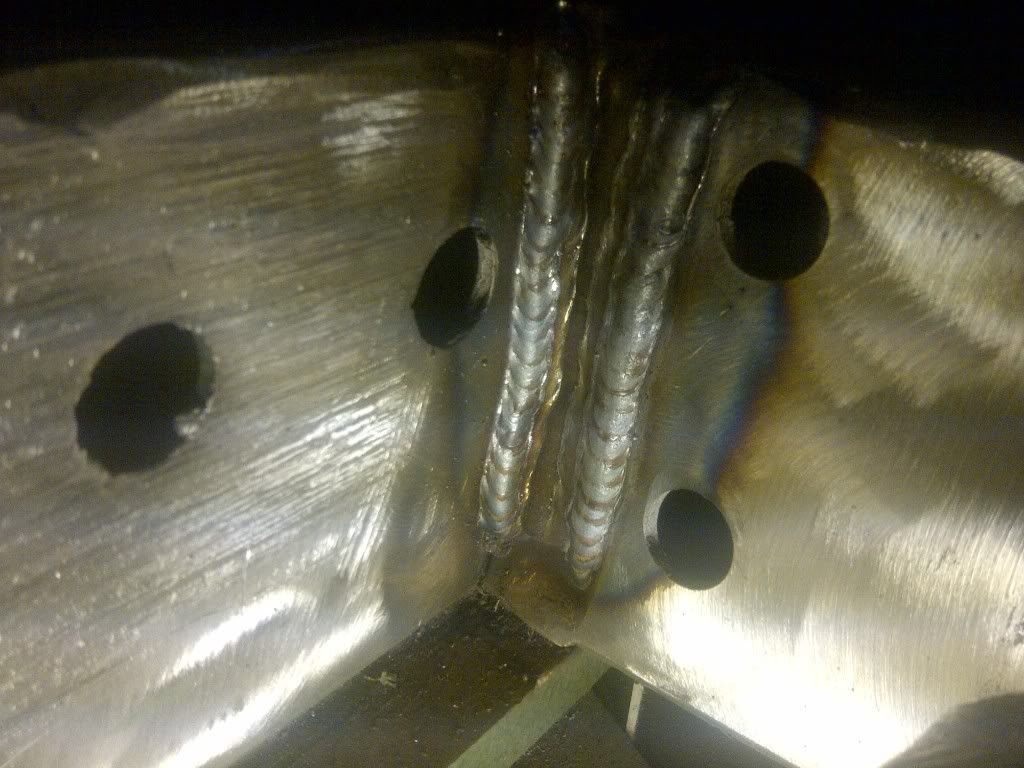
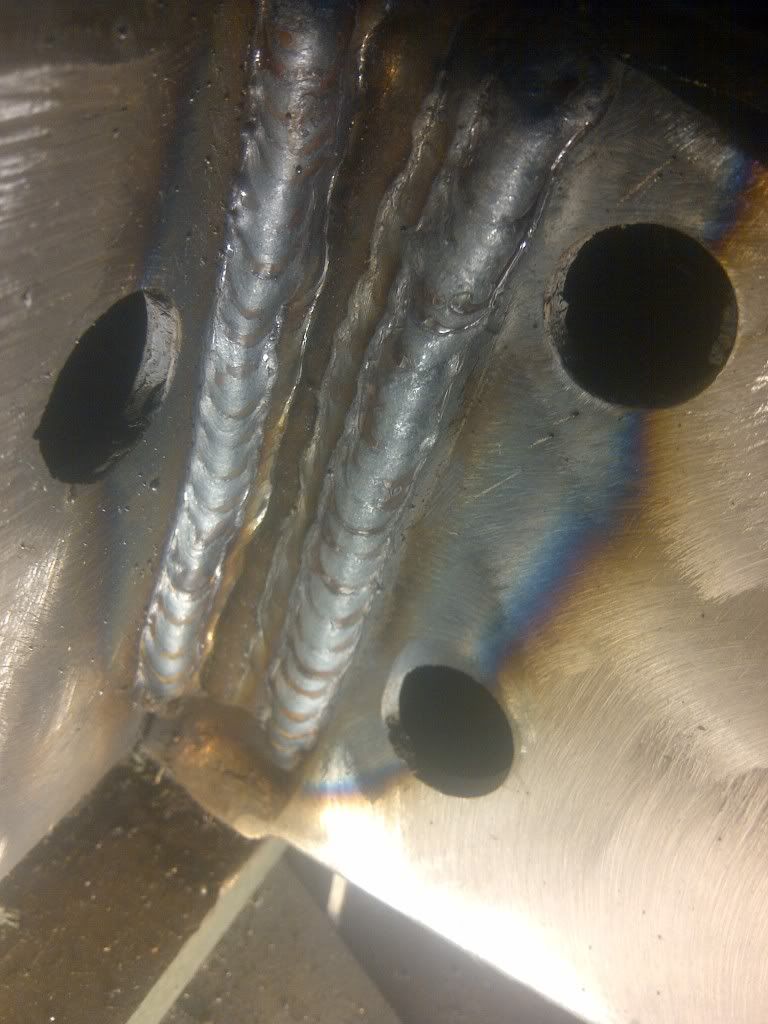
Mig was the choice because we had a 20 amp 120 plug, and I didn't want to chip the flux between passes. The wear is uneven so some half passes and some full passes with some grinding to achieve size was required. The Lincoln 140 did well for this job. The base material is about 10 gauge (3.5mm). The machine is at its Max. but being a build up weld and not a structural weld I was not concerned. I have limited Mig experience (only ran about 5lbs of wire before this job), but lots of Tig and stick.
More pics.
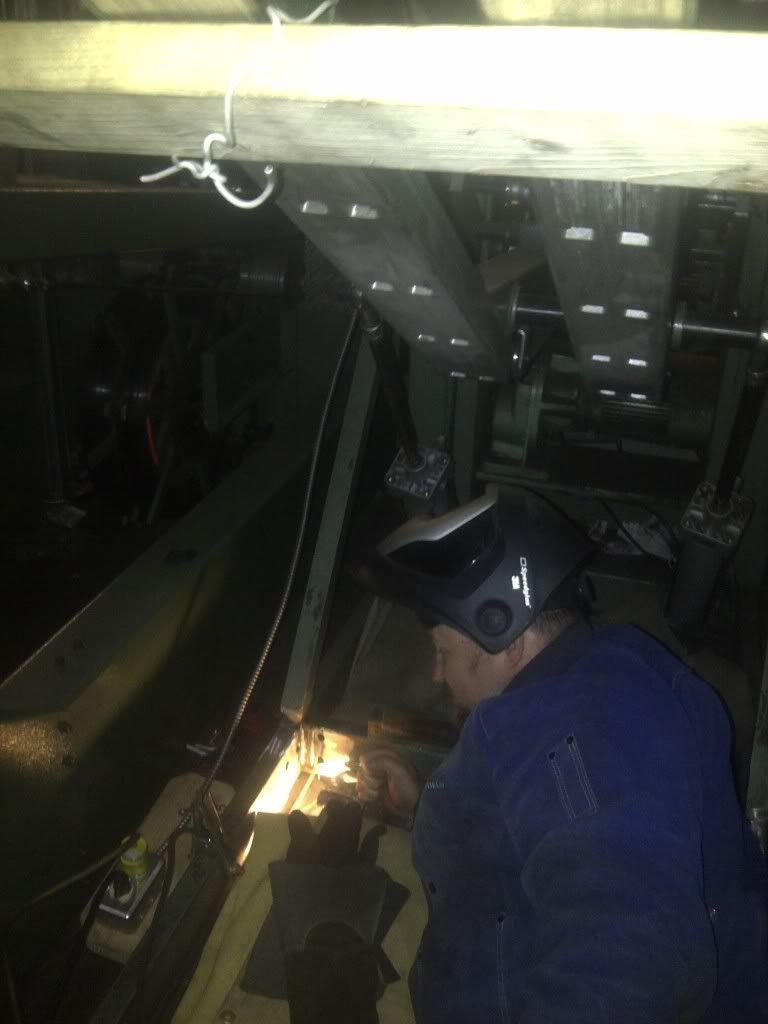
Laying down on the job.
The one weld that wasn't vertical up.
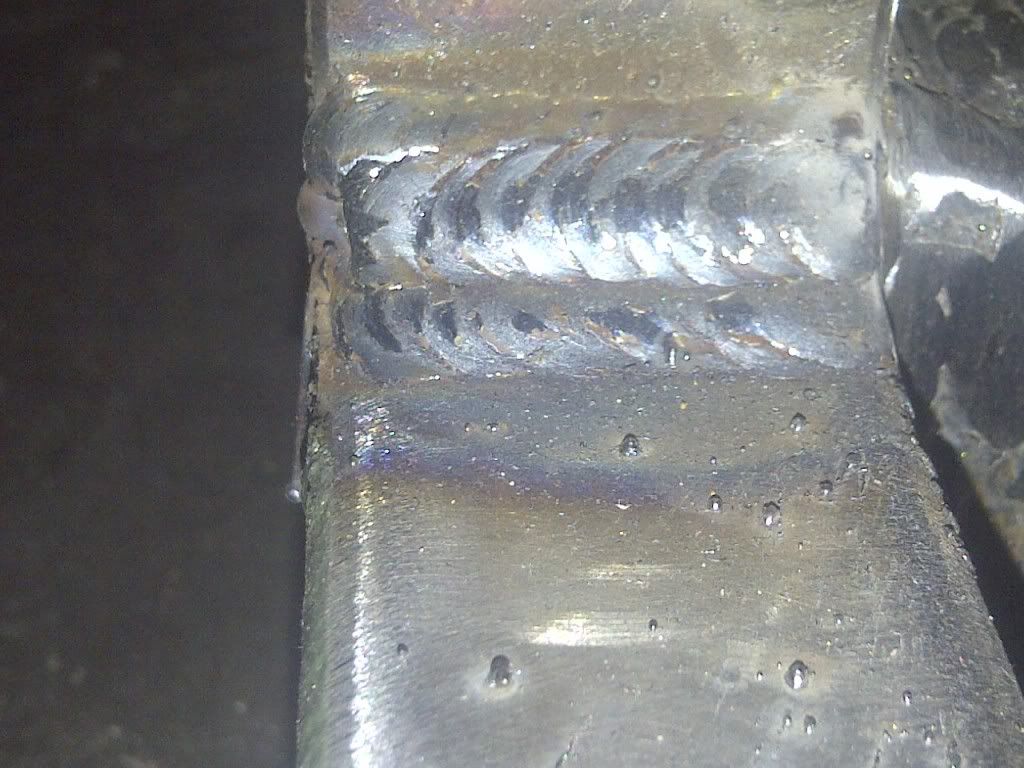
End result. I had to grind it for fit, not for cosmetics.
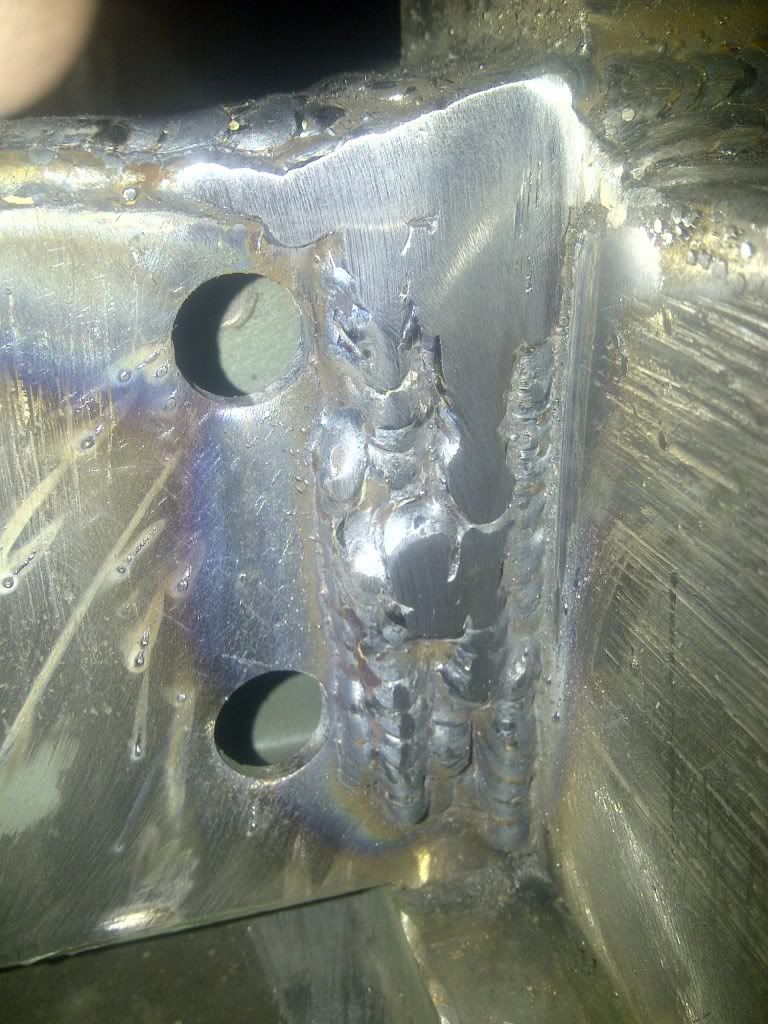

Mig was the choice because we had a 20 amp 120 plug, and I didn't want to chip the flux between passes. The wear is uneven so some half passes and some full passes with some grinding to achieve size was required. The Lincoln 140 did well for this job. The base material is about 10 gauge (3.5mm). The machine is at its Max. but being a build up weld and not a structural weld I was not concerned. I have limited Mig experience (only ran about 5lbs of wire before this job), but lots of Tig and stick.
More pics.


Laying down on the job.

The one weld that wasn't vertical up.

End result. I had to grind it for fit, not for cosmetics.

- Superiorwelding
-
Weldmonger

-
Posts:
-
Joined:Thu Jan 24, 2013 10:13 pm
-
Location:Eddy, TX
Hey for the little mig you have done, those are great vertical ups! I believe that will hold for a long time.
-Jonathan
-Jonathan
Instagram- @superiorwelding/@learntotig
Twitter- @_JonathanLewis
https://www.learntotig.com
https://www.superiorweldandfab.com
https://www.youtube.com/+SuperiorWeldin ... ATHANLEWIS
Twitter- @_JonathanLewis
https://www.learntotig.com
https://www.superiorweldandfab.com
https://www.youtube.com/+SuperiorWeldin ... ATHANLEWIS
Thank you! I have noticed a difference with the little welder plugged into a 20amp vs a 15amp plug. Also, the shiney steel is way better than mill scale when you are pushing the welders limits. Like I say, I have maybe 10lbs of Mig wire under my belt now. The welds look better now than they did a week ago.
- Superiorwelding
-
Weldmonger

-
Posts:
-
Joined:Thu Jan 24, 2013 10:13 pm
-
Location:Eddy, TX
You are progressing great. I need to get a 110 welder, would come in handy sometimes. Airgas is building a new facility here and is supposed to be holding a welding competition at their open house. The prize is a little welder, maybe I will compete and hopefully walk home with a new welder.
-Jonathan
-Jonathan
Instagram- @superiorwelding/@learntotig
Twitter- @_JonathanLewis
https://www.learntotig.com
https://www.superiorweldandfab.com
https://www.youtube.com/+SuperiorWeldin ... ATHANLEWIS
Twitter- @_JonathanLewis
https://www.learntotig.com
https://www.superiorweldandfab.com
https://www.youtube.com/+SuperiorWeldin ... ATHANLEWIS
- AKweldshop
-
Weldmonger

-
Posts:
-
Joined:Wed Oct 23, 2013 3:30 pm
-
Location:Palmer AK
Superiorwelding wrote:You are progressing great. I need to get a 110 welder, would come in handy sometimes. Airgas is building a new facility here and is supposed to be holding a welding competition at their open house. The prize is a little welder, maybe I will compete and hopefully walk home with a new welder.
-Jonathan
Good luck Jonathan!!
Nothing more exciting then winning a prize....
~John
Just a couple welders and a couple of big hammers and torches.
Men in dirty jeans built this country, while men in clean suits have destroyed it.
Trump/Carson 2016-2024
Men in dirty jeans built this country, while men in clean suits have destroyed it.
Trump/Carson 2016-2024
Return to “Mig and Flux Core - gas metal arc welding & flux cored arc welding”
Jump to
- Introductions & How to Use the Forum
- ↳ Welcome!
- ↳ Member Introductions
- ↳ How to Use the Forum
- ↳ Moderator Applications
- Welding Discussion
- ↳ Metal Cutting
- ↳ Tig Welding - Tig Welding Aluminum - Tig Welding Techniques - Aluminum Tig Welding
- ↳ Mig and Flux Core - gas metal arc welding & flux cored arc welding
- ↳ Stick Welding/Arc Welding - Shielded Metal Arc Welding
- ↳ Welding Forum General Shop Talk
- ↳ Welding Certification - Stick/Arc Welding, Tig Welding, Mig Welding Certification tests - Welding Tests of all kinds
- ↳ Welding Projects - Welding project Ideas - Welding project plans
- ↳ Product Reviews
- ↳ Fuel Gas Heating
- Welding Tips & Tricks
- ↳ Video Discussion
- ↳ Wish List
- Announcements & Feedback
- ↳ Forum News
- ↳ Suggestions, Feedback and Support
- Welding Marketplace
- ↳ Welding Jobs - Industrial Welding Jobs - Pipe Welding Jobs - Tig Welding Jobs
- ↳ Classifieds - Buy, Sell, Trade Used Welding Equipment
- Welding Resources
- ↳ Tradeshows, Seminars and Events
- ↳ The Welding Library
- ↳ Education Opportunities

