What welding projects are you working on? Are you proud of something you built?
How about posting some pics so other welders can get some ideas?
TamJeff
  • Posts:
  • Joined:
    Tue Dec 04, 2012 4:46 am

This is just stuff I think is neat. The disappointing part of which, I suppose is, that most people don't notice it enough to care. Still doesn't stop me from doing it. It's the moment I manage to capture it, personally. I am sure many of you have built parts never to be seen again, or covered by something more important perhaps but still make it perfect regardless, just to do it, not once, but each and every time. When I was younger, I was around people who used to get off on these kind of things, and would respect it of each other without even having it pointed out specifically. Very few since, though. Things these days get hyped for much less and many of us fabricators just get lumped in with everyone else, regardless of skill and with an overall picture instead of the tiny details that make the whole picture nicer, even if the casual onlooker may not understand why, exactly.

And that is mostly why I am here on a welding forum among like minded people and posting pictures. Because to me, this is the fun part. Has nothing to do with bragging or needing attention. Most of us by now know we are good enough at what we do. I certainly enjoy noticing these things about others work, and they seem to enjoy it when I do happen to notice the extra attention to even the tiniest detail on their part. More than anything, is to perpetuate such attention to the details with others that it may never occur to, and that there is someone that will notice it.

These photos are of a most simple detail. You would essentially have to pinpoint it at eye level from every direction to notice that it is true. It is harder than it looks to achieve it by the mere science alone, and in fact, will defy the math with regard to the perception of the human eye.

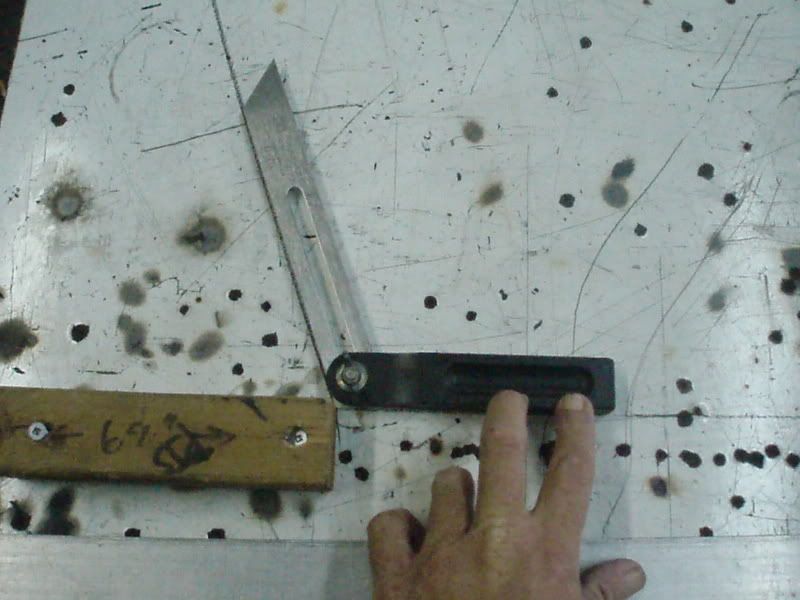
Basically what we have here is a rather simple boat tower. The two tubes that make part of the ladder, are also integral wire and control cable chases. This particular style is my trademark. Nobody else does these plumbing tubes like this. I do it because I hate blasting big through holes in the main structural tubes. . .the legs, if you will, or adding yet another large heat zone that amounts to fatigue with aluminum weldments onto the main support members. Also, where these tubes contact the horizontal members across the corner from the sides to the front brace above the truss, adds yet another significant gusset, a freebie at that. Most just run the plumbing tubes right through the main legs and pick them up on the other side with another pipe and they almost never match up and it irks me. In other words, it should look like one continuous run through. If they miss by even a little, it ends up looking broken, or like a different part altogether, an afterthought perhaps.

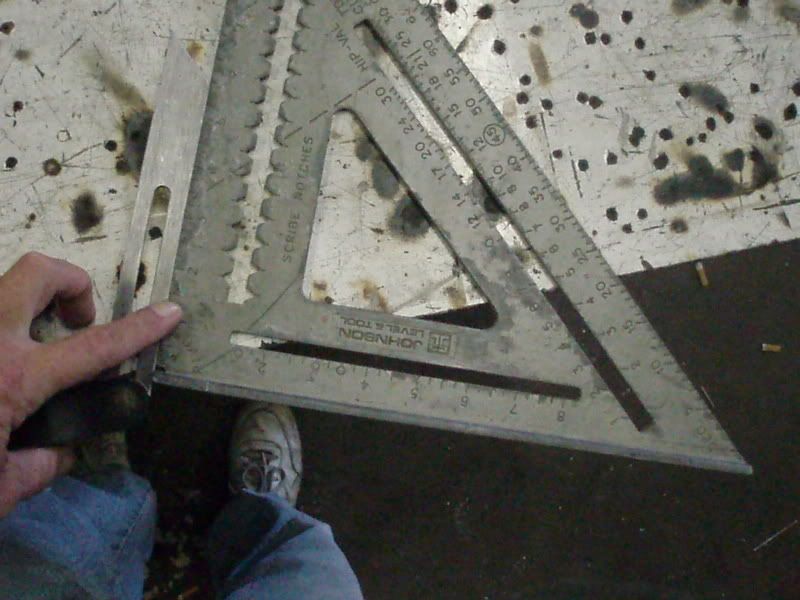
The angled tubes that stick up above the horizontal member is the part I am talking about. That member is the framing for the deck. These tubes are eventually cut off a 1/4" above that so that they disappear into the decking material.
Image

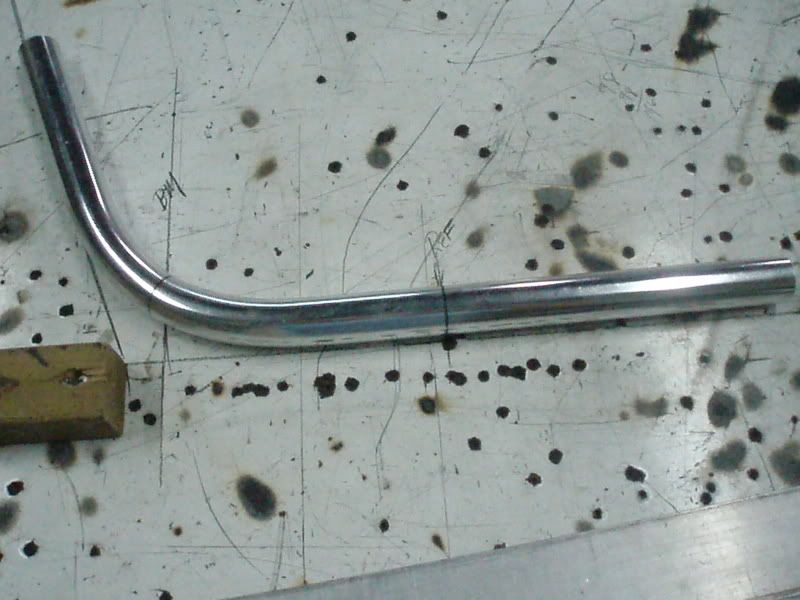
Here is how they project from the side view. The trick later on will be to pick these up all the way to the top seamlessly. Ideally, would be to make the whole part one piece, cut them where you needed, put the decking in and just put the pieces back with the thickness of the decking removed from the cut. Takes too much time though and is actually harder than making the tubes to match after the fact.

Image

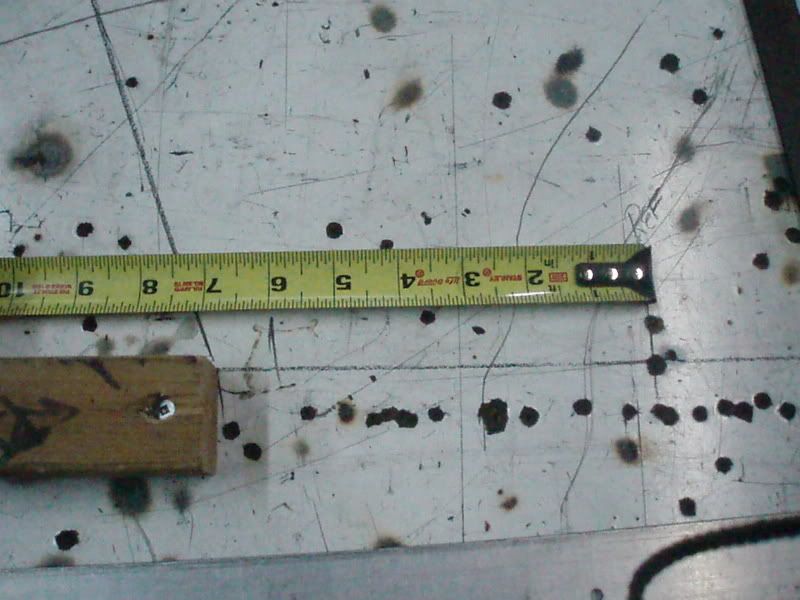
And here it is. I don't always have time to take all the photos of all the views. This boat was on it's way out so I grabbed them at the last minute. The plumbing tubes, ladder steps, cross members, right down to the little oval nipples in the trusses match from all angles, no matter where anyone could dare to look or measure. Most likely, the only other person that would ever notice would be another fabricator, but so what, it's fun stuff. And those of you who are fabricators, know how nice it is to land these simple little details just for your own satisfaction, even if nobody else notices.
Image

Image
Miller ABP 330, Syncrowave 250, Dynasty 300 DX.
Honorary member of the Fraternity of Faded Tee Shirts.
delraydella
  • Posts:
  • Joined:
    Mon Apr 25, 2011 7:35 pm
  • Location:
    Detroit, MI

Very nice! You have a very good sense of style and symmetry. I think a lot of people will generally notice these things, they just may not be able to put their finger on what it is that makes one piece more aesthetic to them than a plain run of the mill factory produced piece. i have to think that today we are living in a minimalist , bottom line induced style of industrial design as opposed to other era's (Art Deco etc.) and creative touches are seen as expendable. People today aren't used to seeing things that are creative and functional, so they don't know how to react.
WeldingSyncrowave 250,Millermatic 252,30a Spoolgun Cutting12" Hi-speed Cutoff Saw, 9x 12 Horizontal Bandsaw MillingGorton 8d Vertical Mill TurningMonarch EE Precision Lathe GrindingBrown & Sharpe #5 Surface Grinder
TamJeff
  • Posts:
  • Joined:
    Tue Dec 04, 2012 4:46 am

The guy who does the rigging notices when it doesn't skin his wires and they just snake right through with minimal effort. The upper tubes have a flange welded that is 1/4 x 4" x 6" flat bar with countersunk holes that sandwich the deck material. That way they are removable in the event they need to service the wiring and it makes it easier to install as well. The best part about this work is you don't get dirty.You go home looking like you did when you arrived other than some sweat perhaps.

Now if I had a lathe, think of all the cool hardware one could make like these ball and socket alignment fittings. They're actually hollow. I don't know how easy they would be to make or if they could be made on a lathe but they are cool, nonetheless.
Image

Image
Miller ABP 330, Syncrowave 250, Dynasty 300 DX.
Honorary member of the Fraternity of Faded Tee Shirts.
delraydella
  • Posts:
  • Joined:
    Mon Apr 25, 2011 7:35 pm
  • Location:
    Detroit, MI

probably cold formed with a tube swager or an end forming machine. It could be done on a lathe,but you would have to start out with a solid piece or at the very least a very thick walled piece and turn it down, bore it out........very time consuming....
WeldingSyncrowave 250,Millermatic 252,30a Spoolgun Cutting12" Hi-speed Cutoff Saw, 9x 12 Horizontal Bandsaw MillingGorton 8d Vertical Mill TurningMonarch EE Precision Lathe GrindingBrown & Sharpe #5 Surface Grinder
CraigLam
  • Posts:
  • Joined:
    Sun Jun 17, 2012 1:52 pm

I seriously noticed it. I ordered my bending dye Friday. Pro-tools said that I will have it in about a week. I got a 7/8" x 3". And man, do I have questions. I finally got a reply from Frank, the inventer of the Takas Bender, and as soon as I finish painting it, he will post it on the web. Did you bend the tube? What kind of bender do you have? I noticed that one of the pipes goes from the top to the bottom and is not in a straight line. It's angled. When you look at the final photo, it fits perfect. You must have had a template. Anyway, I'm painting my bender black and will probably take some photos tomorrow. Very nice work.
TamJeff
  • Posts:
  • Joined:
    Tue Dec 04, 2012 4:46 am

Many times I will make a mock up by bending a piece of filler wire. I use an enerpac press bender. I have it mounted on a pedestal on a hinge so that I can use it both horizontally and vertically. The bender has a degree indicator on it. I have bent thousands of pipes so I can even guess how much to add for spring back. The best bit of information I can give is to say to make yourself a store of test bends of the most common angles with reference marks for the bend layout marks. This saves a LOT of sometimes rather involved math. On top of that, you are going to want to make yourself one of these. I call it a hip bender. Best to use white oak or another durable hardwood. The pipe that's mounted to it is in the event a part with two bends isn't flat. Stick one leg in the tube and put a stand under the other bend, slip a pipe over it and tweak it so the part is flat.
Image

I will draw my patterns out full size, then use an angle finder to get close.
Image

Then I will transfer this angle to the table and gauge it to an actual number in degrees with a speed square and use this number at the bender. That will get it close enough to where you can tweak it accordingly with the hip bender posted above. If you have to make multiple identical pieces, fit one to your drawing and then match the next part by laying it against the first one you bent. If your parts all have multiple bends, bend the first bend in all the parts first, match them with each other, then the 2nd bend in each part etc. If you bend all the bends into the first piece at once, you can't match them very easily.
Image
Last edited by TamJeff on Mon Jan 07, 2013 6:14 am, edited 2 times in total.
Miller ABP 330, Syncrowave 250, Dynasty 300 DX.
Honorary member of the Fraternity of Faded Tee Shirts.
TamJeff
  • Posts:
  • Joined:
    Tue Dec 04, 2012 4:46 am

This is so fast and consistent and it answers a lot of layout questions by using these test bends, plus gives you physical proof.

This is 3/4" sched 40. On the bender I use, it uses the center of the bend for the layout bend marks that you line up with the bender. On sizes up to 1" I use a standard 6" reference. There is two marks on this pipe. The reference mark is 6" away from the actual bend mark. To make the test bends, I take the straight piece of pipe and measure it. This makes it to where you can also use the test bend to figure out the lengths of pipe it takes to make the part. This pipe is 28" and labeled as such. That way I know where this 28" fits and I can put a mark at each end just add the distances that are left between these marks for a total. Otherwise, you will need a calculator and that's just more room for error.

I can set this test bend in, transfer the reference mark to the table and then just measure 6" for the actual bend mark. Then you just set your pipe for the actual part on your layout, and transfer the real bend mark right on to it. Bend that one, tweak it till it fist the layout perfectly, and then you can transfer subsequent bend marks if you have multiple bends.
Image

Image
Miller ABP 330, Syncrowave 250, Dynasty 300 DX.
Honorary member of the Fraternity of Faded Tee Shirts.
CraigLam
  • Posts:
  • Joined:
    Sun Jun 17, 2012 1:52 pm

Tamjeff, that is exactly what I wanted to know. I'm gonna print this and keep it as a reference. I have to call Pro-Tools and find out exactly when the die is coming. Here in Southern Cal. there is an epidemic of flu, which I caught. I'm a little better, now, and will probably go out to the shop and take some photos. Another question. As a woodworker I've worked with white oak a lot and I want to have more dies. I don't know the technology that goes onto a bending die. I would assume that the die is a true circle. I have a wood lathe and could make any size die. Is there a special high tech design that goes into a die or is it really just a circle?
TamJeff
  • Posts:
  • Joined:
    Tue Dec 04, 2012 4:46 am

Depends on what type of bender it is. On a press bender that starts at the center of a bend, yes. in that situation, a 90 degree die will usually have 105 degrees of a circle so that the ends of the die don't crease the inside ends the bend. On an draw type that uses either a wiper die or a follow bar that starts from the beginning of a bend, it will typically include a straight section (about 3") at the beginning that the pipe can be clamped to. Each pipe size will have an ideal radius of bend that conforms more naturally with regard to it's O.D. and wall thickness, type of material etc or at least a minimum. The smaller radius you use, the more it distorts the O.D. of the pipe and the more robust the dies need to be. The shoulders of the groove in the die should be at least half of O.D of the pipe in which to contain the pipe walls as it distorts. Anything beyond that should be chamfered so that you can get the pipe out of it once it is bent. Even still, it will likely need to be knocked out of the die. As the dies become broken in over time, it becomes easier to get the pipe out of them. On steel or aluminum dies, it should be ever so slightly larger than the O.D. of the pipe, at least near the shoulders.
Miller ABP 330, Syncrowave 250, Dynasty 300 DX.
Honorary member of the Fraternity of Faded Tee Shirts.
User avatar
  • Posts:
  • Joined:
    Thu Jan 06, 2011 11:40 pm
  • Location:
    Near New Orleans

People are programmed to notice symmetry, though they're not usually aware of it.

Studies of what we find attractive in the opposite sex show two of the biggest factors are symmetry, and fitting the "golden mean", which an elegant curve may do.

It's in our nature to recognize beauty, whether in people, in art, in nature, or in architecture.
User avatar
  • Posts:
  • Joined:
    Tue Jun 26, 2012 8:05 pm

The 'Golden Ratio' is also known as phi
and is used extensively in photography.


Otto Nobedder wrote:People are programmed to notice symmetry, though they're not usually aware of it.
Studies of what we find attractive in the opposite sex show two of the biggest factors are symmetry, and fitting the "golden mean", which an elegant curve may do. It's in our nature to recognize beauty, whether in people, in art, in nature, or in architecture.
TamJeff
  • Posts:
  • Joined:
    Tue Dec 04, 2012 4:46 am

Otto Nobedder wrote:People are programmed to notice symmetry, though they're not usually aware of it.

Studies of what we find attractive in the opposite sex show two of the biggest factors are symmetry, and fitting the "golden mean", which an elegant curve may do.

It's in our nature to recognize beauty, whether in people, in art, in nature, or in architecture.
That's likely truer than not. Especially the part about not being aware of it. Also, sometimes the eye is deceiving. Something can be perfectly and scientifically aligned and it will look wrong sometimes, parallax error and all that considered.
Miller ABP 330, Syncrowave 250, Dynasty 300 DX.
Honorary member of the Fraternity of Faded Tee Shirts.
CraigLam
  • Posts:
  • Joined:
    Sun Jun 17, 2012 1:52 pm

The info your giving me is priceless. The dies I'm buying, Pro-Tool 105, are specifically made for the Takas Bender. It's probably better if I buy the ones I need and maybe make one for a larger diameter. I didn't get the opportunity to get to the garage today. Literally, everyone in our apartment building is sick, including me. Hopefully, I'll feel better tomorrow.
TamJeff
  • Posts:
  • Joined:
    Tue Dec 04, 2012 4:46 am

There is a lot of math associated with bending/fitting, just considering the formula around gains and losses for each size of pipe alone. When I started where I am at now, they had a guy there with a scientific calculator just going to town on it constantly. Yes, it is good to know because you do need it sometimes, but, with using test bends for most general type of fab, including what I have shown here, it has to be at least 4 times faster, not to mention you get a physical model of the area of concern, how it fits in the pattern etc. After that, you will develop your own formulas with regard to your specific bender and the the other important numbers you will memorize.

There is always a lot of drops with pipe. I use them for test bends for all my parts and it is like getting a new tool. The truss for instance in the photos is 84 degree bend and is almost always that because of the angle I use personally so I made a test bend labeled "truss". I have a 90 and a 45 for each pipe size and others specifically for repetitive parts. The best part is, when you need to show someone else, you can just hold the test bend in place and they will get the idea without trying to imagine it from a scale drawing. My boss frequently walks off with my test bends and I have to go hunt them down.

I also have a pro tool pneumatic bender and that's all I had when I started where I am at now. Found the enerpac new on Ebay for $1100 and I bid on it. Someone else beat my bid by $100 and it ended up being my boss!
Miller ABP 330, Syncrowave 250, Dynasty 300 DX.
Honorary member of the Fraternity of Faded Tee Shirts.
Post Reply