What welding projects are you working on? Are you proud of something you built?
How about posting some pics so other welders can get some ideas?
spkrman15
  • Posts:
  • Joined:
    Fri Mar 15, 2013 4:52 pm
  • Location:
    Gatineau Canada

hey guys,

I am building some metal steps and I would like some suggestions on how to control some warpage. All the steel is HR carbon steel, laser cut and 1/4" thick. The issue I am having, at least in the demo I made up for the customer is the plate that will be receiving the mohagany boards is warping. Now some of it was attributed to the shear cut from my supplier, but you can see where I welded it warped some more.

Template I built for customer approval
Image

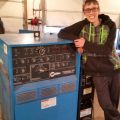
Here is a picture the customer provided as what they wanted as a final product
Image

I am welding with Lincoln mig 180. I weld from the outer edges to the center of the support.

I look forward to your suggestions.

Rob :)

P.S. I will post pictures as the project progresses
User avatar
  • Posts:
  • Joined:
    Wed Oct 23, 2013 3:30 pm
  • Location:
    Palmer AK

This man here is the best at building staircases.
Check the end of the thread for the completed pics.

http://weldingweb.com/showthread.php?42 ... highlight=
Just a couple welders and a couple of big hammers and torches.

Men in dirty jeans built this country, while men in clean suits have destroyed it.
Trump/Carson 2016-2024
Artie F. Emm
  • Posts:
  • Joined:
    Thu Jul 24, 2014 7:53 am

I can't get to the youtube link that AKWeldshop suggests (from this location). Would a different type of brace weld differently, and give a more favorable warp situation? I see all those triangular openings under each tread and all I can think is: stuff will get in there. Dust, carpet fuzz, lint. Or in my house, small toys. If it rains on Easter Sunday, a great place to hide eggs for the indoor egg hunt. Not sure what that alternate design would be so I can't suggest anything better right at this minute, just thinking out loud.
Dave
aka "RTFM"
spkrman15
  • Posts:
  • Joined:
    Fri Mar 15, 2013 4:52 pm
  • Location:
    Gatineau Canada

@AK weldshop,
Cool link, the steps he is making are bent and those edges will help battle warpage. (in my experience). Really nice welds as well

@ Artie fin
HAha, true. Everything will get caught in the triangles. I left some distance from the stringer to help battle that. Also this isn't my house and I won't be cleaning it.

Thanks guys...I appreciate the feedback. :)

Rob :)
User avatar
  • Posts:
  • Joined:
    Sat Jul 06, 2013 11:16 am
  • Location:
    Near Pittsburgh,Pennsylvania. Steel Buckle of the Rust Belt

spkrman,
Since you've already welded a few you should be able to find the average deflection with a straight edge. Take a heavy piece of angle, maybe 3 x 3 x1/4 the length of the stringer and place a strip of metal (key stock comes to mind) whatever thickness the average deflection measured, plus a little, right in line with the weld on the top side and clamp the ends to the angle with a c-clamp. This should give the stringer the same amout of preset that will offset the warpage. Hope this makes sense.

Len
Now go melt something.
Instagram @lenny_gforce

Len
angus
  • angus

if you are lagging them in or bolting get a piece of wood and try fastening and see if they pull in.

after welding all risers, flip, hit plate with three pound hammer, check with straight edge.

clamp a piece of angle, as has been suggested but you probably would not even need the spacer.

don't particularly like the way the wings are tied into the stair but I am not climbing them.
probably would have had them formed in one piece so they laid across the square tube. like a wing. either precut for
angle of rise or cut to fit myself.

is it my aged eyes or is that stair in the photo all out of whack. or is it the pic? it's making me dizzy.
User avatar
  • Posts:
  • Joined:
    Fri Apr 01, 2011 10:59 pm
  • Location:
    Australia; Victoria

Or pre-set them the opposite way to the warping
User avatar
  • Posts:
  • Joined:
    Sat Jul 06, 2013 11:16 am
  • Location:
    Near Pittsburgh,Pennsylvania. Steel Buckle of the Rust Belt

Mick,
That's what I was suggesting, but the long drawn out version. :)

Len
Now go melt something.
Instagram @lenny_gforce

Len
spkrman15
  • Posts:
  • Joined:
    Fri Mar 15, 2013 4:52 pm
  • Location:
    Gatineau Canada

I was considering doing a second pass on the opposite side. Basically a blank pass to help correct the warp page. I have seen that done several times. Anyone have any experience with that?

Rob :)
User avatar
  • Posts:
  • Joined:
    Fri Apr 01, 2011 10:59 pm
  • Location:
    Australia; Victoria

Sorry Len. I read this hungover in bed this morning.
spkrman15
  • Posts:
  • Joined:
    Fri Mar 15, 2013 4:52 pm
  • Location:
    Gatineau Canada

Here are some pictures of the stairs and how they have progressed.

The metal has a 1.5" thick Mohogany tread on each one.

The finish is sandblasted with a coat of clear coat on each section.
Attachments
2nd view of the stairs installed
Stairs 2.JPG (26.79 KiB) Viewed 1543 times
1st view of the stairs installed
Stairs.JPG (27.85 KiB) Viewed 1543 times
User avatar
  • Posts:
  • Joined:
    Sun Oct 27, 2013 10:57 pm
  • Location:
    Big Lake/Monticello MN, U.S.A.

Braehill wrote:spkrman,
Since you've already welded a few you should be able to find the average deflection with a straight edge. Take a heavy piece of angle, maybe 3 x 3 x1/4 the length of the stringer and place a strip of metal (key stock comes to mind) whatever thickness the average deflection measured, plus a little, right in line with the weld on the top side and clamp the ends to the angle with a c-clamp. This should give the stringer the same amout of preset that will offset the warpage. Hope this makes sense.

Len
This will work fine.

If you want to correct after welding - take your oxy fuel torch and run an orange line on top of the plate where the weld is.

This will pull the plate up as it cools - pulls to the side your torch was on.

Check out this video "Mr. Shrink" for a little about why it works.

http://youtu.be/2vuGlcbDwKY
Dave J.

Beware of false knowledge; it is more dangerous than ignorance. ~George Bernard Shaw~

Syncro 350
Invertec v250-s
Thermal Arc 161 and 300
MM210
Dialarc
Tried being normal once, didn't take....I think it was a Tuesday.
motox
  • Posts:
  • Joined:
    Thu Nov 28, 2013 12:49 pm
  • Location:
    Delaware

dave
after watching that video i spent a half hour
trying to buy war bonds.
very good examples.
craig
htp invertig 221
syncrowave 250
miller 140 mig
hypertherm plasma
morse 14 metal devil
User avatar
  • Posts:
  • Joined:
    Sat Jul 06, 2013 11:16 am
  • Location:
    Near Pittsburgh,Pennsylvania. Steel Buckle of the Rust Belt

It looks like they're turning out pretty well. Which method of warparge control did you employ?

Len
Now go melt something.
Instagram @lenny_gforce

Len
spkrman15
  • Posts:
  • Joined:
    Fri Mar 15, 2013 4:52 pm
  • Location:
    Gatineau Canada

@ Len
I welded the opposite side of the original weld. I didn't want to do the preload method as I figured there would be inconsistencies with the set up (and my patience).

Step one (Verify the warpage)
The initial warpage
The initial warpage
Stairs crooked.jpg (28.89 KiB) Viewed 1505 times
Step 2 ( A line to guide my weld. I purposely went in the opposite direction of the first weld. Thanks Jody for the video on warpage)
Line to guide the weld
Stair chalk line.jpg (26.92 KiB) Viewed 1505 times
Step 3. (All the welds done)
Stairs with all the welds to straighten
Stairs welded to straighten.jpg (27.27 KiB) Viewed 1505 times
Step 4. (Grind off the welds...)
The straightening welds ground off
Stairs welds ground off.jpg (32.64 KiB) Viewed 1505 times
Step 5. Result!!! BooYAH
The result
The result
Stairs straight.jpg (27.75 KiB) Viewed 1505 times
Went pretty good and added about the time I estimated. That doesn't happen to often. I am usually WAY off LOL

Rob :)
spkrman15
  • Posts:
  • Joined:
    Fri Mar 15, 2013 4:52 pm
  • Location:
    Gatineau Canada

Here are some pictures of the project through the build

The view from the top
View from the top of the landing
Stair view from top.jpg (27.14 KiB) Viewed 1503 times
The view from underneath
View from underneath
Stair view from underneath.jpg (33.66 KiB) Viewed 1503 times
This is the powder coating from the paint shop. Sandblasted and cleared with a gloss finish.
Painted stairs
Painted stairs
Stairs paint finish.jpg (42.79 KiB) Viewed 1503 times
User avatar
  • Posts:
  • Joined:
    Fri Apr 01, 2011 10:59 pm
  • Location:
    Australia; Victoria

What kind of hand rail/banister will it have?
spkrman15
  • Posts:
  • Joined:
    Fri Mar 15, 2013 4:52 pm
  • Location:
    Gatineau Canada

Not sure yet. I know there will be glass involved but not sure of what look he wants. I told them I am interested in building the railing but not if they want every weld polished.

Got any suggestions?

Rob :)
User avatar
  • Posts:
  • Joined:
    Fri Apr 01, 2011 10:59 pm
  • Location:
    Australia; Victoria

Not really my area of expertise, but a free standing glass panel would fit your floating tread set up. Ones ive seen have a stainless post with clamps to hold the glass sheets.
User avatar
  • Posts:
  • Joined:
    Fri Apr 01, 2011 10:59 pm
  • Location:
    Australia; Victoria

What.....? Not a fan of this?Image
superclarkey
  • Posts:
  • Joined:
    Tue Apr 14, 2015 9:23 am
  • Location:
    United Kingdom, Birmingham

Interesting read and nice work :-)
spkrman15
  • Posts:
  • Joined:
    Fri Mar 15, 2013 4:52 pm
  • Location:
    Gatineau Canada

@ Superclarkey

thanks :)
Post Reply