What welding projects are you working on? Are you proud of something you built?
How about posting some pics so other welders can get some ideas?
Post Reply
TamJeff
  • Posts:
  • Joined:
    Tue Dec 04, 2012 4:46 am

I will have no worry when they cart me off to the old folks home. I will be the one to beat at the macaroni art table. :D

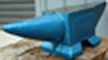
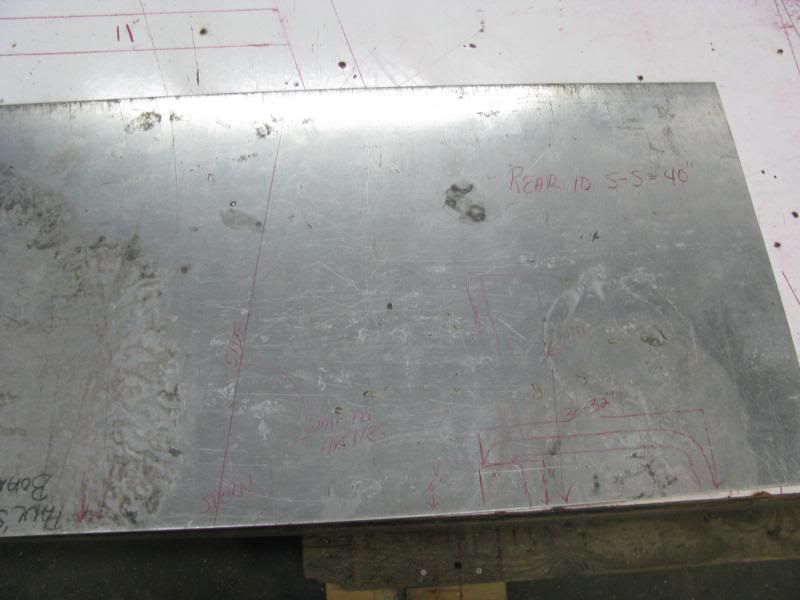
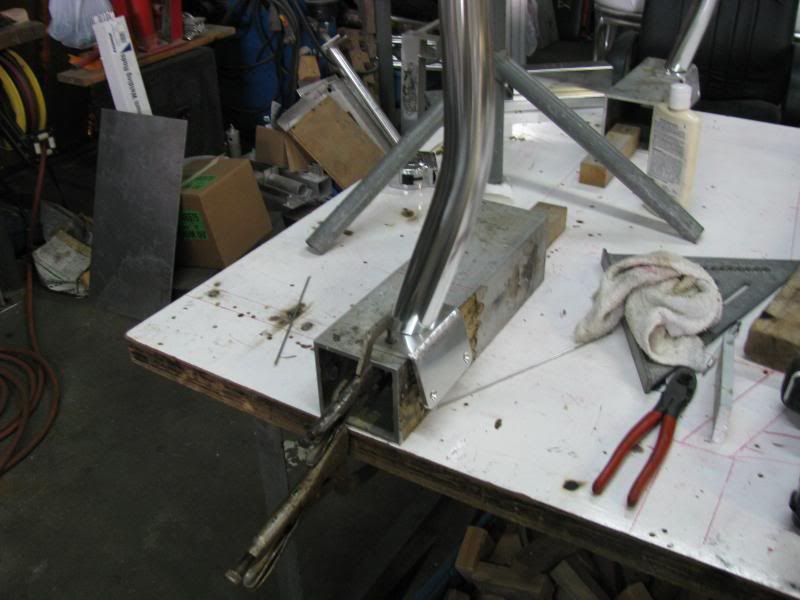
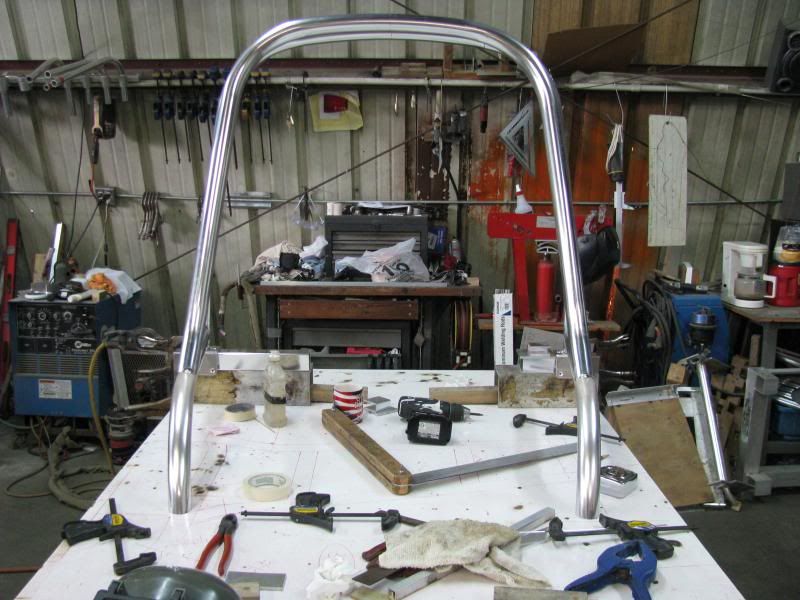
Starts with the foundation, which in this case is a welded mounting pad, angled to fit a transom edge of a boat. It will have fasteners from two directions, which is a good thing in this instance.
Image

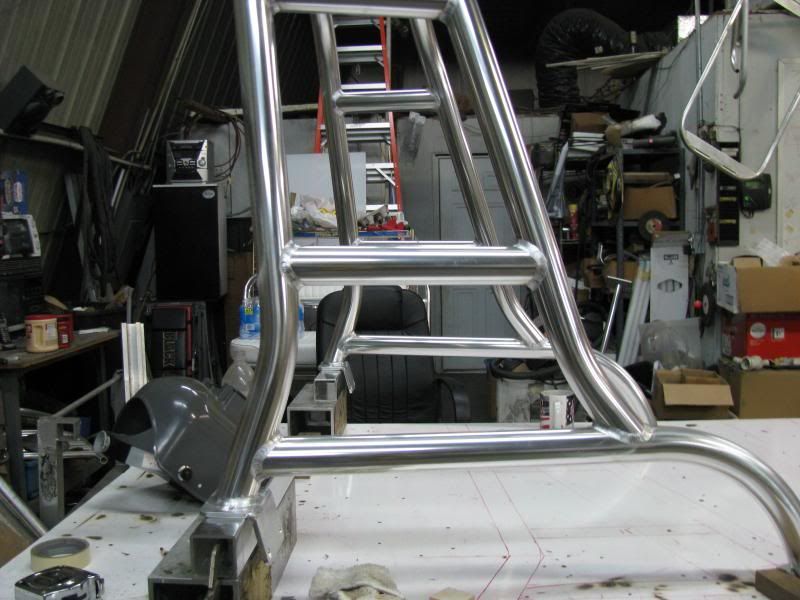
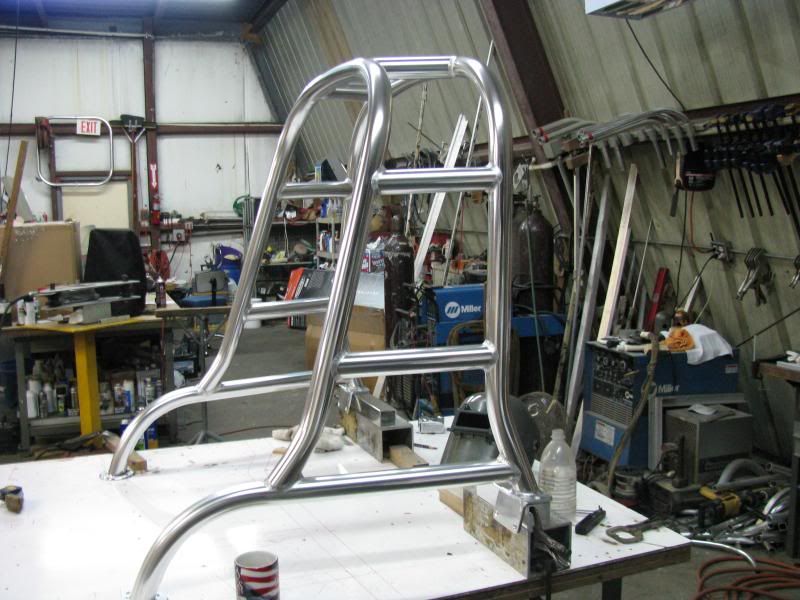
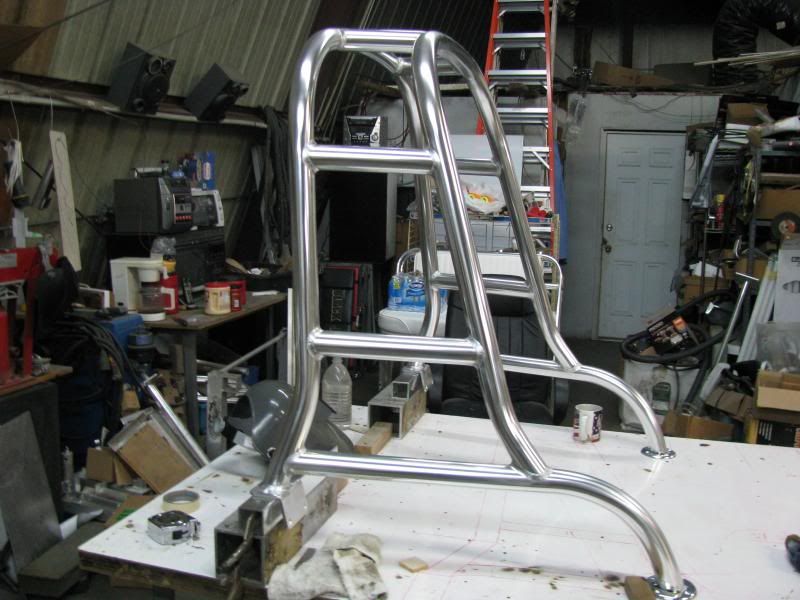
Then bend a hoop, with an arc across the top. I arch the pipe so when I weld the ski rope thimble on the center, it doesn't sink the pipe in the center, which ends up being really noticeable, at least to me.
Image

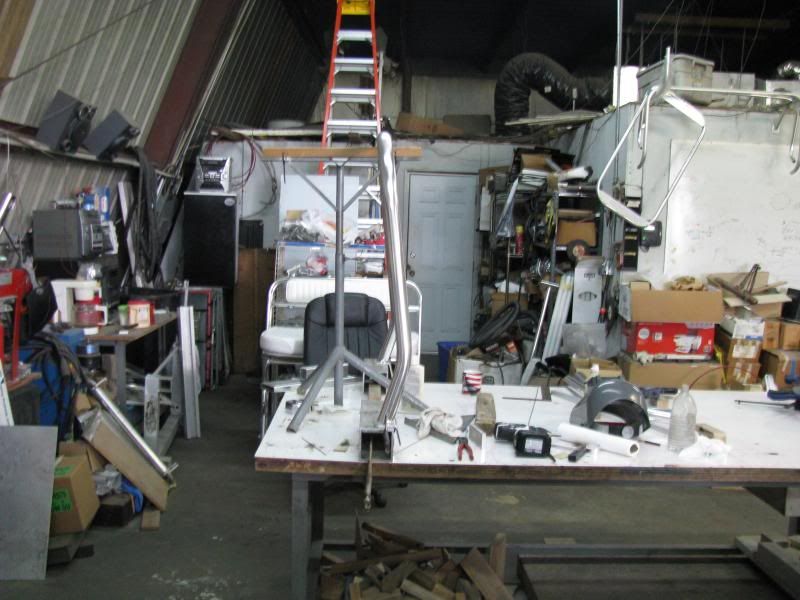
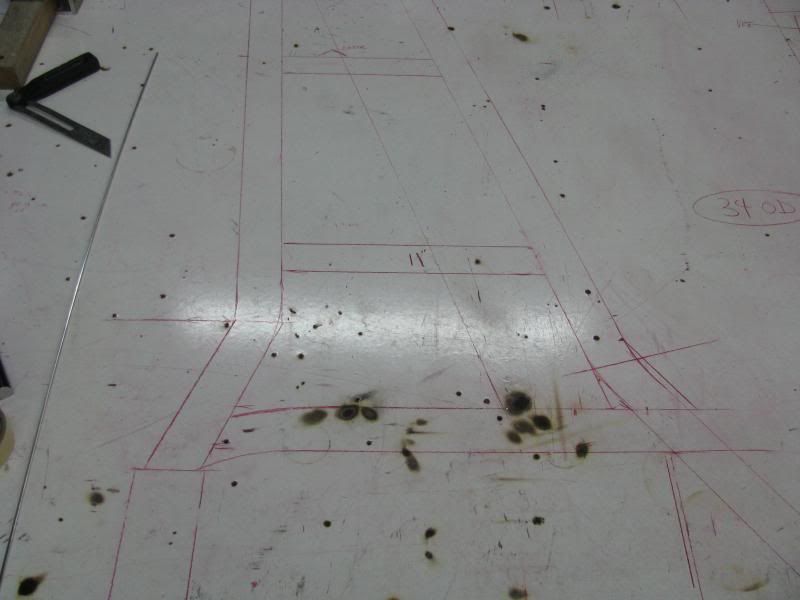
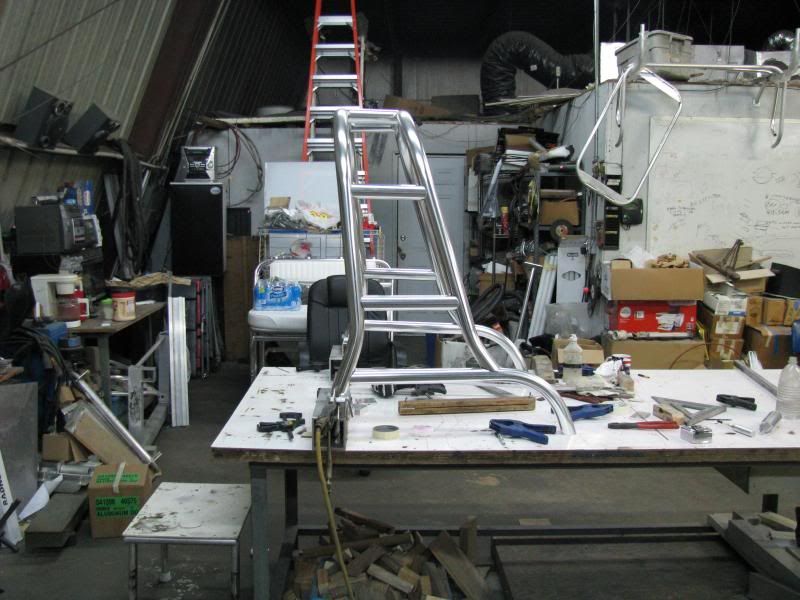
This thing tapers forward 9 degrees, so the front arch needs to be fabricated narrower than the rear. But it's Monday, and I am nailing my targets so far and I am happy about this. I was feeling cocky so I added kink bends near the bottom which means the bends will need to be articulated to fit the 9 degree taper.
Image

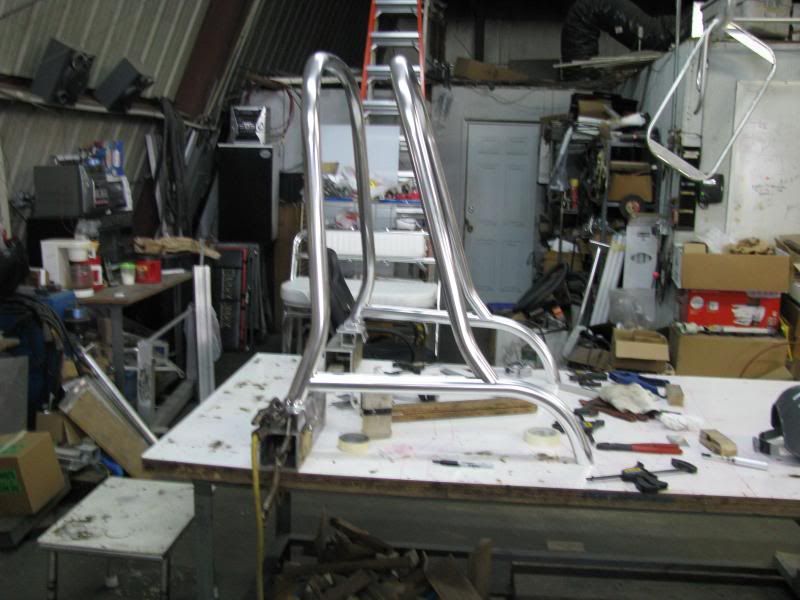
And then to have the arc of arches line up with one leaning back 10 degrees (it's a different amount of arc to make this work) more than the other is something a lot of folks would not think about, but it matters.
Image

Otherwise, the top rungs will not be level with the side ones.
Image

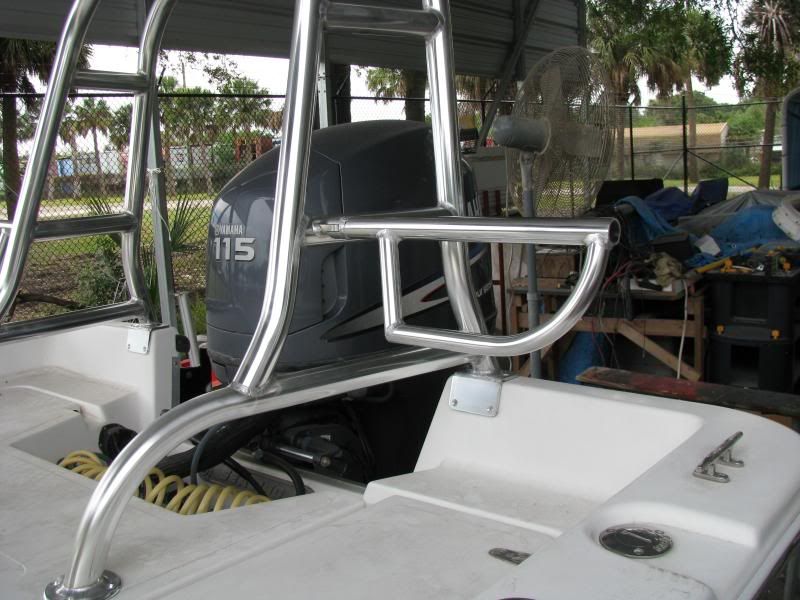
I even managed to think ahead to taper the top rungs as well, so that everything ends up graduating symmetrically. It's a wake board/ski arch for the back of a boat. It is to have folding seat backs on it as well. They need to fold so that the hatches under this thing can still be opened. The hatch layout is why this needed to be tapered in the first place. Tomorrow I get to weld it up. As it is, it sits on the boat as if it grew there. It had to clear hatches and the outboard motor tilted in all positions, a dive platform on the back of the boat as well.
Image

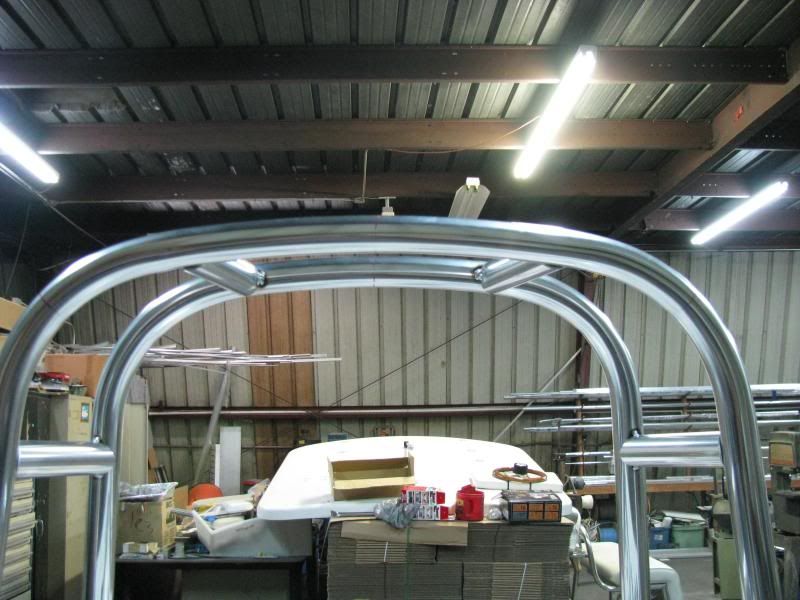
Anyway, it was a fun project. There was no extra pipe for errors and ended up using scrap for the rungs.
Miller ABP 330, Syncrowave 250, Dynasty 300 DX.
Honorary member of the Fraternity of Faded Tee Shirts.
NYWELDERJim
  • Posts:
  • Joined:
    Sun Feb 24, 2013 1:09 am
  • Location:
    Poughkeepsie, NY

Magnificent worK!!! Well planned and perfectly executed. You do superb work!!

Jim
User avatar
  • Posts:
  • Joined:
    Thu Sep 12, 2013 7:47 am

Doesn't he. Beaudy -- and good to get a look around his shop, too.
TamJeff
  • Posts:
  • Joined:
    Tue Dec 04, 2012 4:46 am

The shop is TRASHED! None of that is mine. I grew up in industry where we cleaned the shop every evening and double on Fridays. I have been round and round with the owner and have cleaned it dozens (top to bottom) of times by now. My table is typically the cleanest area but then guess what happens when you have the only clear landing strip in the jungle?

I dream of having my own shop where I can set it up like a professional would. My whole personal fabrication process is based on efficiency, right down to the points on my pencils. That whole disaster there really makes it hard to even show up some days. Piece working for years taught me the art of 'no wasted moves,' and that a messy shop is nothing but.

The only time I usually get anything done about it, it takes for me to go into a, tool throwing tirade, and it makes my otherwise normal blood pressure peak to uncomfortable levels. I try not to do that so much these days.

Thank you for the compliments. I get to build a lot of neat things out of aluminum. Most people on this forum would probably get a kick out of playing with this stuff, which is why I show it here. I don't get to see many other fabricators these days to compare notes with, which is why I hawk this section of the forum the most, just to see what everyone else is into.
Miller ABP 330, Syncrowave 250, Dynasty 300 DX.
Honorary member of the Fraternity of Faded Tee Shirts.
User avatar
  • Posts:
  • Joined:
    Sun Oct 27, 2013 8:58 am
  • Location:
    Cape Cod, MA

My table is typically the cleanest area but then guess what happens when you have the only clear landing strip in the jungle?
My whole personal fabrication process is based on efficiency, right down to the points on my pencils.
Nice work Jeff. I hear ya on the shop. The boatyard I work for full time is like that. I clean my shop nearly every day, come Monday morning I walk into a tornado of crap dumped on the floor, bench etc. I can't wait for the day when I can open my canvas shop up full time again, one of the reasons I am getting into aluminum fabrication... to add extra work. Some craftsmen can thrive in dirt and disorder, not me. :D
Best regards,
Geoff C
http://www.gscmarine.com
Miller dynasty 200 DX
Hobart Handler 140
User avatar
  • Posts:
  • Joined:
    Thu Sep 12, 2013 7:47 am

I also find myself checking out this forum daily for the insights into other people's skills, their projects, and their questions and issues. Working without a lot of contact with other people who weld and fabricate and build stuff has its advantages (you can get a lot done), but finding a niche and being busy can be limiting.

I clean about every 20 minutes -- after each section, whatever that might be is welded, or cut, or been ground, I sweep the table, on the floor nearby. It helps with working accurately, makes fitup easier, etc. (But the dust still gets everywhere, and is a major pain. I will redesign some of my shop space when I finish my current major projects, which includes brickwork, so I have stored cement, tools, etc just where I need them today, but gone as soon as I can.)

Thank you, again, for sharing your work.
TamJeff
  • Posts:
  • Joined:
    Tue Dec 04, 2012 4:46 am

One off projects mean a LOT of paraphernalia on the table by the time you figure in clamps and makeshift jigging. Like the 2 chunks of 4 x 4 aluminum holding it up and various other bits of dimensional extrusion used as spacers and shims etc. Working alone, everything has to be right there as well. Get a pipe in place and you better be able to reach a clamp or have to start over again. It seems I end up with everything from my tool box on my table. I constantly have to wipe, and blow off the table because air alone will not get the fines that has stuck to that white board.
Miller ABP 330, Syncrowave 250, Dynasty 300 DX.
Honorary member of the Fraternity of Faded Tee Shirts.
TamJeff
  • Posts:
  • Joined:
    Tue Dec 04, 2012 4:46 am

It welded out nice once I got a good lens in my hood.

Image

I like it. Ain't it cute? lol
Image

The taper in the front and the angles are throwing some serious parallax error with regard to the rungs being straight from one side to the other in the photos. This angle catches it a little better as it really is.
Image

Here's how it started. Some key measurements and a recorded base angle.
Image

Which results in one of my typical cartoon drawings. I may have an hour in this to this point, including the drawings. I did confer with the customer initially. He wasn't really sure what he wanted or even what to call it. Drew a couple sketches for him until we got on the same page. This is the actual full size, working drawing. Where most people that do not fabricate regularly get lost is with getting their heads out of the overall L X W X H dimensions and into the linear dimensions of the actual parts. After that, it's all degrees and included angles, that end up referencing themselves in multiple points as proof before you even cut the first pipe. Seeing it full size helps a lot.

Image

Here is the one for the forward, smaller arch. I have a pile of test bends that fit a bunch of these situations that I can simply lay onto this drawing and get my bend marks instantly, along with the total length of pipe (plus a couple inches just in case) in a matter of seconds. If they are off, just compensate times two the amount the center line moves from the pipe to the drawing, being we are dealing with grease pencil lines. I do the math in my head as a reference check but there is a much greater chance of error with the math, than there is with test bends.
Image

If you are going to fabricate in bent pipe and tube, make a kit of test bends for all of your average bends. It will save you a LOT of time and error. I make them out of the drops, which would otherwise go to the scrap. As test bends, they are worth much more. In the "Ain't it cute?" photo above, you can see my 90 degree bends hanging in a rack on the wall with red tape on the ends from sizes 3/4" to 1-1/2". I have others for typical truss angles etc (you can use these for different degrees of bend, say down to 75 degrees, and up to 105, which is as far as our dies go anyway.
Miller ABP 330, Syncrowave 250, Dynasty 300 DX.
Honorary member of the Fraternity of Faded Tee Shirts.
jwmacawful
  • Posts:
  • Joined:
    Fri Aug 13, 2010 1:23 pm
  • Location:
    the city that never sleeps

you can't do good work without a good plan. you got both. great looking job.
User avatar
  • Posts:
  • Joined:
    Thu Sep 12, 2013 7:47 am

I don't care what anyone else says. I'm proud of you, TamJeff.

If you are new to this caper, people, make sure you learn to draw.
TamJeff
  • Posts:
  • Joined:
    Tue Dec 04, 2012 4:46 am

Thanks y'all. CAD has taken drawing out of the process for many younger people. It's probably one of the best self teachers, otherwise. I showed one younger guy about setting up control lines and points and it was like flipping a switch to his understanding and reasoning process. Same with copes on pipe. On a print, it looks like it takes a special machine to do it and then you look at it from a certain angle and you notice it is actually a collection of lines in which to dissect it and translate it to your straight cutting machines.
Miller ABP 330, Syncrowave 250, Dynasty 300 DX.
Honorary member of the Fraternity of Faded Tee Shirts.
delraydella
  • Posts:
  • Joined:
    Mon Apr 25, 2011 7:35 pm
  • Location:
    Detroit, MI

You're a true artist, TamJeff!
WeldingSyncrowave 250,Millermatic 252,30a Spoolgun Cutting12" Hi-speed Cutoff Saw, 9x 12 Horizontal Bandsaw MillingGorton 8d Vertical Mill TurningMonarch EE Precision Lathe GrindingBrown & Sharpe #5 Surface Grinder
dhazelton
  • Posts:
  • Joined:
    Thu Mar 07, 2013 1:30 pm

By the title of your post and the first couple of pics I thought you were fabbing up a walker. Pretty work.
TamJeff
  • Posts:
  • Joined:
    Tue Dec 04, 2012 4:46 am

Thanks guys. This was a fun project. I have built arches from 2" sched 40 that were 11-12 feet wide and 10 feet tall with an 11-12 foot lid attached to them that was skinned in 11 gauge to where I would have to climb on it to fit and weld it. So this little one seems silly in effect. Admittedly, I don't feel like doing the large ones anymore. I could, but just don't feel like it. I would be happy just doing these small one-offs. I like building the chairs and such as well.
Miller ABP 330, Syncrowave 250, Dynasty 300 DX.
Honorary member of the Fraternity of Faded Tee Shirts.
TamJeff
  • Posts:
  • Joined:
    Tue Dec 04, 2012 4:46 am

It got more interesting. I had heard talk of backrests and something told me to make the front leg 15 degrees. I don't know why but I just did. Typical backrest is 15 degrees.

Image

They have to fold out of the way for the side hatches to open. I could have made it to where it folded out of the way AND be 'conveniently' removable.
Image

It gets patterned cushions and plastic tube caps at some point and removable seat cushions.
Last edited by TamJeff on Sun Dec 01, 2013 6:01 am, edited 1 time in total.
Miller ABP 330, Syncrowave 250, Dynasty 300 DX.
Honorary member of the Fraternity of Faded Tee Shirts.
delraydella
  • Posts:
  • Joined:
    Mon Apr 25, 2011 7:35 pm
  • Location:
    Detroit, MI

Beautiful work as always!

I know exactly what you mean about the aesthetic value of any project. Unfortunately that value always runs into the brick wall of "The customer is always right". You and I and everyone else who build things for a living knows that that maxim isn't always true, though. More times than not the customer is fu**ed in the head.

What sucks most, when you have a beautiful concept/design all ready and the client/customer comes in and changes everything only because he can and turns it into some lifeless blob, you have to live with seeing that. People know you built it and look at you like it's your fault that the design looks like sh*t, when all you did was follow the drawings.

I suppose what matters most is at the end of the day the check cashes and you can move on to the next project!

Other Steve
WeldingSyncrowave 250,Millermatic 252,30a Spoolgun Cutting12" Hi-speed Cutoff Saw, 9x 12 Horizontal Bandsaw MillingGorton 8d Vertical Mill TurningMonarch EE Precision Lathe GrindingBrown & Sharpe #5 Surface Grinder
Post Reply