My dad (Braehill) works for the company that Steve does the majority of the trailer "rehab" work for. He drove for eons for them, and works at a hydrogen plant for them now. So he fills them now instead of driving them around amongst other things lolPoland308 wrote:Cool always like to learn a little more.
Tig welding tips, questions, equipment, applications, instructions, techniques, tig welding machines, troubleshooting tig welding process
GreinTime
- GreinTime
-
Weldmonger

-
Posts:
-
Joined:Fri Nov 01, 2013 11:20 am
-
Location:Pittsburgh, PA
#oneleggedproblems
-=Sam=-
-=Sam=-

- Otto Nobedder
-
Weldmonger
-
Posts:
-
Joined:Thu Jan 06, 2011 11:40 pm
-
Location:Near New Orleans
Just realized, I've spent about six years in rehab, now...GreinTime wrote:My dad (Braehill) works for the company that Steve does the majority of the trailer "rehab" work for. He drove for eons for them, and works at a hydrogen plant for them now. So he fills them now instead of driving them around amongst other things lolPoland308 wrote:Cool always like to learn a little more.
You'd think I'd be better.
Steve S
- subwayrocket
-
Ace

-
Posts:
-
Joined:Thu Aug 13, 2015 11:38 pm
-
Location:Scranton/WilkesBarre, Pennsylvania
Made alotta scrap , practiced a bit of everything today, 6061 , 304 and sheet metal body panel. The thing on the left is a dog leg body panel , cut off 2 extra pieces from a junked jeep so I could practice first joining them back . Thin body panel was pretty difficult ...and starting the inside corners on the aluminum's so challenging...so I cut a bunch of little pieces to keep practicing just starting the "T" joint . I keep watching Jody's Alum 2F T joint vid , great vid . . . notice my "dipped" tungsten in the background ...haha
-----------------
-----------------
- LottaScrap.jpg (65.82 KiB) Viewed 1917 times

- MosquitoMoto
-
Weldmonger
-
Posts:
-
Joined:Sat Aug 01, 2015 8:38 am
-
Location:The Land Down Under
Nice work, Sub.
Yes, I've been viewing and re-viewing Jody's Alum 2F joint video, too. It is pure instructive gold.
Kym
Yes, I've been viewing and re-viewing Jody's Alum 2F joint video, too. It is pure instructive gold.
Kym
ex framie
- ex framie
-
Ace
-
Posts:
-
Joined:Sun Aug 09, 2015 1:09 am
-
Location:Brisbane QLD Land of oz
Kym,
Re welding thin stuff, I'm was finding it easier to start thicker and work down.
Then I didnt tig weld for 8 months, so back to square 1.
I did a water holder for my linisher stand with the alloy I had at the time, something like .8mm.
I eventually got it water tight, but as Jodie is want to say "looks like ass", still a good learning experience.
Lesson learned? Start thicker.
Pete
God gave man 2 heads and only enough blood to run 1 at a time. Who said God didn't have a sense of humour.....
God gave man 2 heads and only enough blood to run 1 at a time. Who said God didn't have a sense of humour.....
- subwayrocket
-
Ace
-
Posts:
-
Joined:Thu Aug 13, 2015 11:38 pm
-
Location:Scranton/WilkesBarre, Pennsylvania
Thanks ! you guys want a good laugh ...I should post my "Pop can" mess...haha
--------------------
It started ok ...then went POOF !
--------------------
It started ok ...then went POOF !
- 1GoodStartPop.jpg (58.76 KiB) Viewed 1917 times
- 2PoopPopCan.jpg (59.81 KiB) Viewed 1917 times
- MosquitoMoto
-
Weldmonger
-
Posts:
-
Joined:Sat Aug 01, 2015 8:38 am
-
Location:The Land Down Under
Pete -
Thanks for the tip, Pete. I am working on aluminium motorcycle frame beams of 2mm thick at the moment and starting to create welds I'm half happy with. They are strong, just not quite as pretty and even as I would like.
(I will post pics soon of some of my beam frame repairs).
I do reasonably okay on aluminium down to about 1.6mm as long as I have some kind of heat sink backing. On small pieces I find the heat gets out of hand quickly.
Out of position stuff is a real challenge for me right now. Struggling with my big size 26 torch. See me blaming the torch?
Subway...I'd be very happy to be able to weld cans at all, regardless of finish!
Kym
- subwayrocket
-
Ace
-
Posts:
-
Joined:Thu Aug 13, 2015 11:38 pm
-
Location:Scranton/WilkesBarre, Pennsylvania
MotoMosquito, I've been hesitant to weld anything structural for the bikes... i'm confident that the weld is good and strong, but i'm thinking they heat treat everything post welding ? What are you thoughts on this ? anyone else for that matter.
Lotta good vids out there on heat treating steels , not to much out there on Alum though .
Lotta good vids out there on heat treating steels , not to much out there on Alum though .
- MosquitoMoto
-
Weldmonger
-
Posts:
-
Joined:Sat Aug 01, 2015 8:38 am
-
Location:The Land Down Under
Sub -subwayrocket wrote:MotoMosquito, I've been hesitant to weld anything structural for the bikes... i'm confident that the weld is good and strong, but i'm thinking they heat treat everything post welding ? What are you thoughts on this ? anyone else for that matter.
Lotta good vids out there on heat treating steels , not to much out there on Alum though .
We are thinking along the same lines. I've recently been following a discussion on 4643 filler versus 4043 and 5356 with this very issue in mind - watching Jody bend strips of aluminium to demonstrate annealing at the HAZ.
A couple weeks ago I successfully repaired a broken aluminium brake pedal from a race bike. Someone here suggested that the repair was sound but probably soft through annealing - of course for a control part, this can be an advantage because of course I'd rather the pedal bend than snap should it ever kiss tarmac again.
However of course frames are another matter. I have a late model 'donor' superbike frame that I have been chopping to pieces and welding back together using 5356. The frame will never be used again in anger, but I am eager as you are to know what I need to do when in future I set about working on active race bike frames. Which filler? How do I heat treat?
Needless to say, safety is paramount here. I would love to hear from anyone who is in the know about this. Perhaps a question to put to Jody?
Thanks for sharing your thinking with me, Sub. We are on the same page.
Kym
- subwayrocket
-
Ace
-
Posts:
-
Joined:Thu Aug 13, 2015 11:38 pm
-
Location:Scranton/WilkesBarre, Pennsylvania
Kym, from what I've read, you've got to evenly heat the part up to about 990 F , long enough that the whole part is at 990F for about an hour...then quickly drop it in water. Then put it back in an over at 320 F for something like 12 to 18 hours and then allow to cool at room temp....and then re heat again to 350 F for 8 hours and again let it cool at room temp. There's alot of different articles out there, I've read some only put it in a home oven on the highest heat . I don't know which one applies to the bike parts we use. I do know that when I've cracked certain cast alum parts, you see large crystals (grains) and then other VERY tough aluminum I've had great difficulty trying to break has very fine and very uniform crystals (grains) when it finally does break--->presumably heat treated alum . The welding disorganizes that fine grain structure, post weld heat treatment reorganizes the strong/tough grain structure back throughout the whole part . While I understand what's actually going on, I don't know how to to do it DIY ...or if it's feasible or not. Sorry to hijack the thread...haha ...maybe someone that does it can share a good vid or article describing how to do it on a 'DIY' level .
----------------
I just found this article, not DIY but still a good read: http://www.pinkbike.com/news/To-the-Poi ... rames.html
----------------
I just found this article, not DIY but still a good read: http://www.pinkbike.com/news/To-the-Poi ... rames.html
- MosquitoMoto
-
Weldmonger
-
Posts:
-
Joined:Sat Aug 01, 2015 8:38 am
-
Location:The Land Down Under
Thanks Sub.
That first regime you outline is pretty exhaustive, and needless to say not DIY possible when it comes to something as large as, say, a frame or swingarm.
I, too, have seen some parts break seemingly easily and others that are monster tough - and have also witnessed grain structure differences you noted.
While we wait for wisdom and also do our own research, I see this as a great opportunity to do some experimenting of my own on smaller, disposable items.
Interesting, because I have seen, time and again, magazine/internet articles showing parts such as aluminium tube subframes welded up from scratch - often for use on race bikes - yet never any mention of annealing/tempering. Just fabricate and use.
I reckon that Zank on this forum will know more - he seems like something of a gun welder and I know that he fabricates some pretty fine aluminium bicycle frames. With no suspension to cushion shocks/loads, you'd want to be sure to get tempering right on those.
Kym
kiwi2wheels
- kiwi2wheels
-
Ace
-
Posts:
-
Joined:Sun Feb 17, 2013 10:27 am
@ Kym,
Have a squiz through these links.
http://www.sillygrin.co.uk/techstuff/se ... 5_6061.pdf
http://www.esabna.com/us/en/education/b ... elding.cfm
Most bike chassis used the equivalent of 7005 ( US ),7020 ( European ) alloys for extruded/pressed parts. The castings ?
Have a squiz through these links.
http://www.sillygrin.co.uk/techstuff/se ... 5_6061.pdf
http://www.esabna.com/us/en/education/b ... elding.cfm
Most bike chassis used the equivalent of 7005 ( US ),7020 ( European ) alloys for extruded/pressed parts. The castings ?
Last edited by kiwi2wheels on Thu Sep 24, 2015 8:18 am, edited 1 time in total.
- MosquitoMoto
-
Weldmonger
-
Posts:
-
Joined:Sat Aug 01, 2015 8:38 am
-
Location:The Land Down Under
- MosquitoMoto
-
Weldmonger
-
Posts:
-
Joined:Sat Aug 01, 2015 8:38 am
-
Location:The Land Down Under
Kiwi, thanks so much for those links. That is really helpful stuff.
I'm now going to get into the motorcycle specific stuff and track down precisely what alloys are used, although I expect this will vary quite a bit.
Straight up though, it seems that if I was to fabricate using 7005 for non-critical stuff, I could potentially go ahead and use the parts immediately post-welding with no need for heat treatment.
Although it might still pay to do some Jody-style 'destruction testing' on a couple of pieces first I think.
Best thread jack ever. Thanks again!
Kym
- image.jpeg (52.16 KiB) Viewed 2074 times
- Attachments
-
- image.jpeg (67.3 KiB) Viewed 2074 times
-
- image.jpeg (36.5 KiB) Viewed 2074 times
-
- image.jpeg (55.94 KiB) Viewed 2074 times
-
- image.jpeg (67.34 KiB) Viewed 2074 times
-
- image.jpeg (56.8 KiB) Viewed 2074 times
I have more questions than answers
Josh
Josh
Awesome job. Lots of different joint methods. Is this a fertilizer project? What is the purpose of the orange dye in the ammonia? What's the temperature like there where you are welding? What schedule pipe was used?. Sorry for all the questions, my interest is piqued.
Flat out like a lizard drinkin'
It is for fertilizer. There ammonia is allowed to have up to 20 percent water in it. Not good for refrigeration. The pipe is all sch 40 seamless. 3 in is liquid line 1-1/4 in is vapor line. And there was some 2 in that was for pump auto bypass. And an extra 2 in hand valve that allows for them to use the pump to transfer from one big tank to the other if they ever need to. There is also a semi header for filling the system. The 2 big tanks hold about 3-1/2 semi loads. The pump pushes liquid down to the filling stations were they load out small tanks for applicators. The orange and yellow paint is just there standard way of color coding the pipe orange/liquid. Yellow/vapor. State law requires that here as well as pipe labels. Lots of valves. And lots of safety's
I have more questions than answers
Josh
Josh


built a bike rack for my daily driver (a '67 Dodge Coronet 4-dr)... 6061, 1" OD tubes, .083 wall, welds from hell, struggled like mad trying to weld the little tubes, came out pretty ugly but at least solid... fits like a glove, weighs nothing, nice and simple, put little short tube 'nubs' at 45 degree downward angles on it to keep the bike from hitting the trunk of the car, something to rest on... don't even need to tie it down (though of course I do). Can fit 3 bikes (though I've only tried 2 so far). Going to add another short tube in parallel with the main tubes to slip a bicycle 'U-Lock' through to support the heavy steel U-Lock without it bouncing around for time when we need to lock them up. Gonna build a jig now to duplicate it and build a second one to see if I can do better welds next time (I suck at it!)... Learning, practicing, making stuff...
(Gonna make a fake 'wing' to put on it as a joke for my drag racing friends, will make a good photo, so the Coronet has a big Top Fuel dragster wing on it... ha)
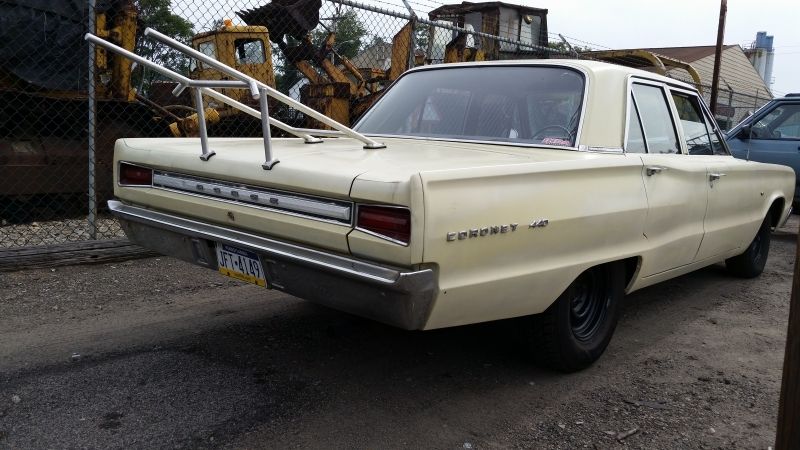
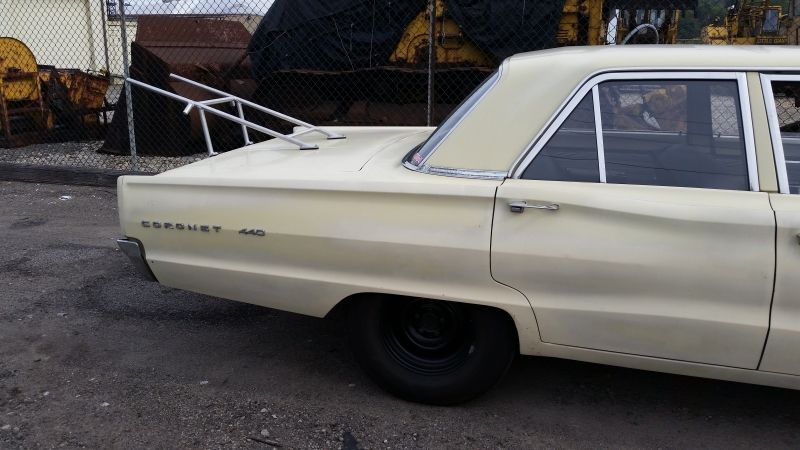
(Gonna make a fake 'wing' to put on it as a joke for my drag racing friends, will make a good photo, so the Coronet has a big Top Fuel dragster wing on it... ha)
can't believe it took me this many years to buy a diamond wheel for my bench grinder... what a difference
- MosquitoMoto
-
Weldmonger
-
Posts:
-
Joined:Sat Aug 01, 2015 8:38 am
-
Location:The Land Down Under

- Braehill
-
Weldmonger
-
Posts:
-
Joined:Sat Jul 06, 2013 11:16 am
-
Location:Near Pittsburgh,Pennsylvania. Steel Buckle of the Rust Belt
Raticus,
I hope you get fuel perks from Giant Eagle with that thing. We had a 67 Chrysler Newport when I was younger with a 383 in it and it would burn tires off better than any car I ever seen. Problem was after a while I had to go into a 12 step program to get weaned off of the gas pump. I wasn't old enough to drive but I had a job and still spent all my money on gas so my older brother could drive us around. Then he bought a 67 Bonneville (426 engine if I remember correctly) that liked gas even more. Those 440's liked their gas too.
Gas was $.59 a gallon, but I made $15 dollars a day. A set of recaps for the back (every month) was $40 mounted. Those days were not as good as some would have you believe. I like my cars that get mid 20's in the MPG department.
Len
Now go melt something.
Instagram @lenny_gforce
Len
Instagram @lenny_gforce
Len
ha, yeah... MPG on the Coronet is abysmal, only 11mpg (on a good day)... I just don't understand why, it's a little mild 318 with a tiny 2-barrel Stromberg carb, but 11mpg is the stock spec mpg for it, so it's not because it's old and worn out. My race car when I used to drive it on the street (my 66 Chevy Biscayne), is a good 100 lbs heavier with a non-street friendly 4.86 rear gears and putting out a good 550hp, and if I take it easy it'll get 13mpg, which is pretty good considering, and it's almost 3 times the power of the Coronet...
yeah, gonna have to get better with my welding so I can get a welding job (i.e. better paying than being a mechanic) just to afford my cars... practice practice practice right?
yeah, gonna have to get better with my welding so I can get a welding job (i.e. better paying than being a mechanic) just to afford my cars... practice practice practice right?
can't believe it took me this many years to buy a diamond wheel for my bench grinder... what a difference
Return to “Tig Welding - Tig Welding Aluminum - Tig Welding Techniques - Aluminum Tig Welding”
Jump to
- Introductions & How to Use the Forum
- ↳ Welcome!
- ↳ Member Introductions
- ↳ How to Use the Forum
- ↳ Moderator Applications
- Welding Discussion
- ↳ Metal Cutting
- ↳ Tig Welding - Tig Welding Aluminum - Tig Welding Techniques - Aluminum Tig Welding
- ↳ Mig and Flux Core - gas metal arc welding & flux cored arc welding
- ↳ Stick Welding/Arc Welding - Shielded Metal Arc Welding
- ↳ Welding Forum General Shop Talk
- ↳ Welding Certification - Stick/Arc Welding, Tig Welding, Mig Welding Certification tests - Welding Tests of all kinds
- ↳ Welding Projects - Welding project Ideas - Welding project plans
- ↳ Product Reviews
- ↳ Fuel Gas Heating
- Welding Tips & Tricks
- ↳ Video Discussion
- ↳ Wish List
- Announcements & Feedback
- ↳ Forum News
- ↳ Suggestions, Feedback and Support
- Welding Marketplace
- ↳ Welding Jobs - Industrial Welding Jobs - Pipe Welding Jobs - Tig Welding Jobs
- ↳ Classifieds - Buy, Sell, Trade Used Welding Equipment
- Welding Resources
- ↳ Tradeshows, Seminars and Events
- ↳ The Welding Library
- ↳ Education Opportunities